
Introduzione al progetto: Sky Three–>
Benvenuti in questo particolare articolo che tratterà di PC Modding e, nello specifico, della realizzazione di Project Sky Three, una mod di St.Jimmy’s PC Modding.
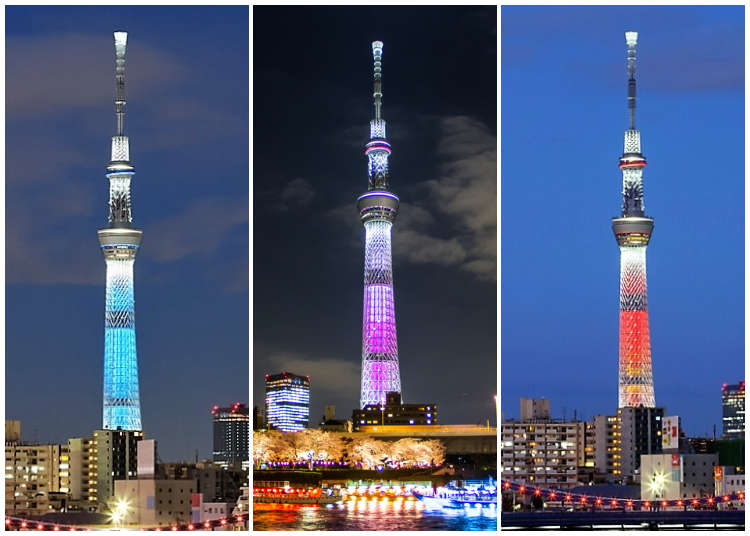
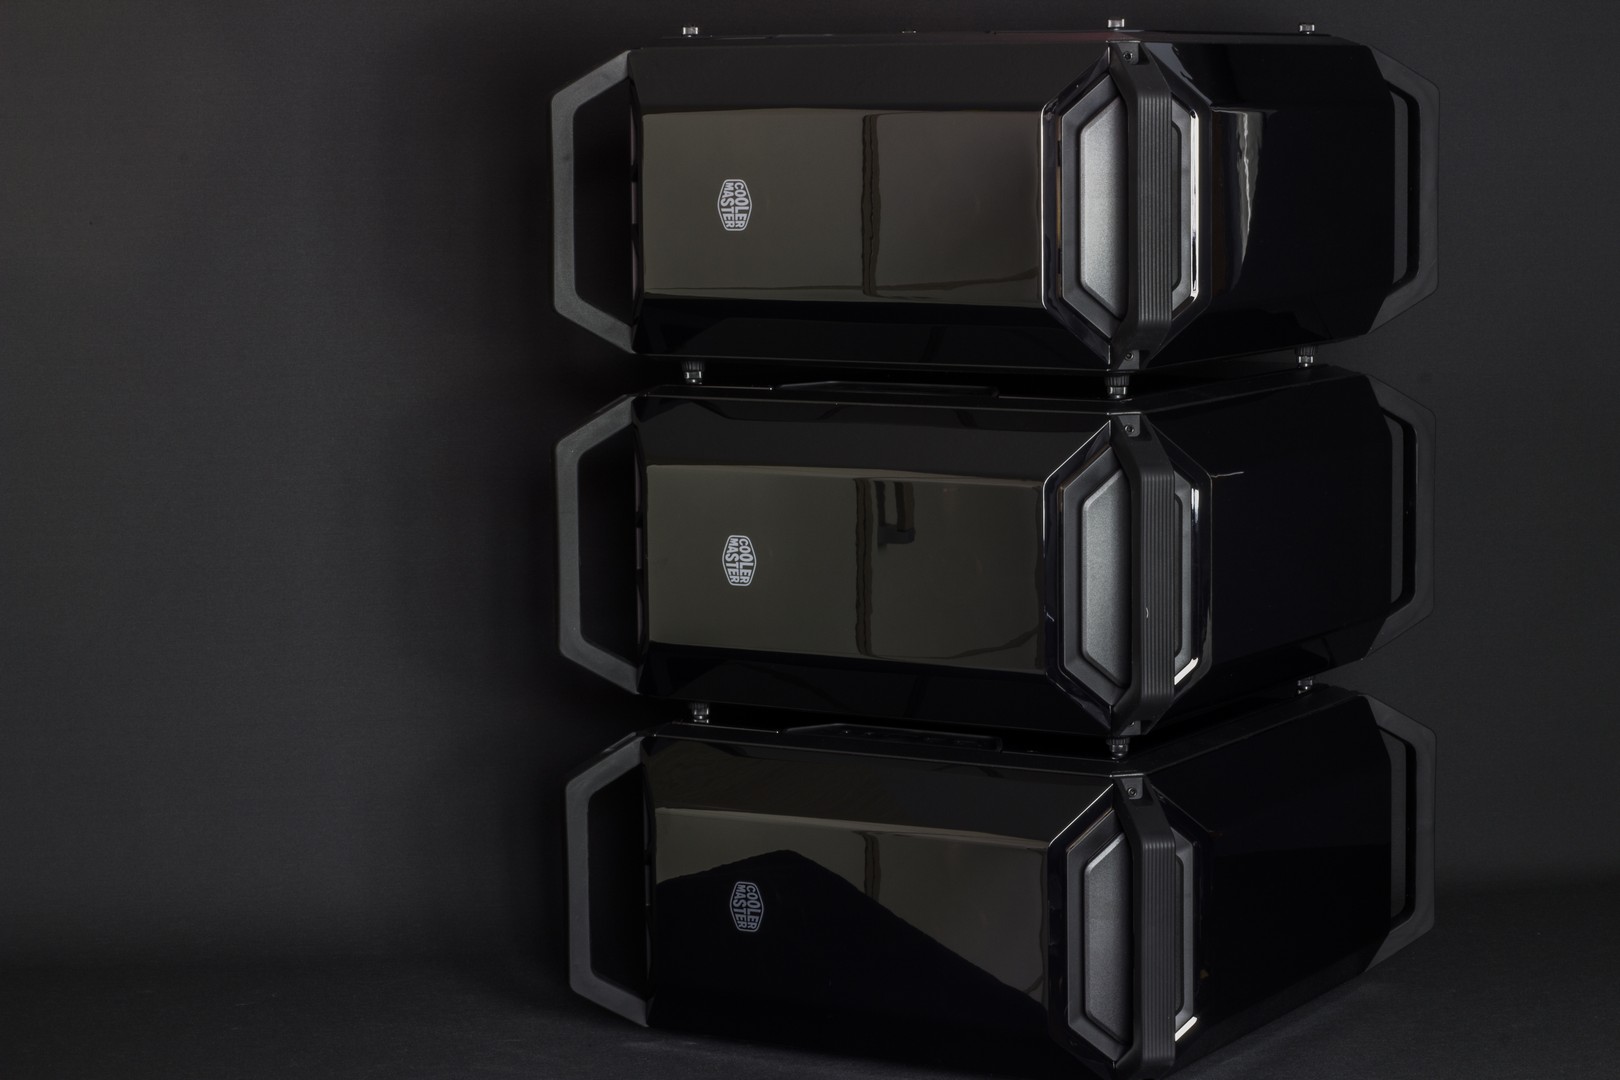
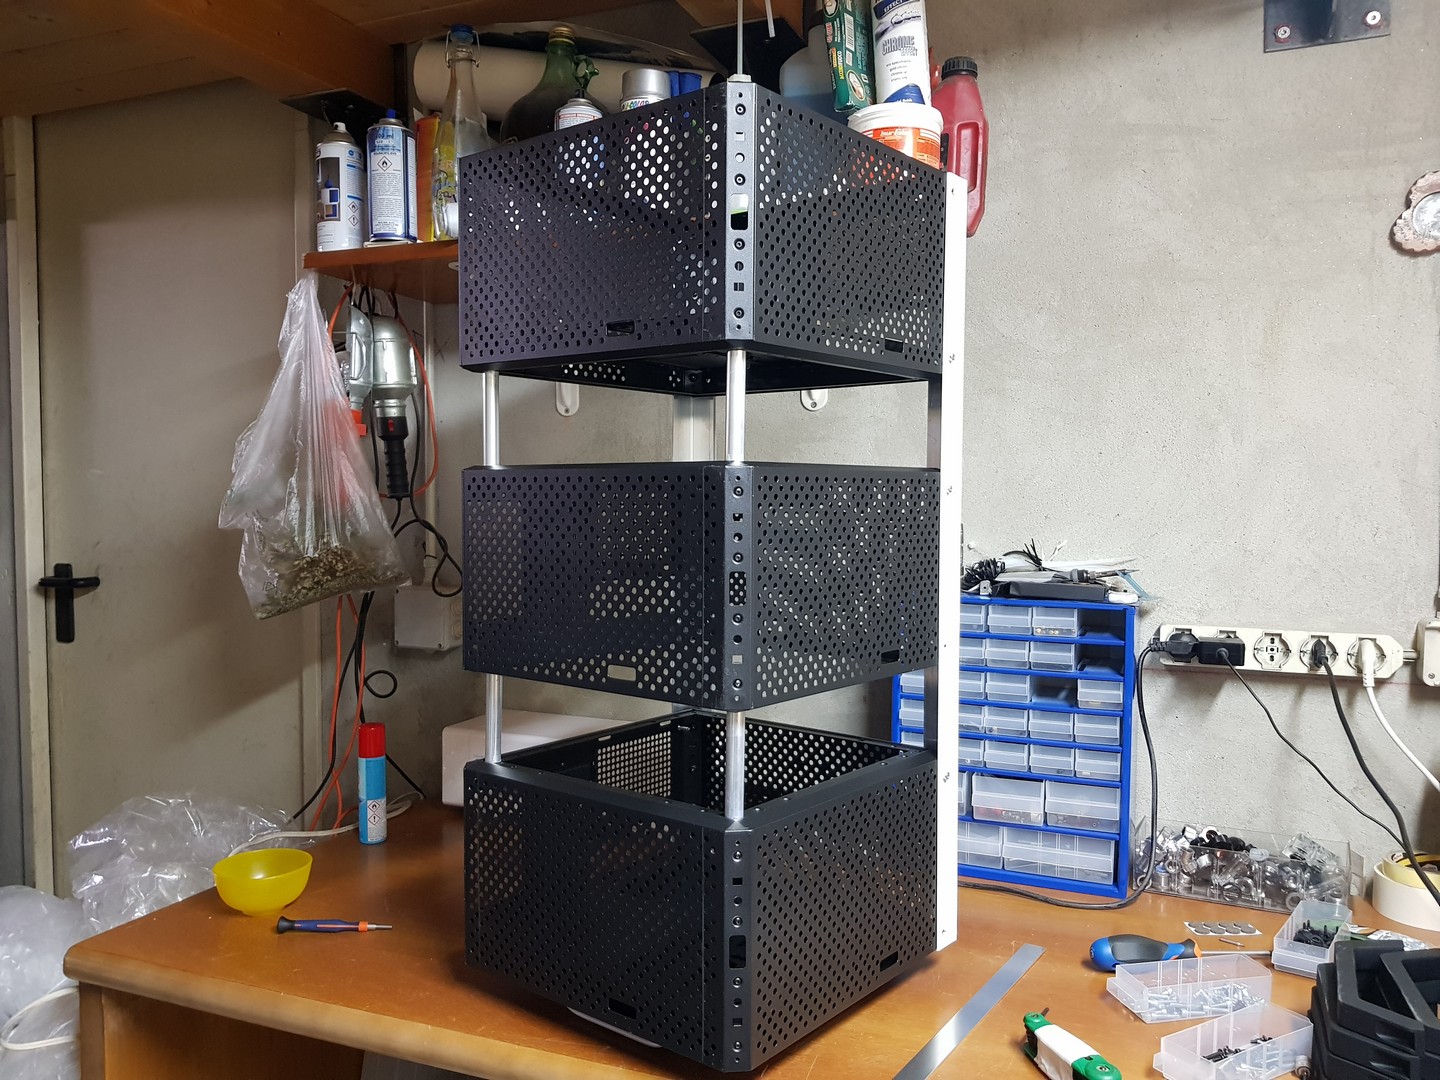
Il concept per questa mod prende ispirazione dal design della torre Sky Tree di Tokyo, nonché dall’idea caratteristica della series Stacker di Cooler Master, che prevede la possibilità di montare più case uno sopra l’altro per aumentare le possibilità di espansione.
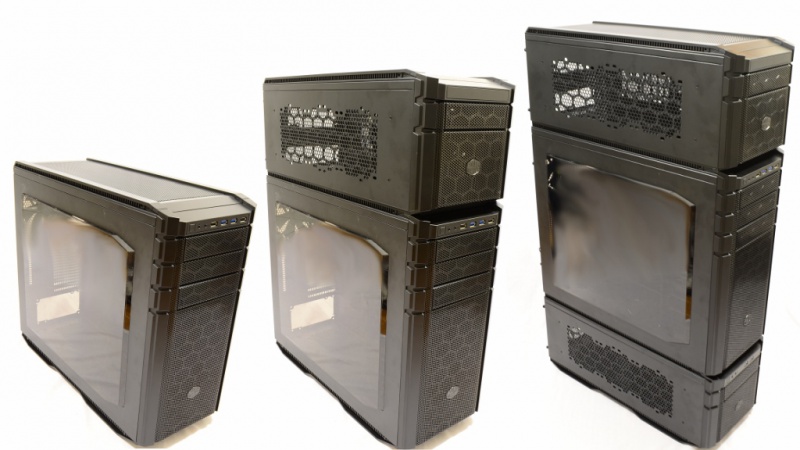
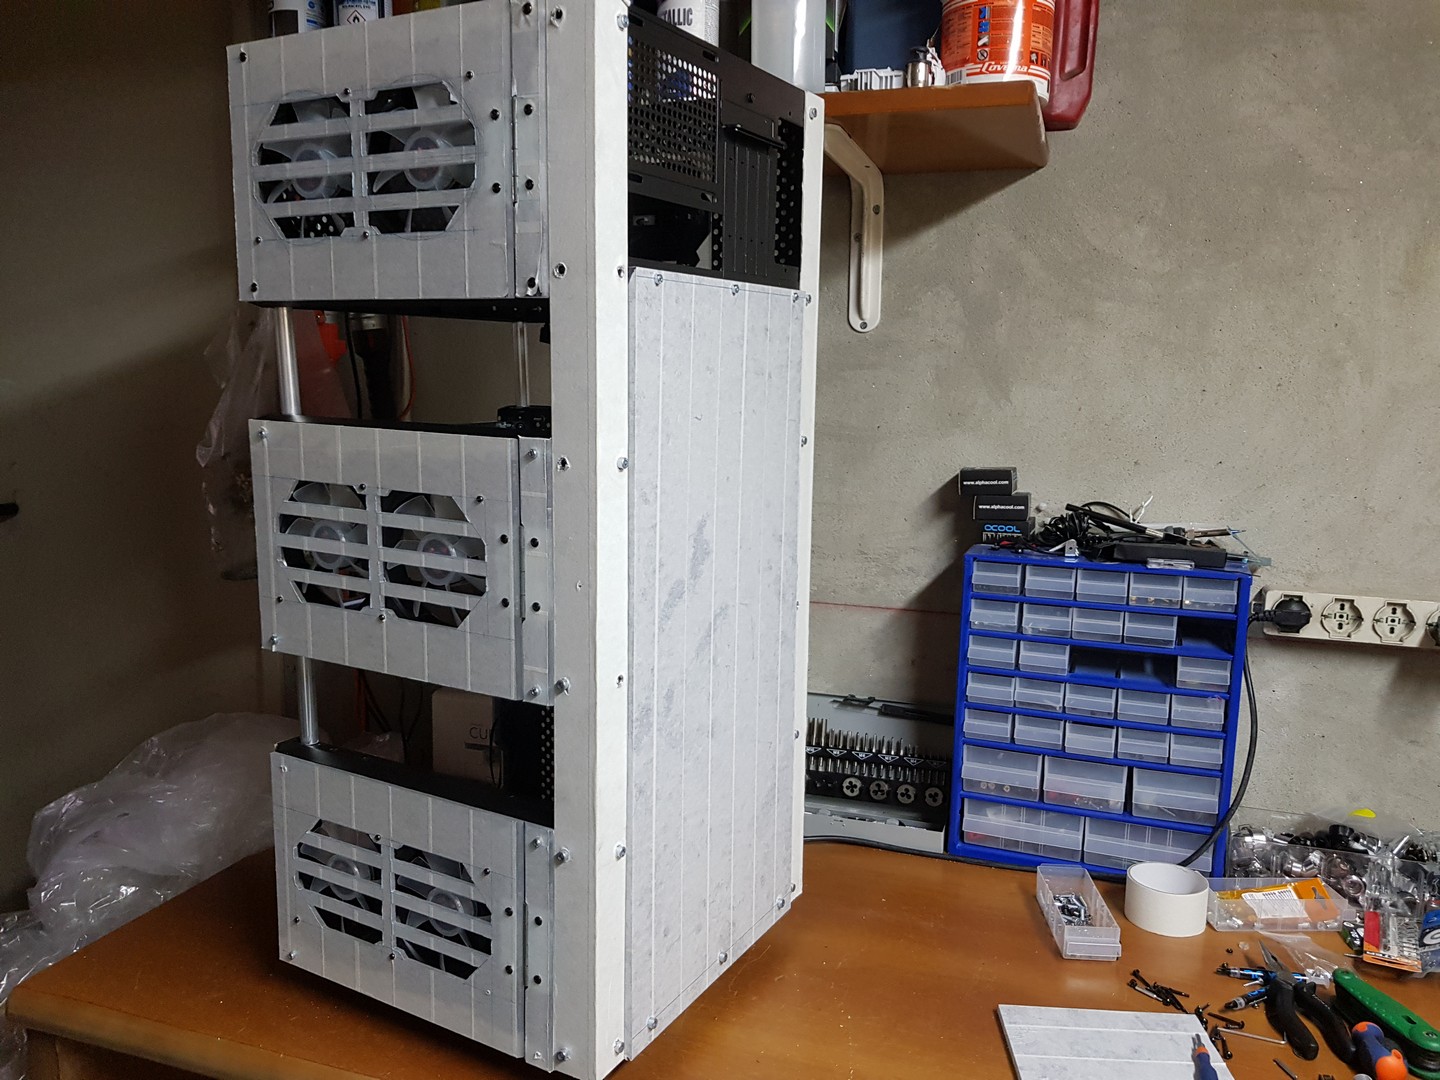
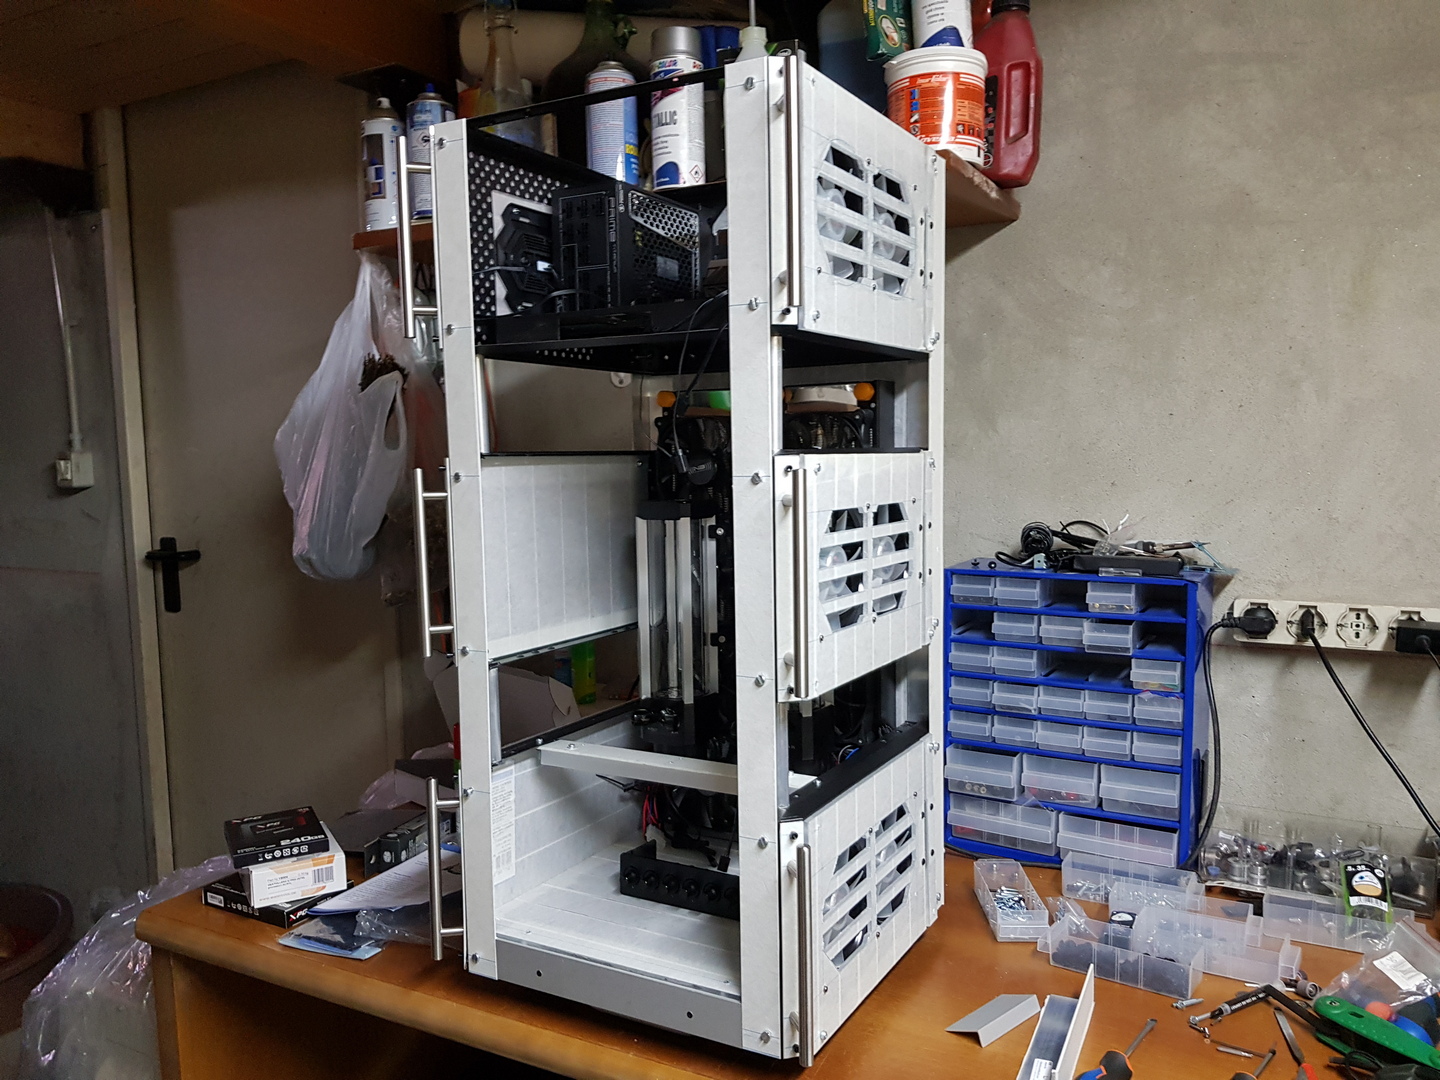
Completamente realizzato a mano, Project Sky Three vuole prendere il concetto di watercooling estremo ed avvicinarlo al fattore di forma MicroATX, mantenendo un’impronta compatta ed espandendosi verso l’alto, mediante l’unione di ben tre Cooler Master Q300P posizionati orizzontalmente uno sopra l’altro e fissati con profili in alluminio.
[ENG]
Welcome in this particular article that will talk about PC Modding and, specifically, about the realization of Project Sky Three, a mod by St.Jimmy’s PC Modding.
The concept for this mod takes inspiration from the Tokyo Sky Tree tower design, as well as from the idea behind the Cooler Master Stacker series, which provides the possibility to pile more cases in order to enhance the expandability.
Completely hand made, Project Sky Three aims to take the extreme watercooling concept and bring it closer to the MicroATX form factor, keeping a compact footprint and developing in height, through the combination of three Cooler Master Q300P’s positioned horizontally one above the other and fixed with aluminum profiles.
Componenti utilizzate e sponsors–>
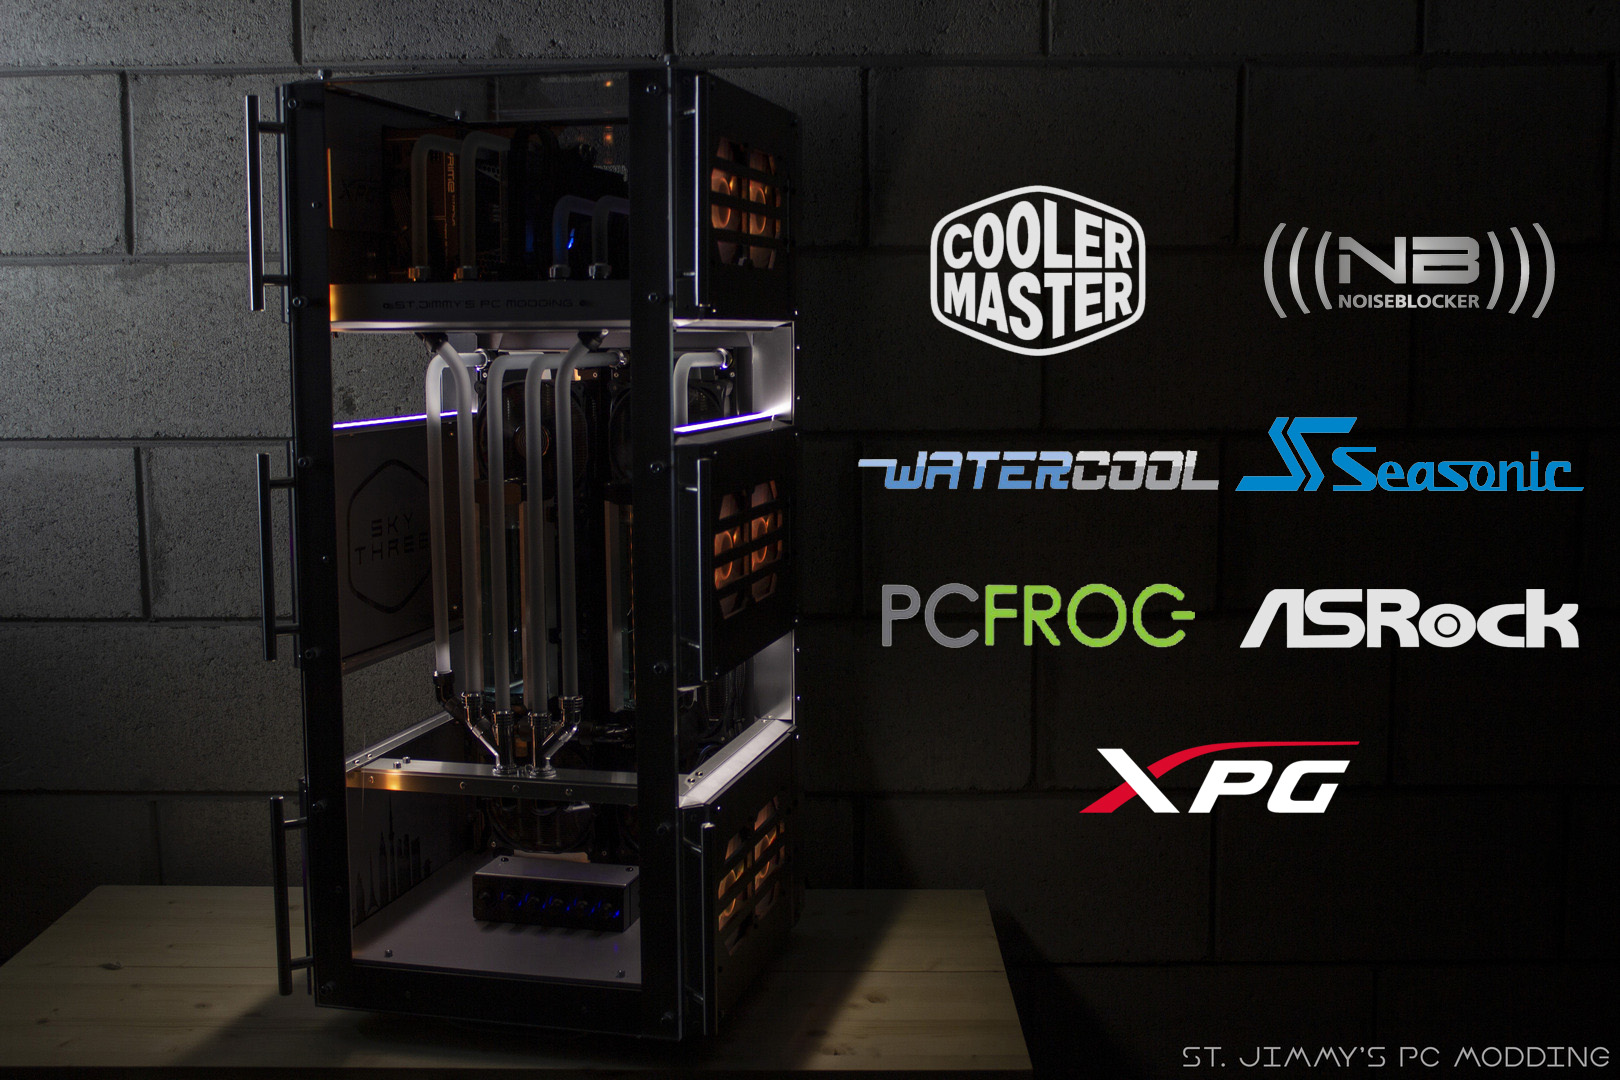
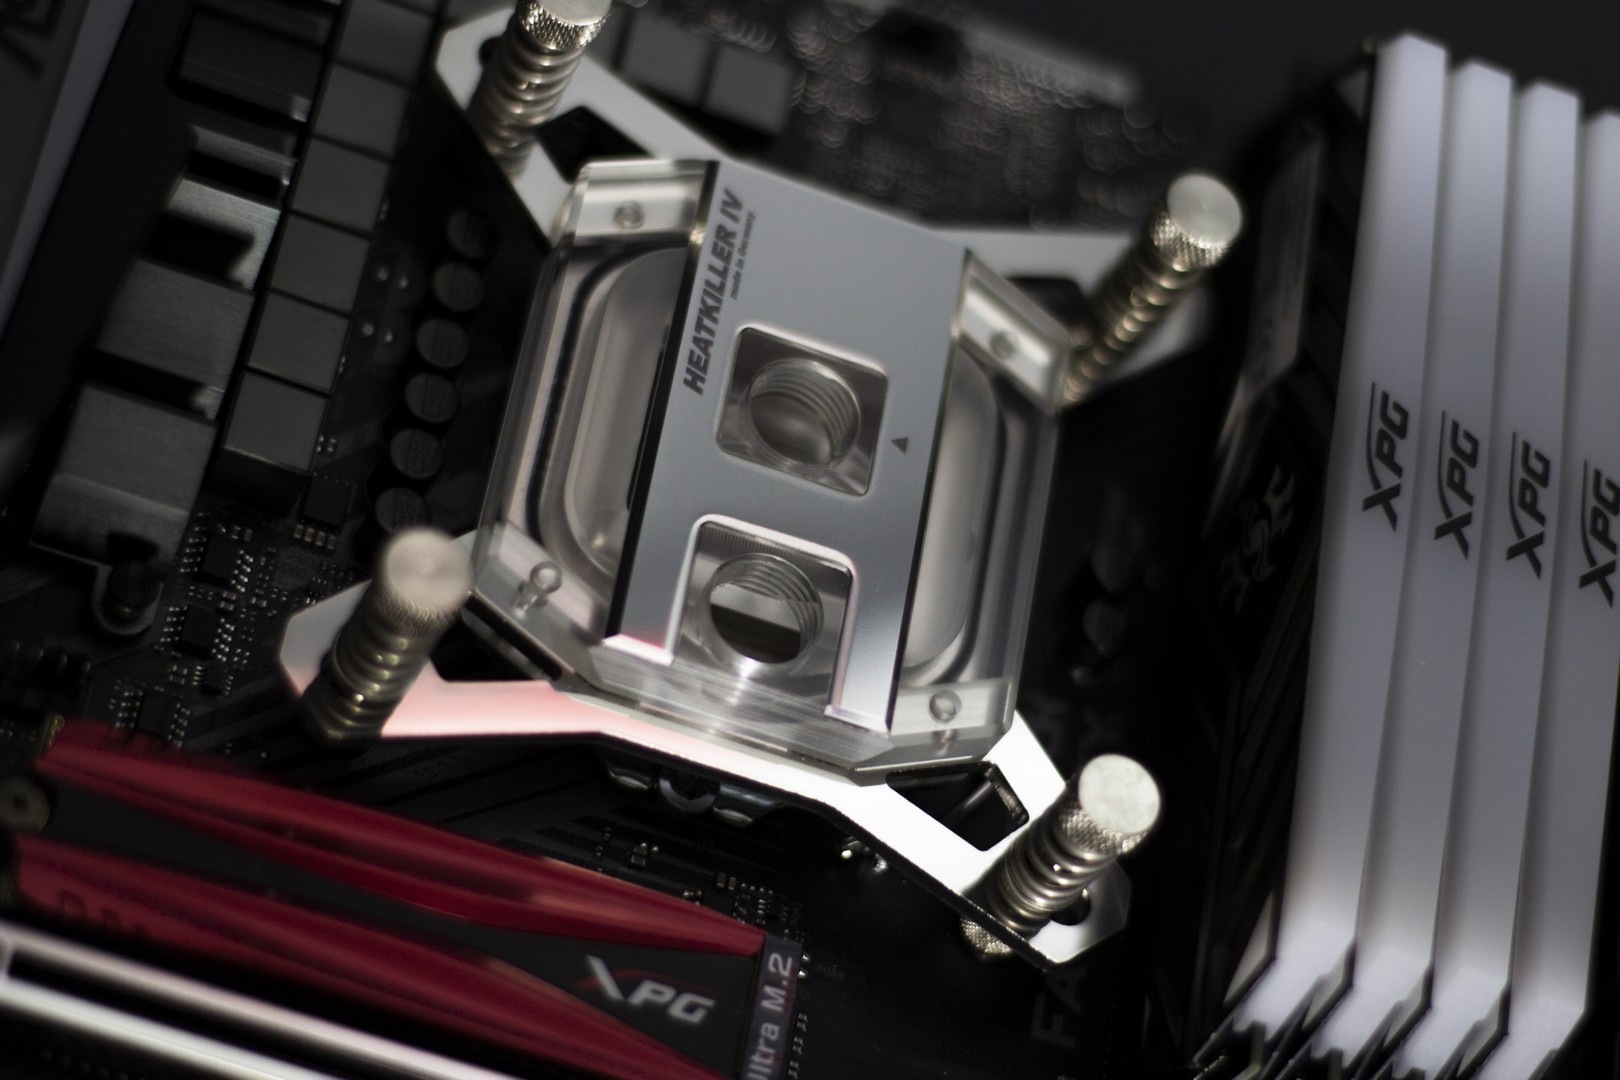
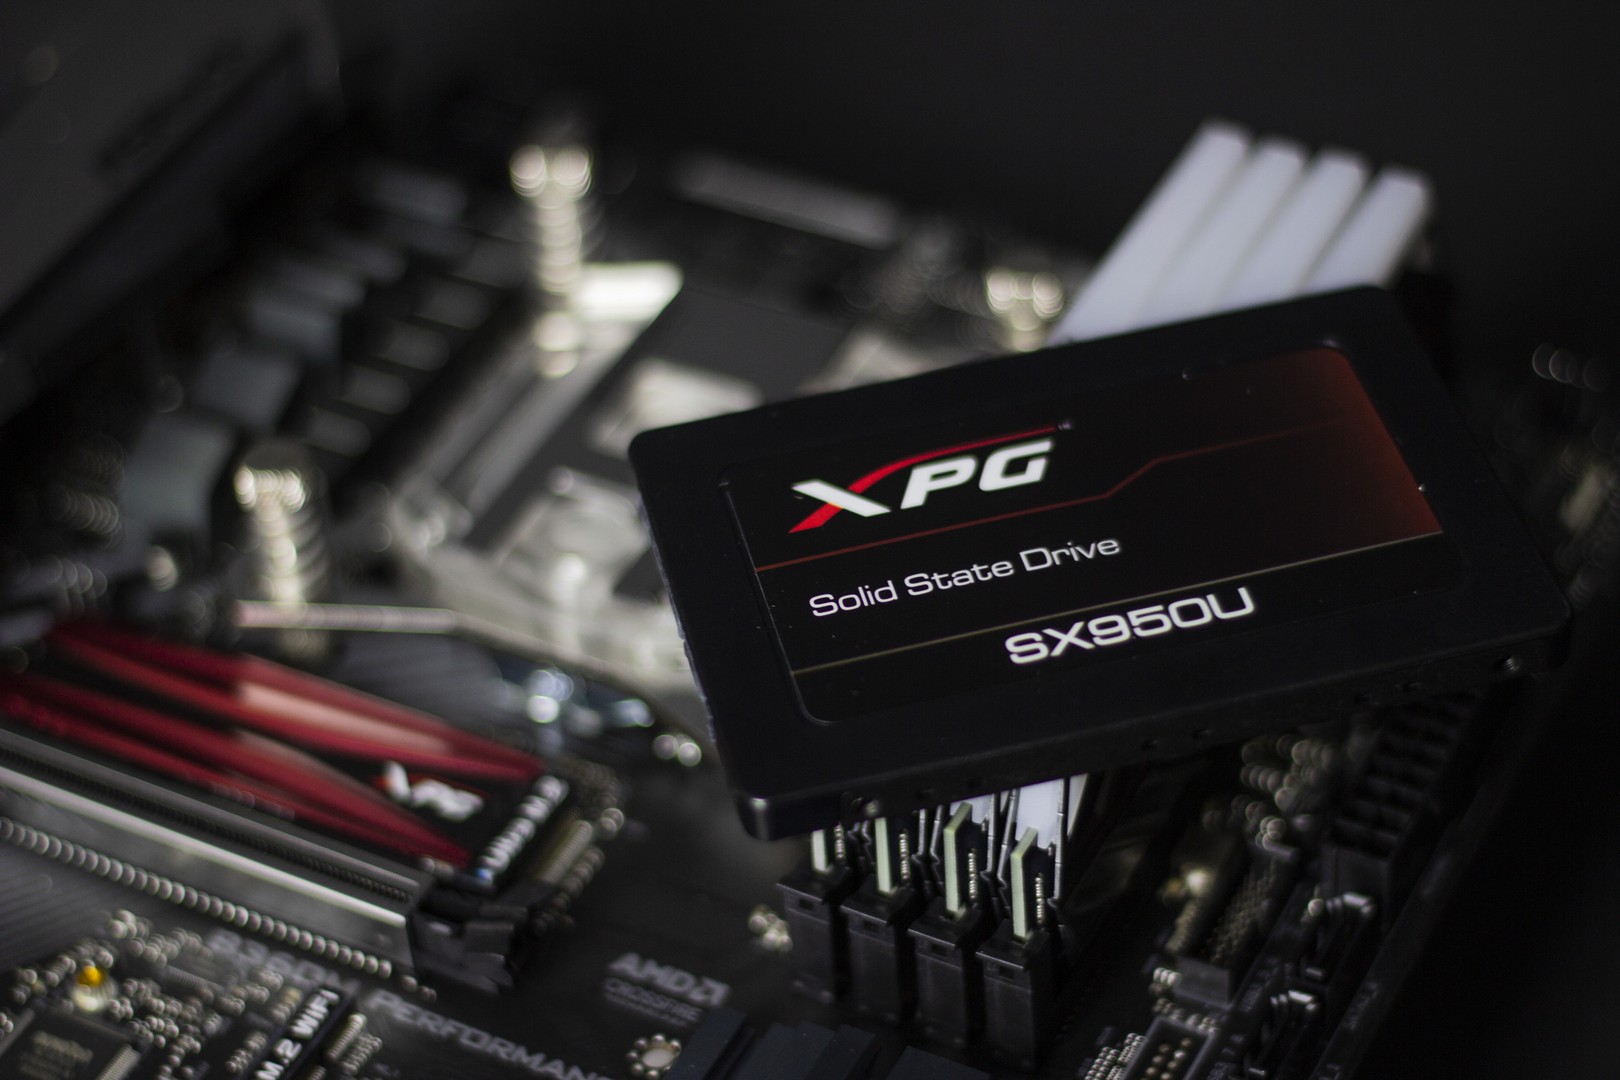
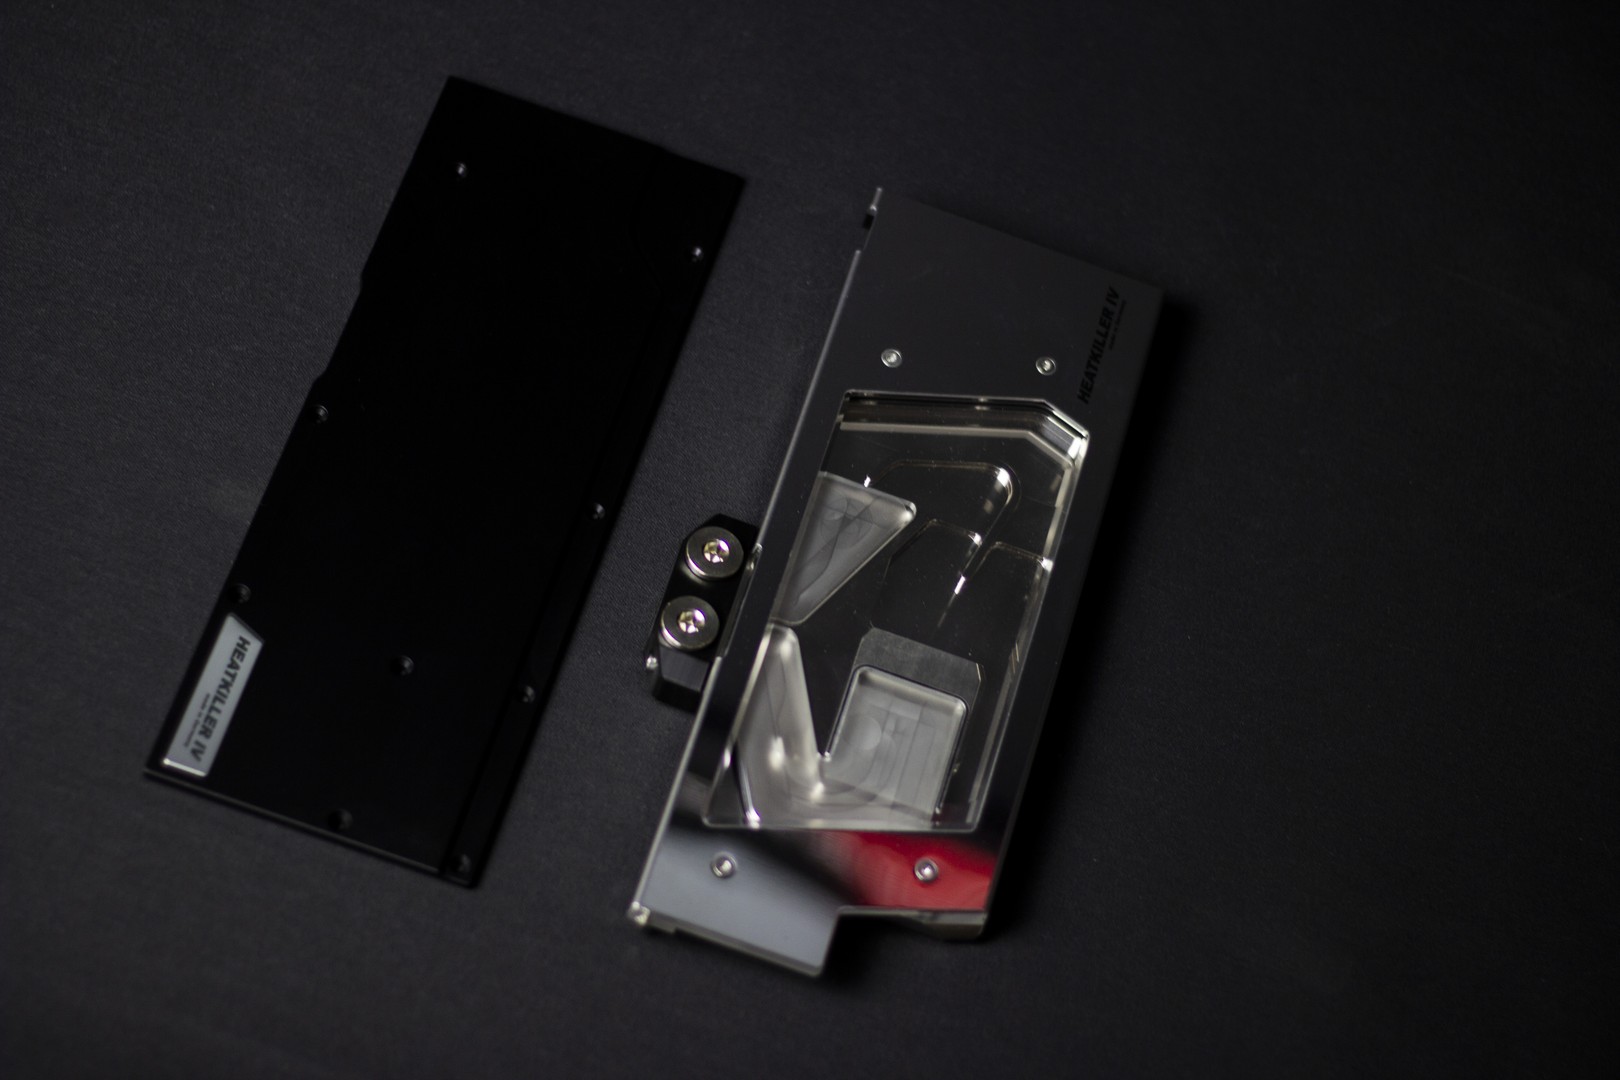
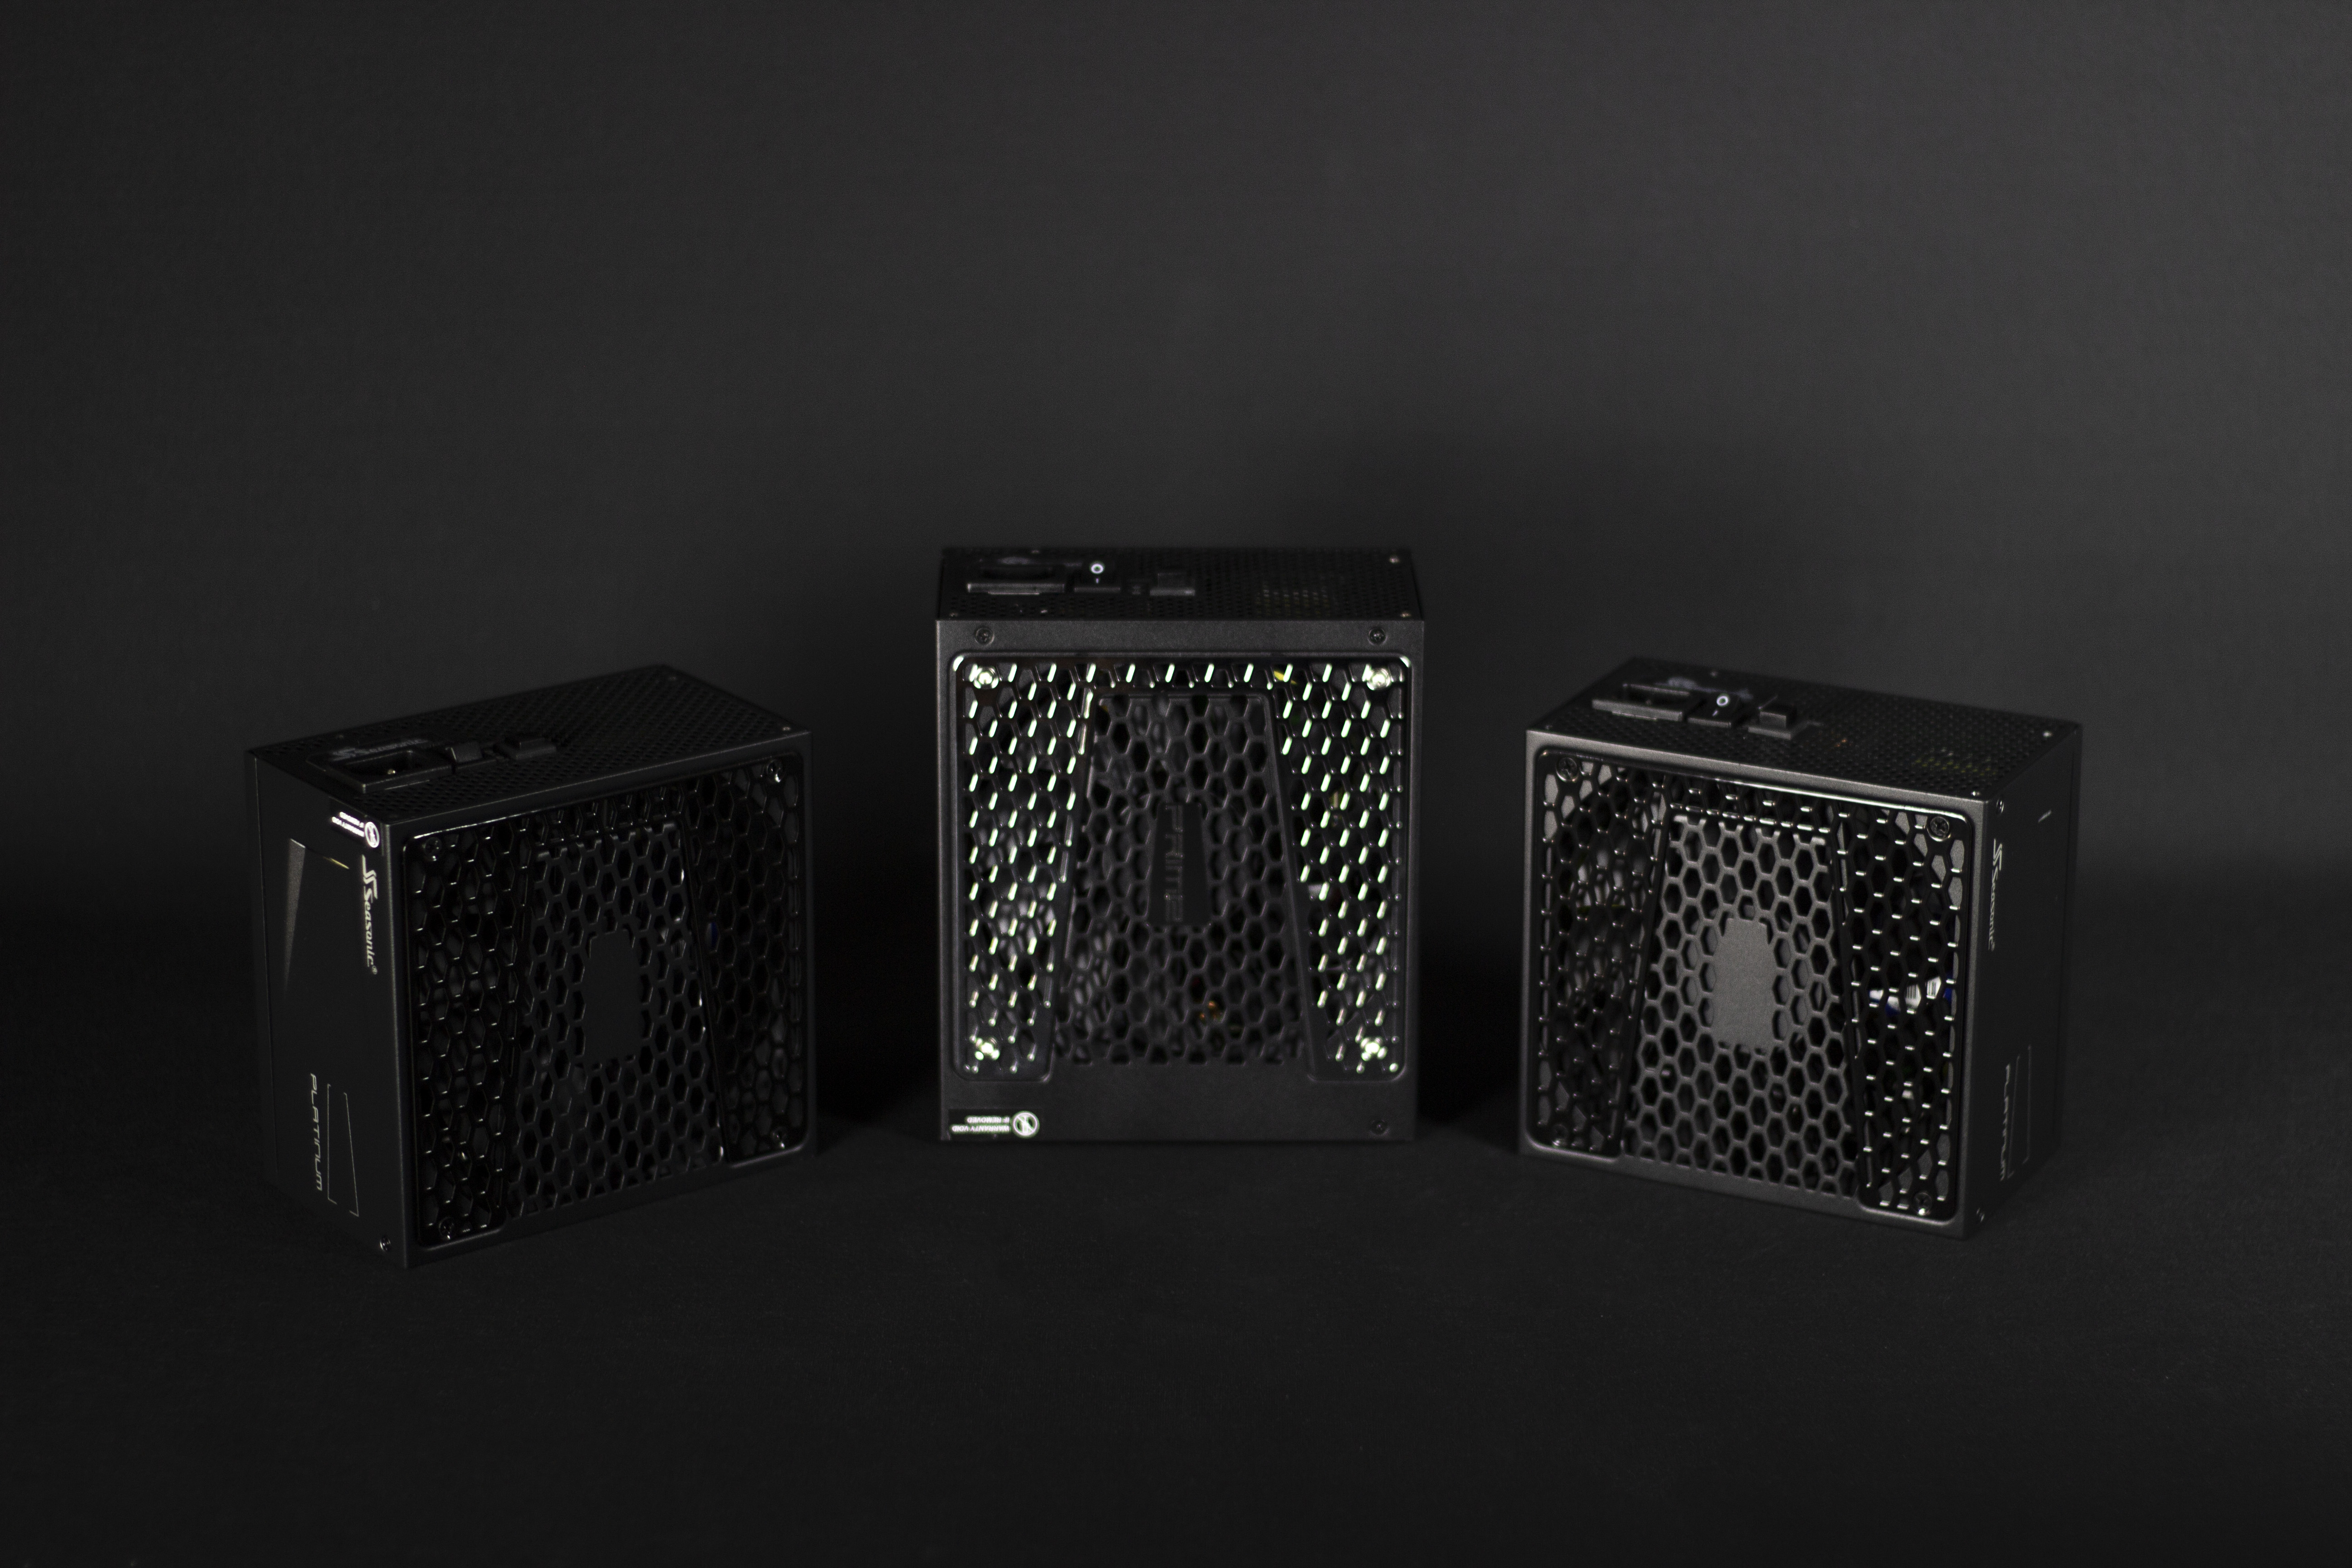
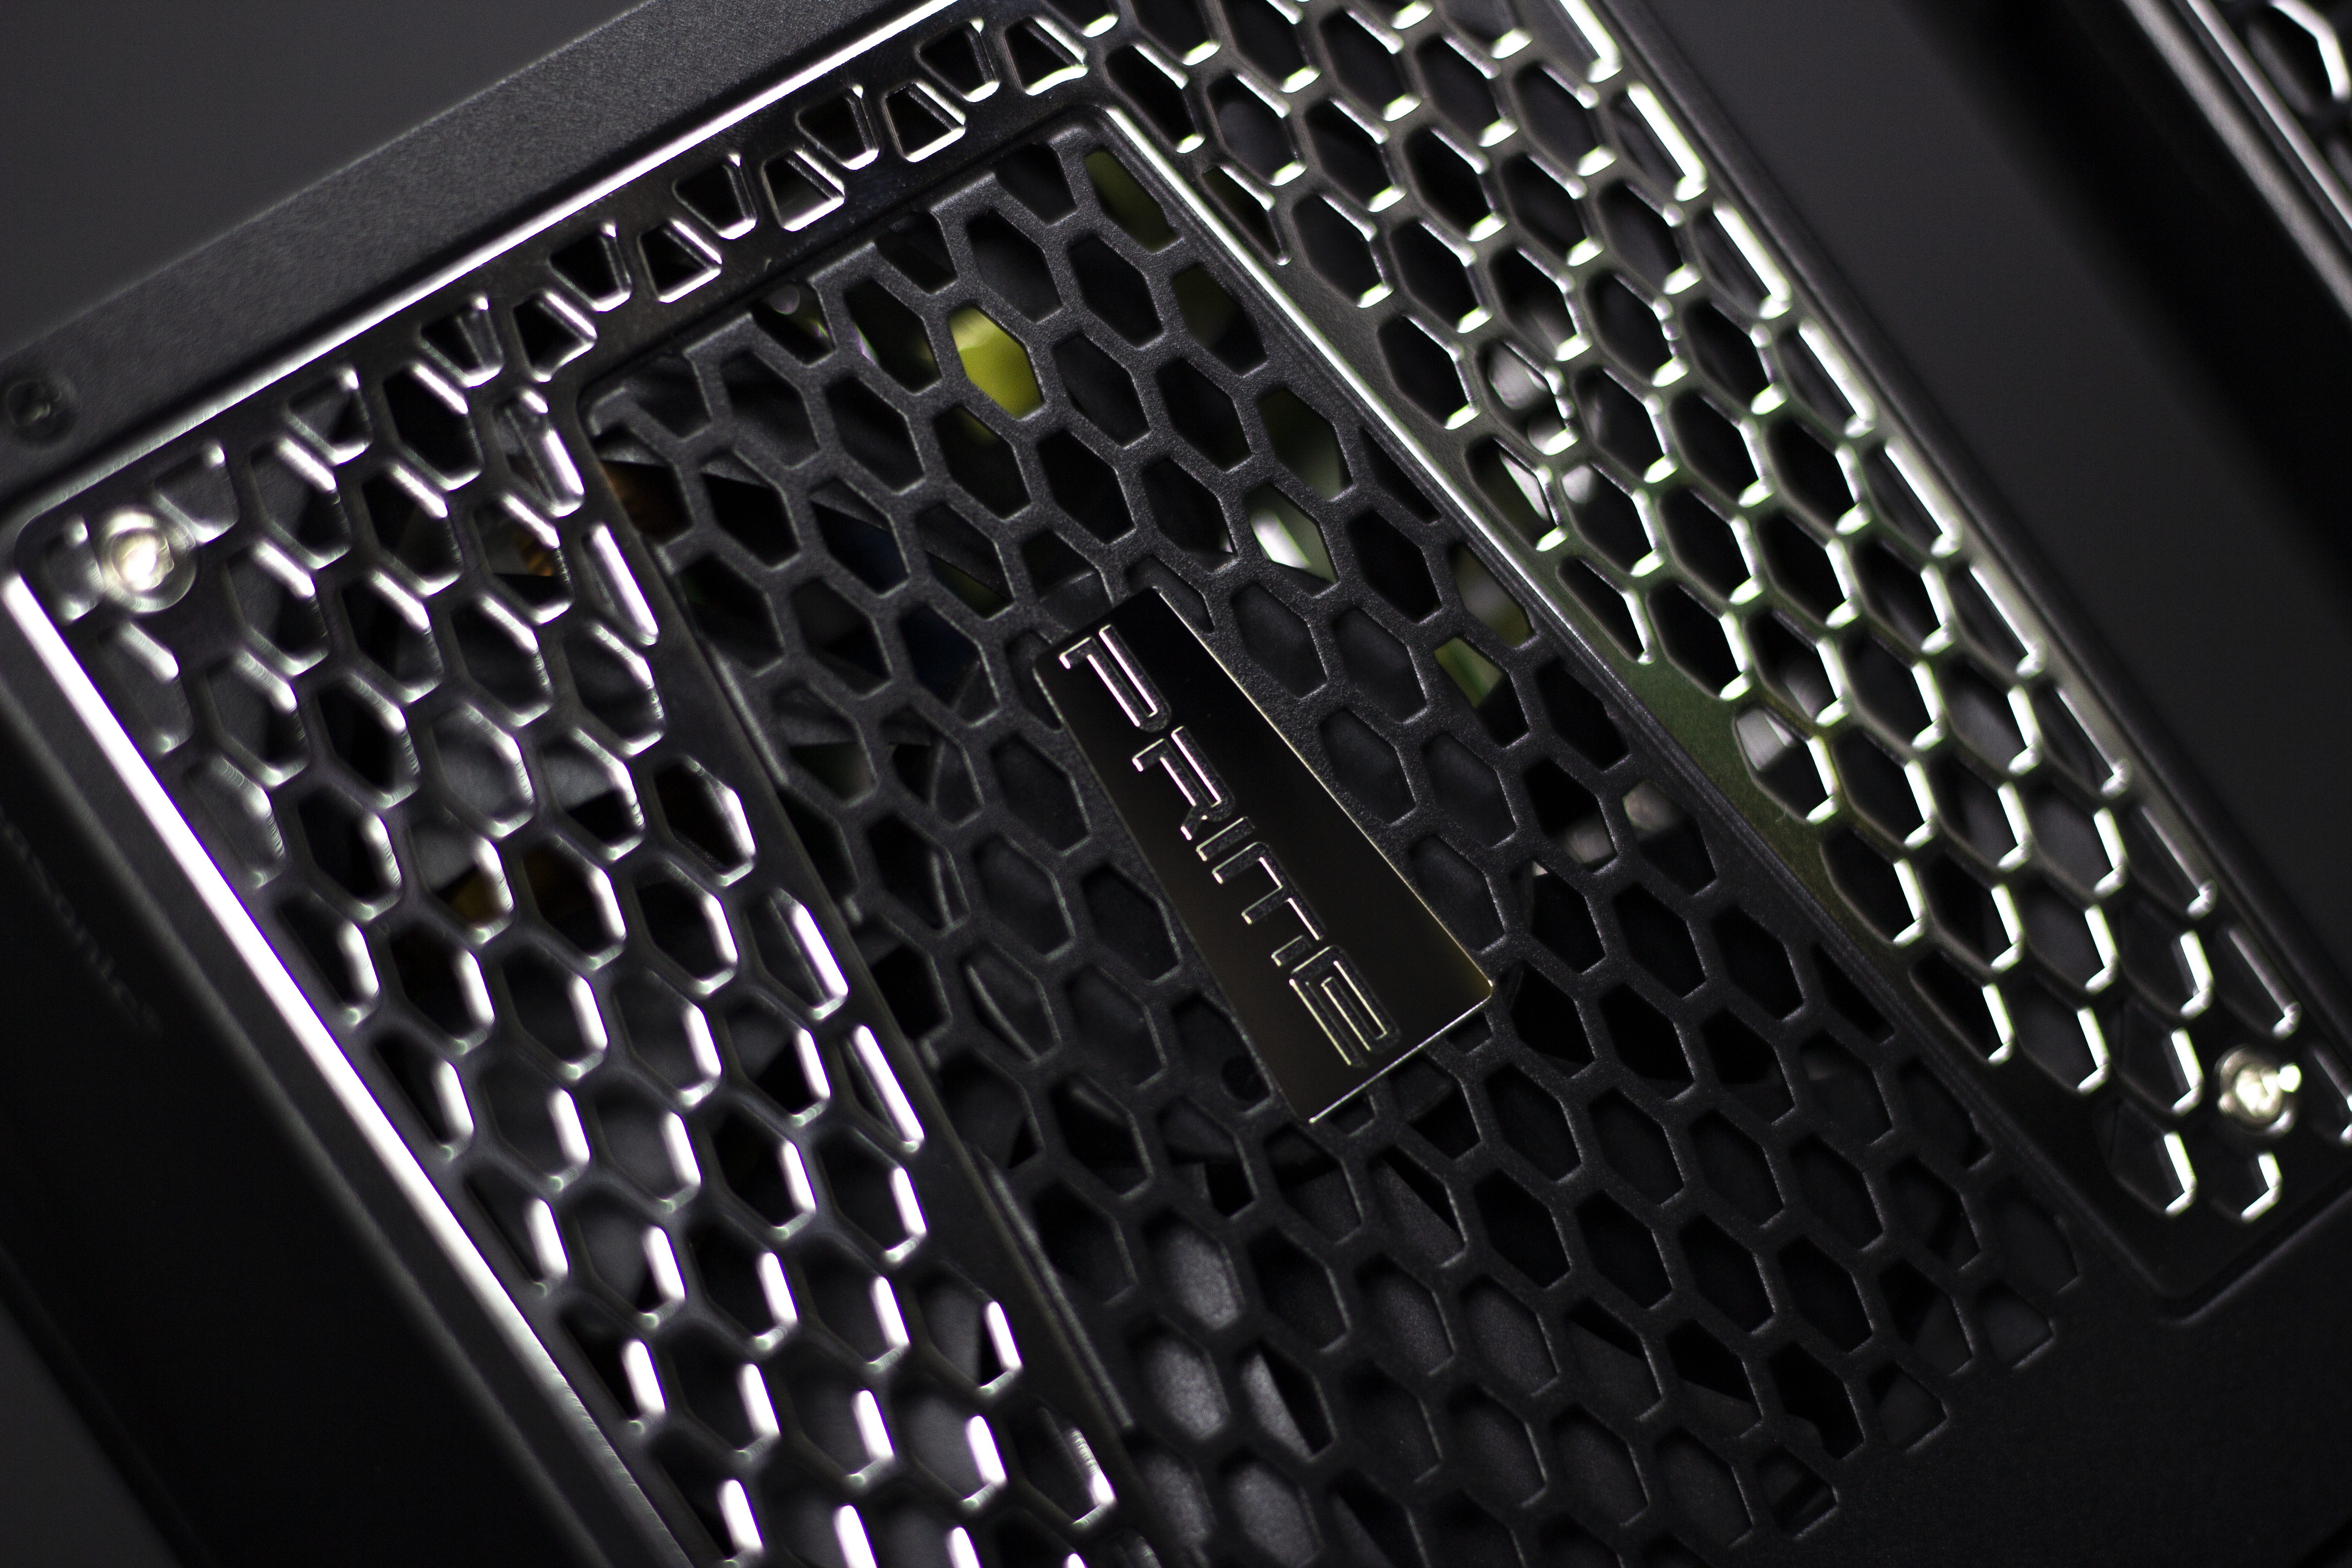
Il progetto è stato realizzato in collaborazione con Cooler Master, Watercool, Seasonic, Asrock, Noiseblocker, Adata XPG e PC Frog Milano.
Prima di partire con i lavori, una lista e alcuni scatti dei componenti che Sky Three ospiterà.
[ENG]
The project was made in collaboration with Cooler Master, Watercool, Seasonic, Asrock, Noiseblocker, Adata XPG and PC Frog Milano.
Before starting with the worklog, a list and some shots of the hardware Sky Three is going to accomodate.
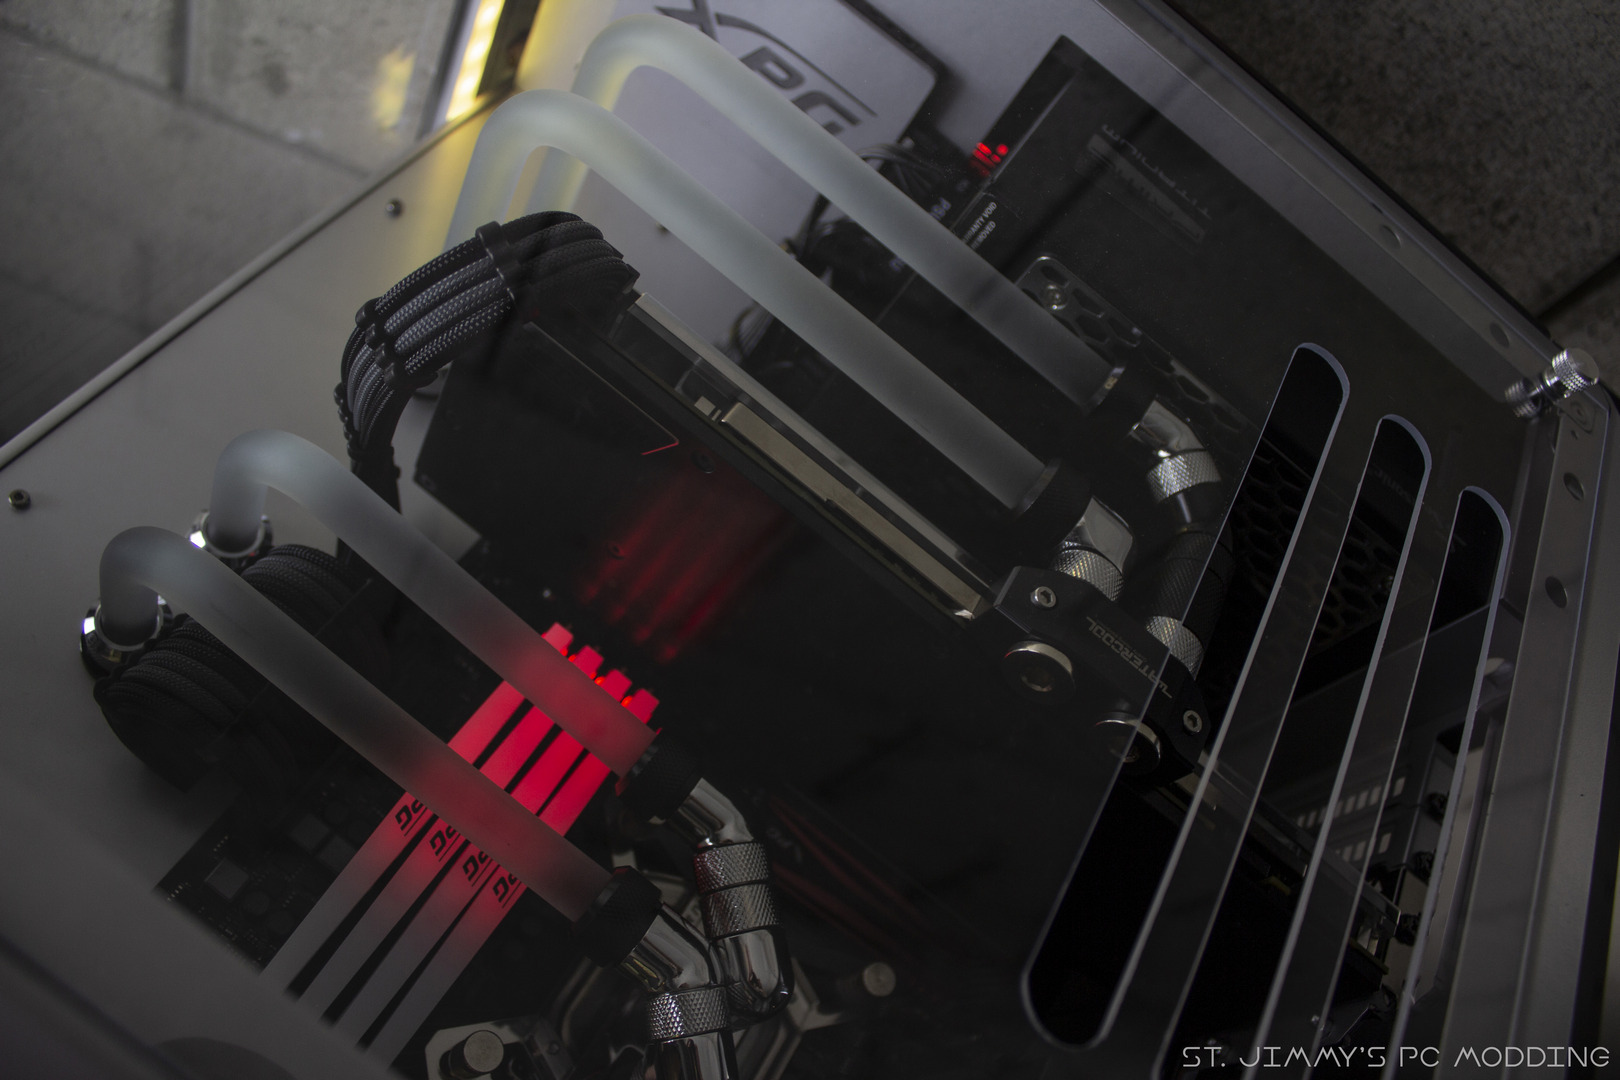
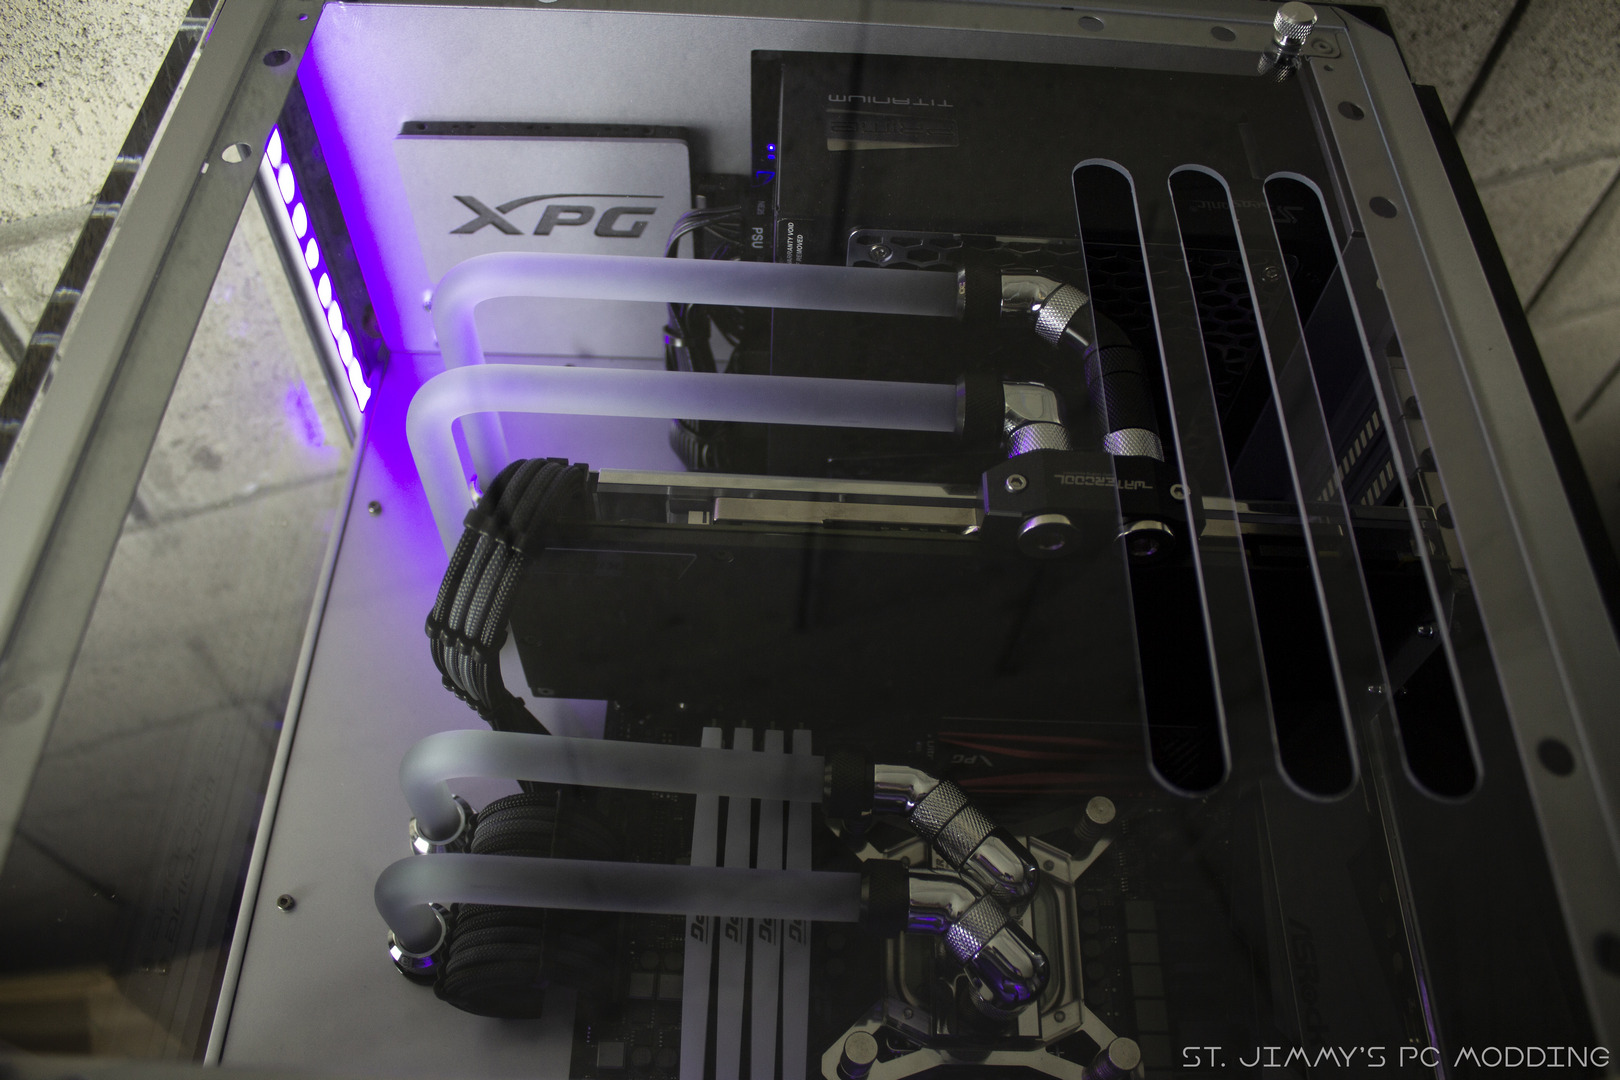
Specs
Case: 3x Cooler Master Q300P
CPU: Intel Core i5-8600K
GPU: GeForce GTX 1070 Founders Edition
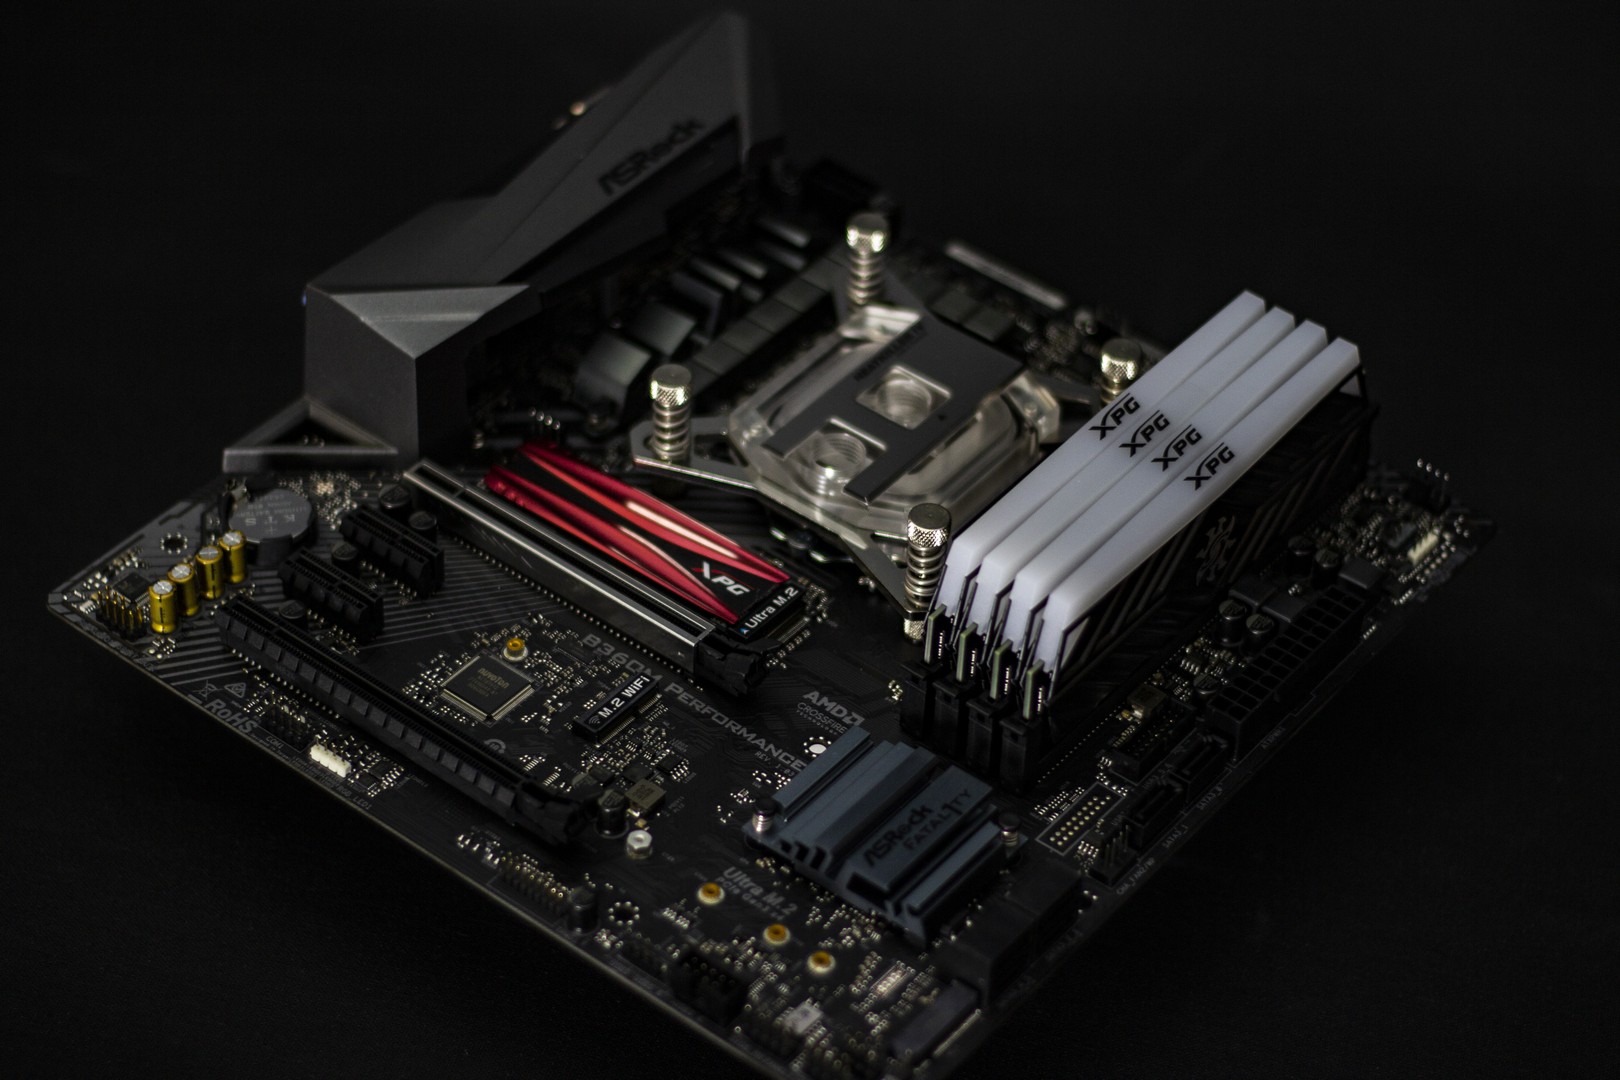
MB: Asrock Fatal1ty B360M Performance
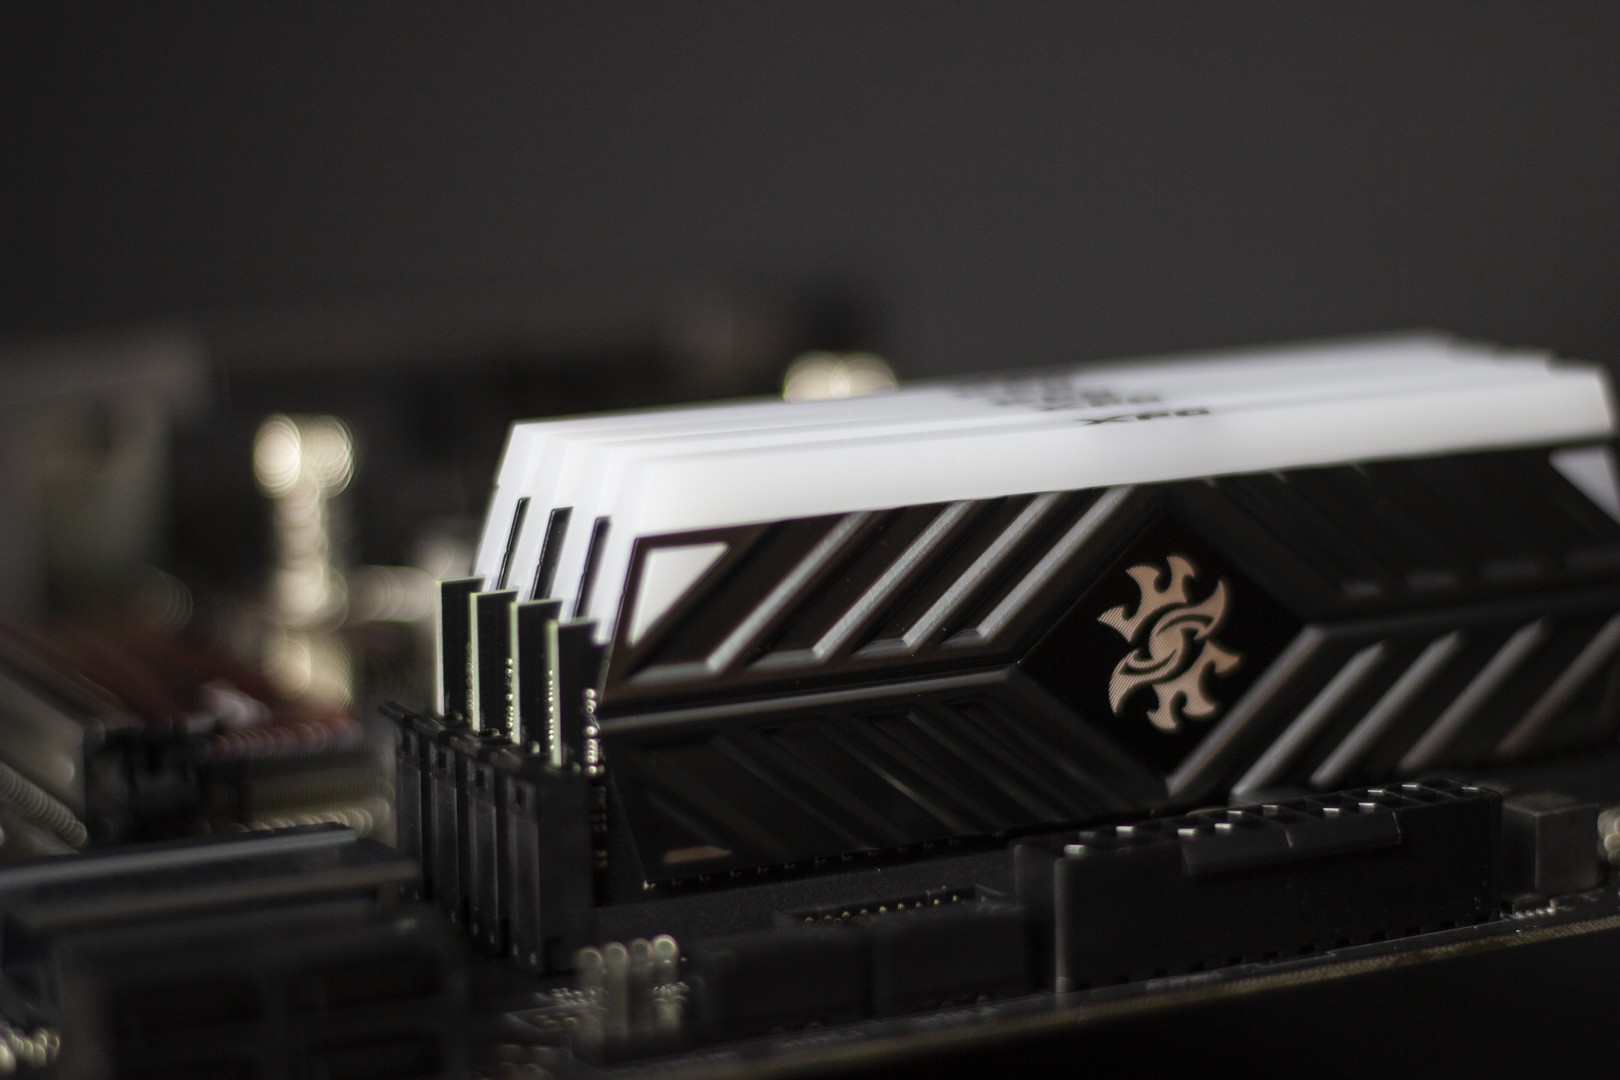
RAM: Adata XPG D41 3000MHz 4x8Gb
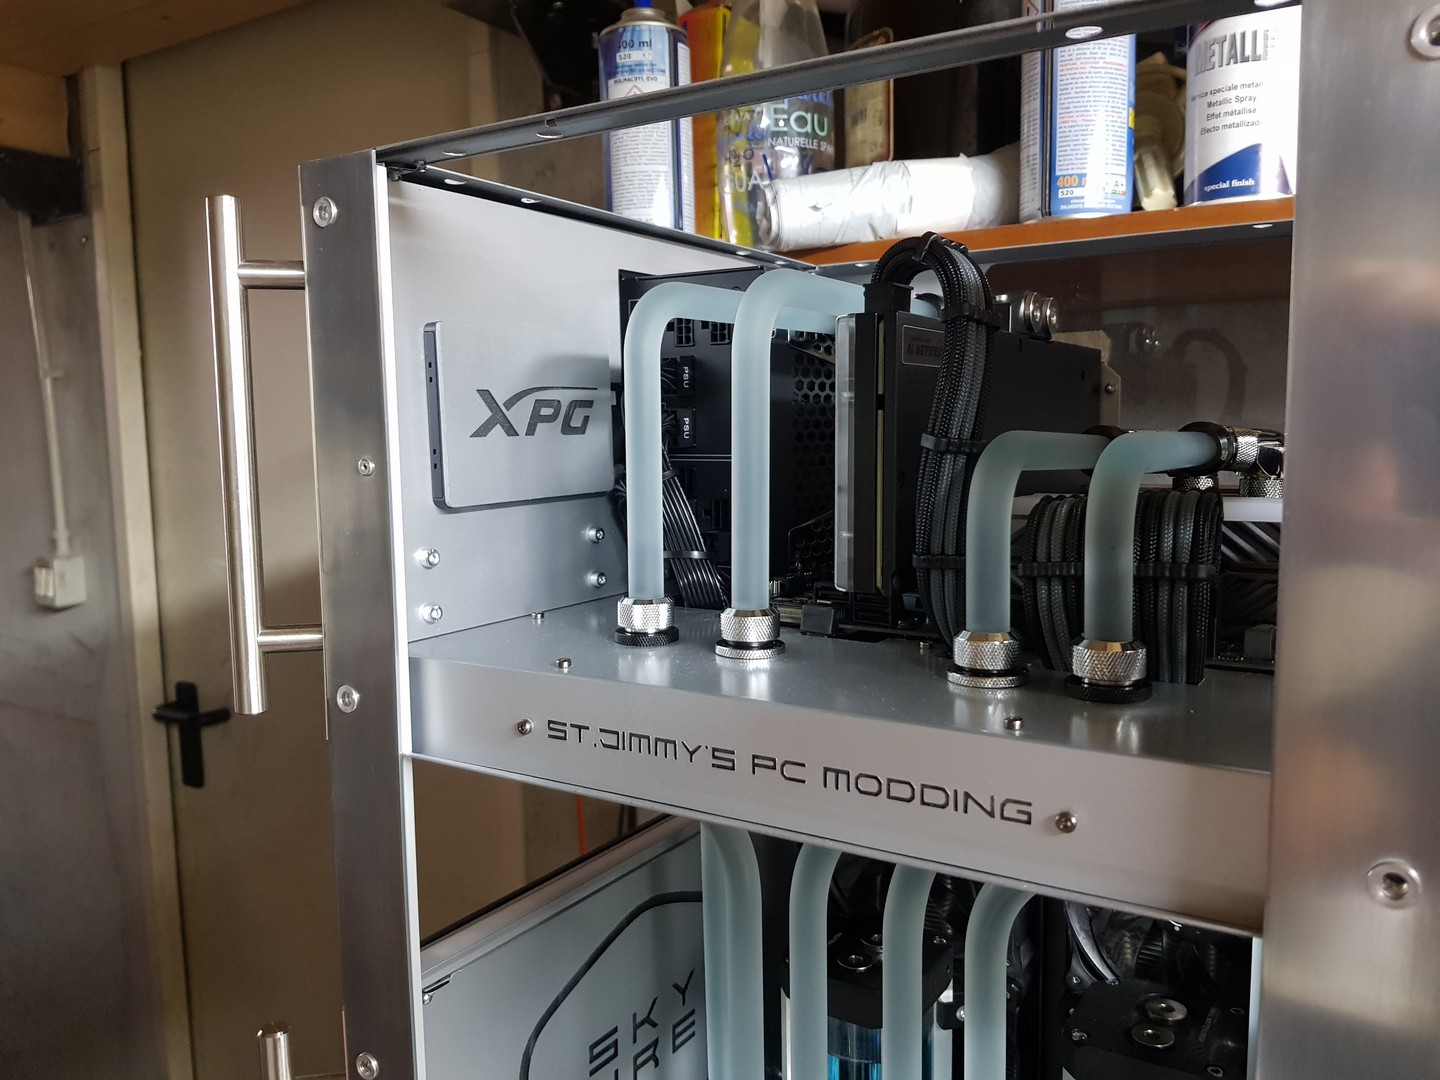
SSD: 1x Adata XPG S11 m.2 240Gb + 1x Adata XPG SX950U SATA 240Gb
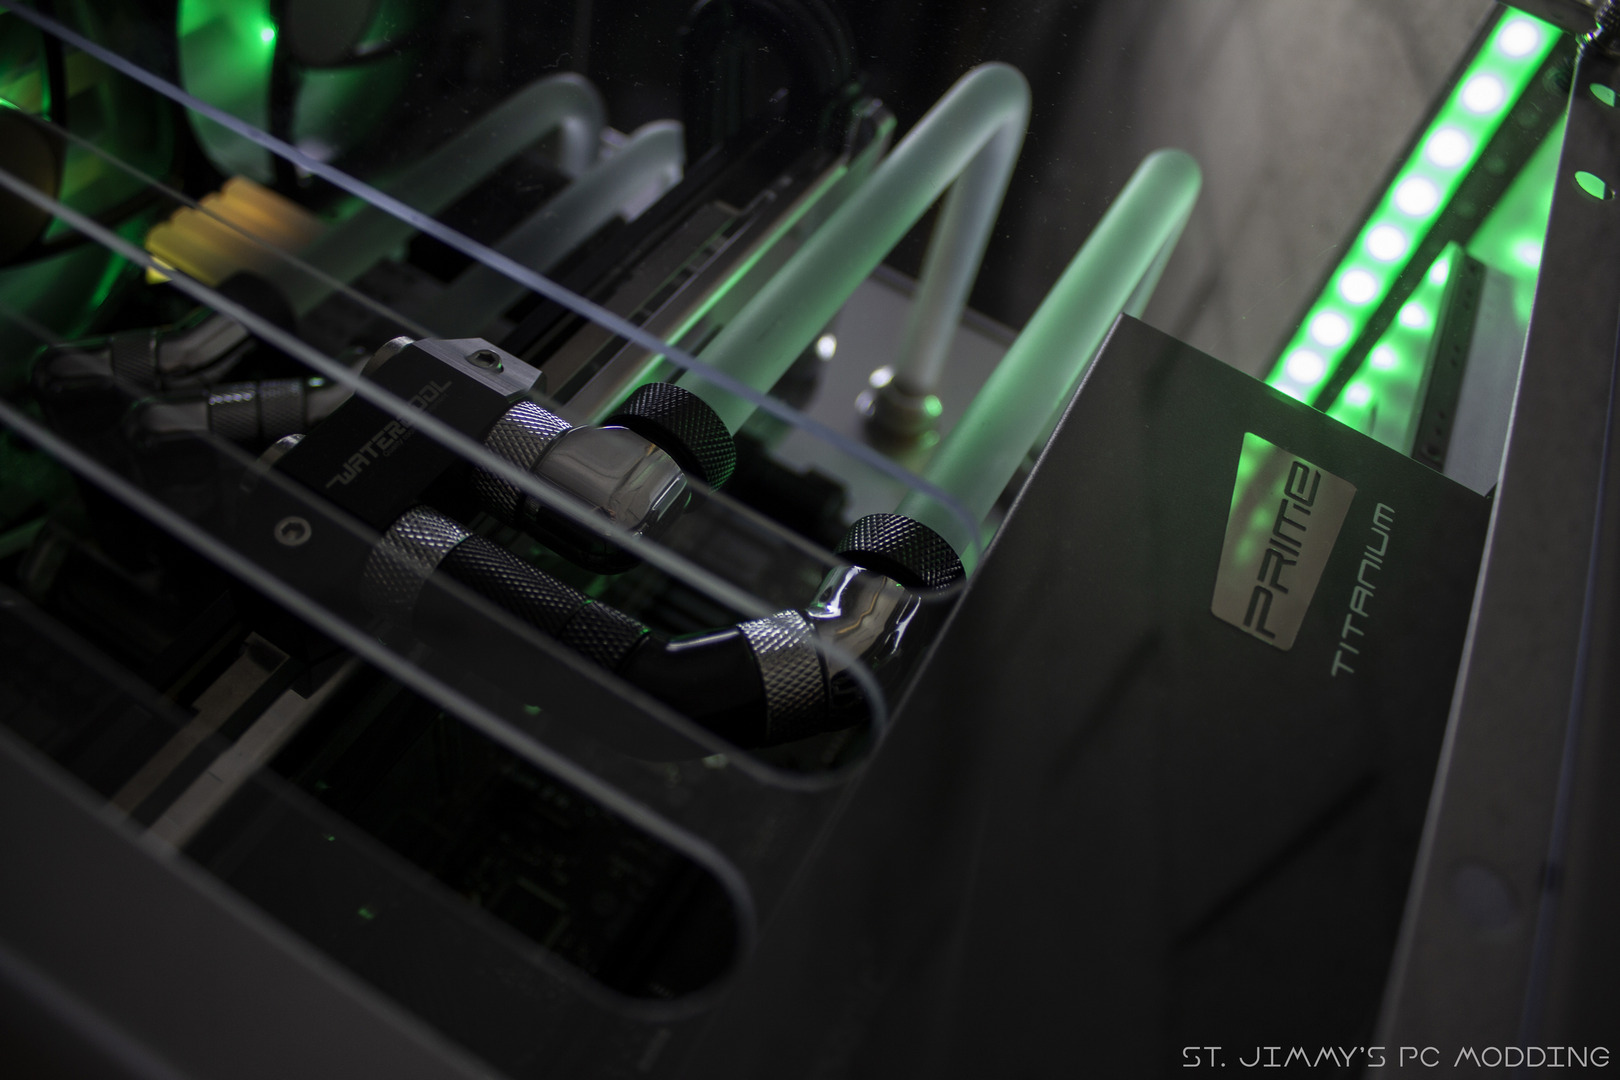
PSU: Seasonic Prima Ultra Titanium 750W
Radiator Fans: Noiseblocker Multiframe 120mm
Case Fans: Cooler Master Masterfan Airflow RGB 120mm
CPU Waterblock: Heatkiller IV PRO
GPU Waterblock: Heatkiller IV 1070/80
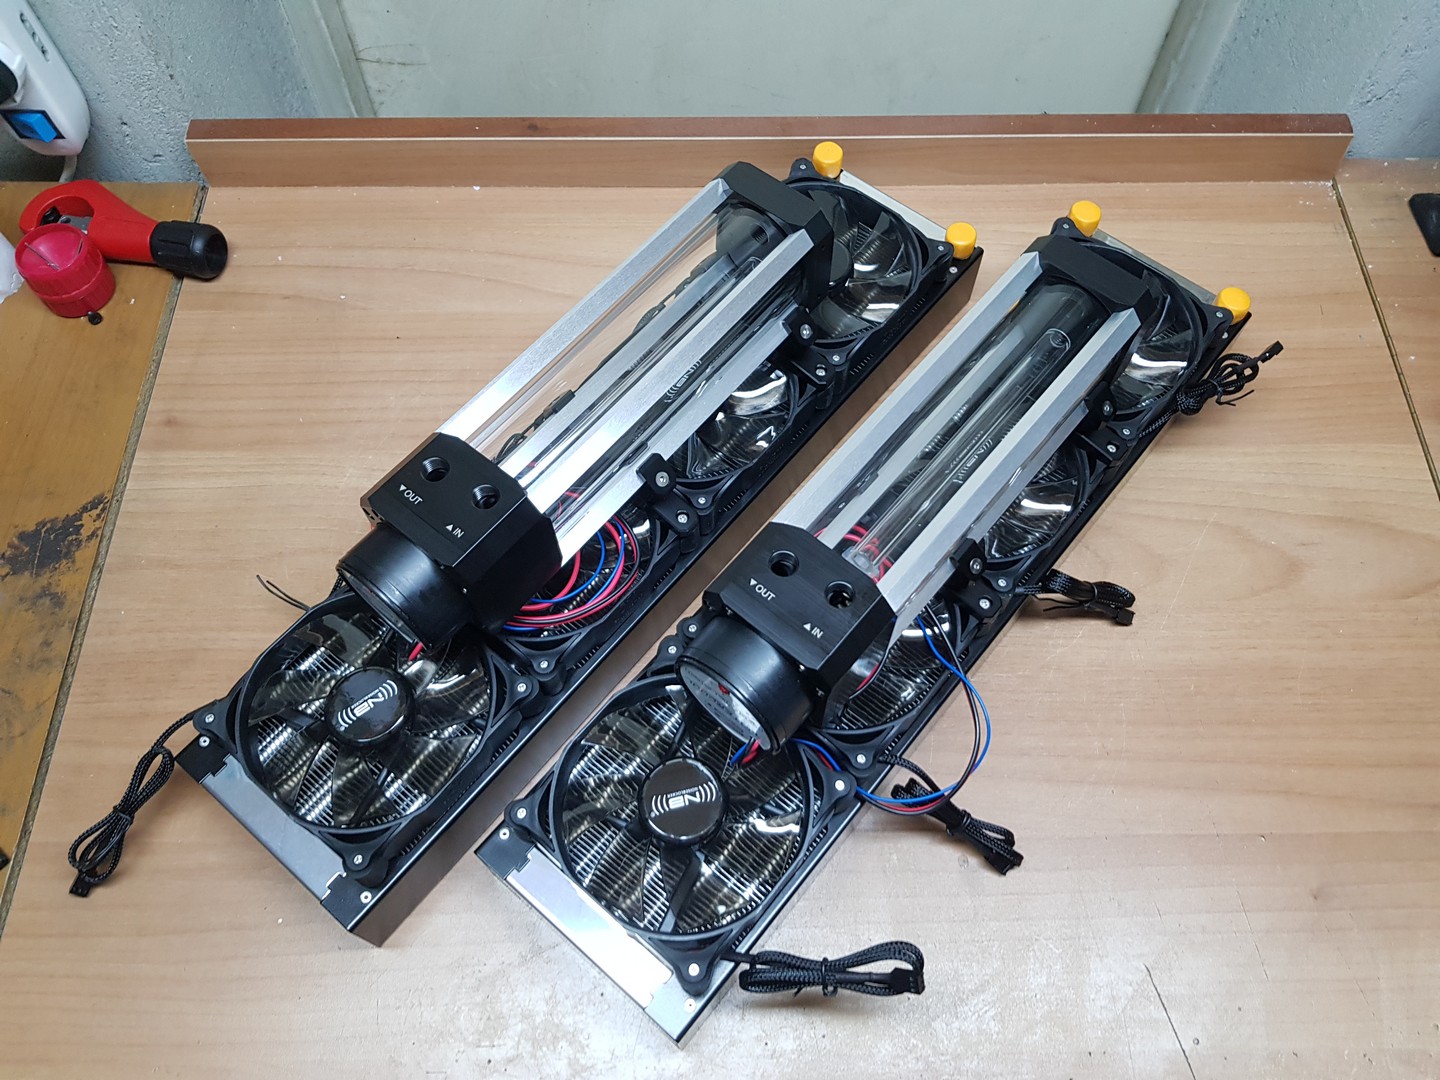
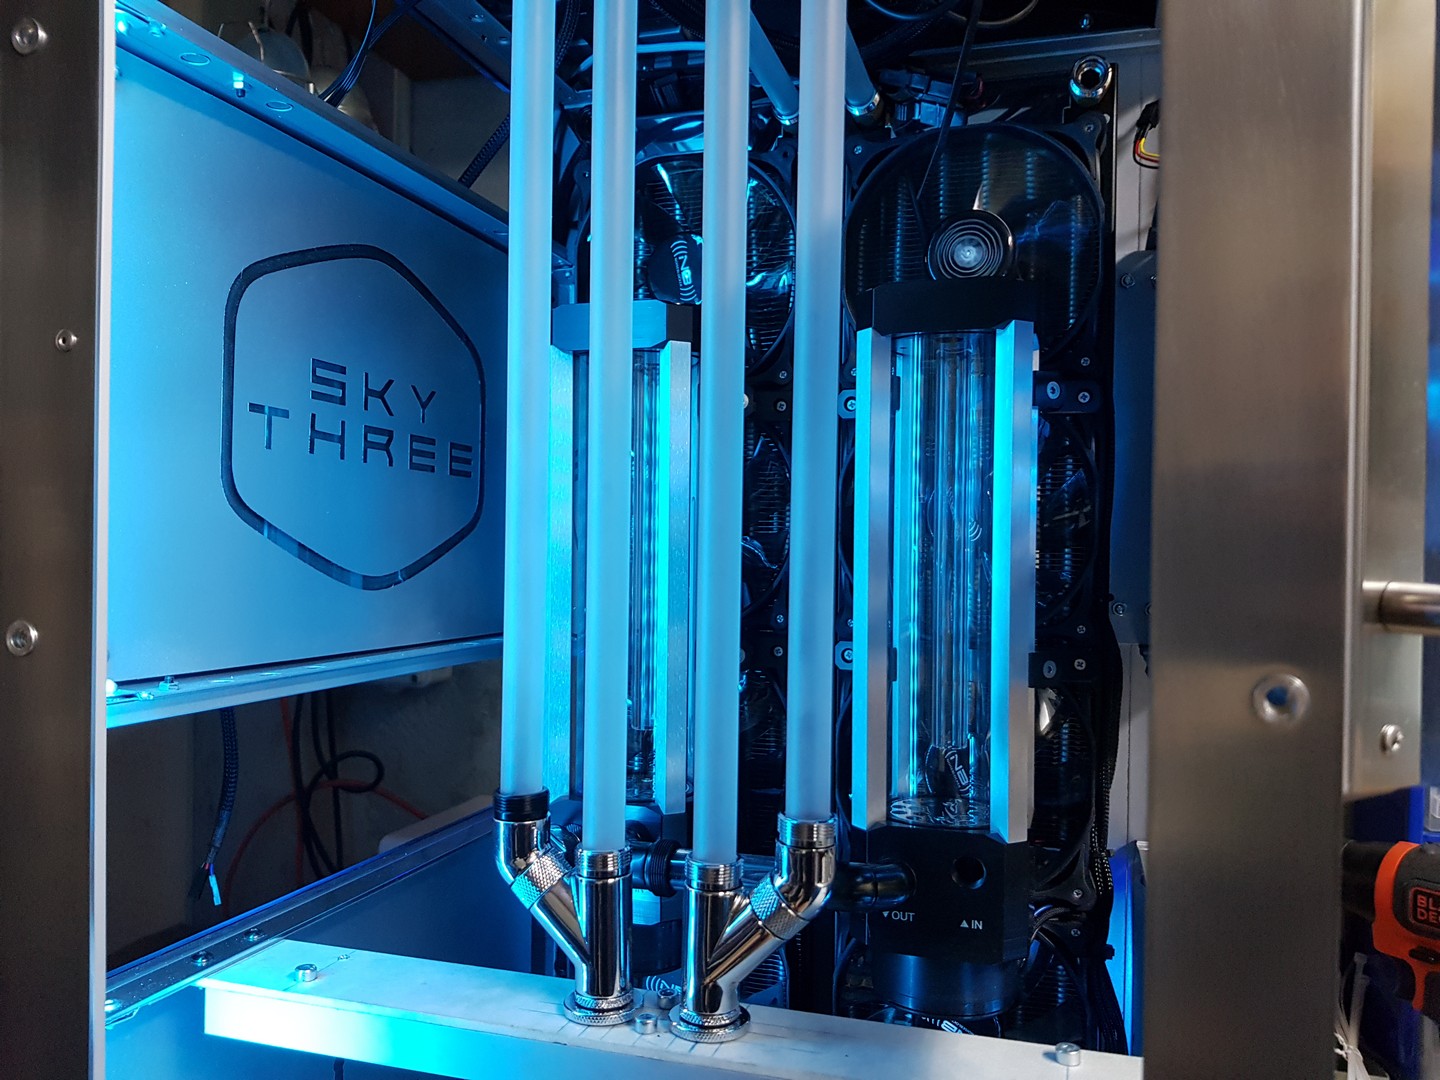
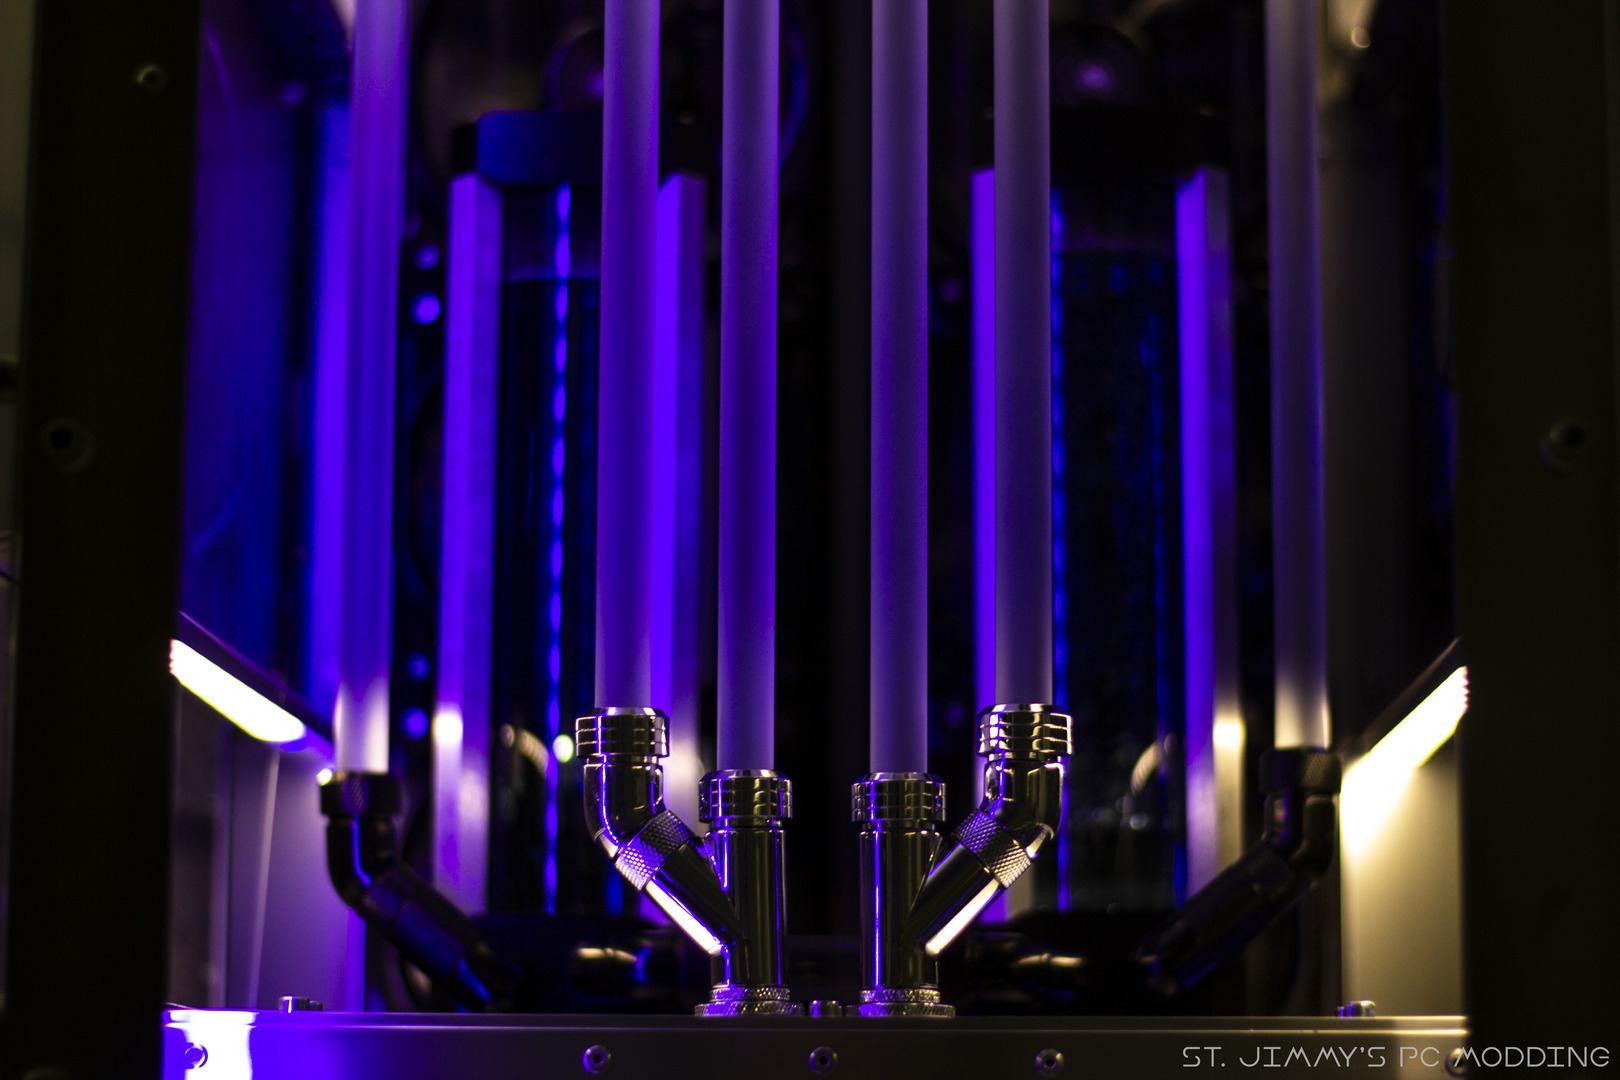
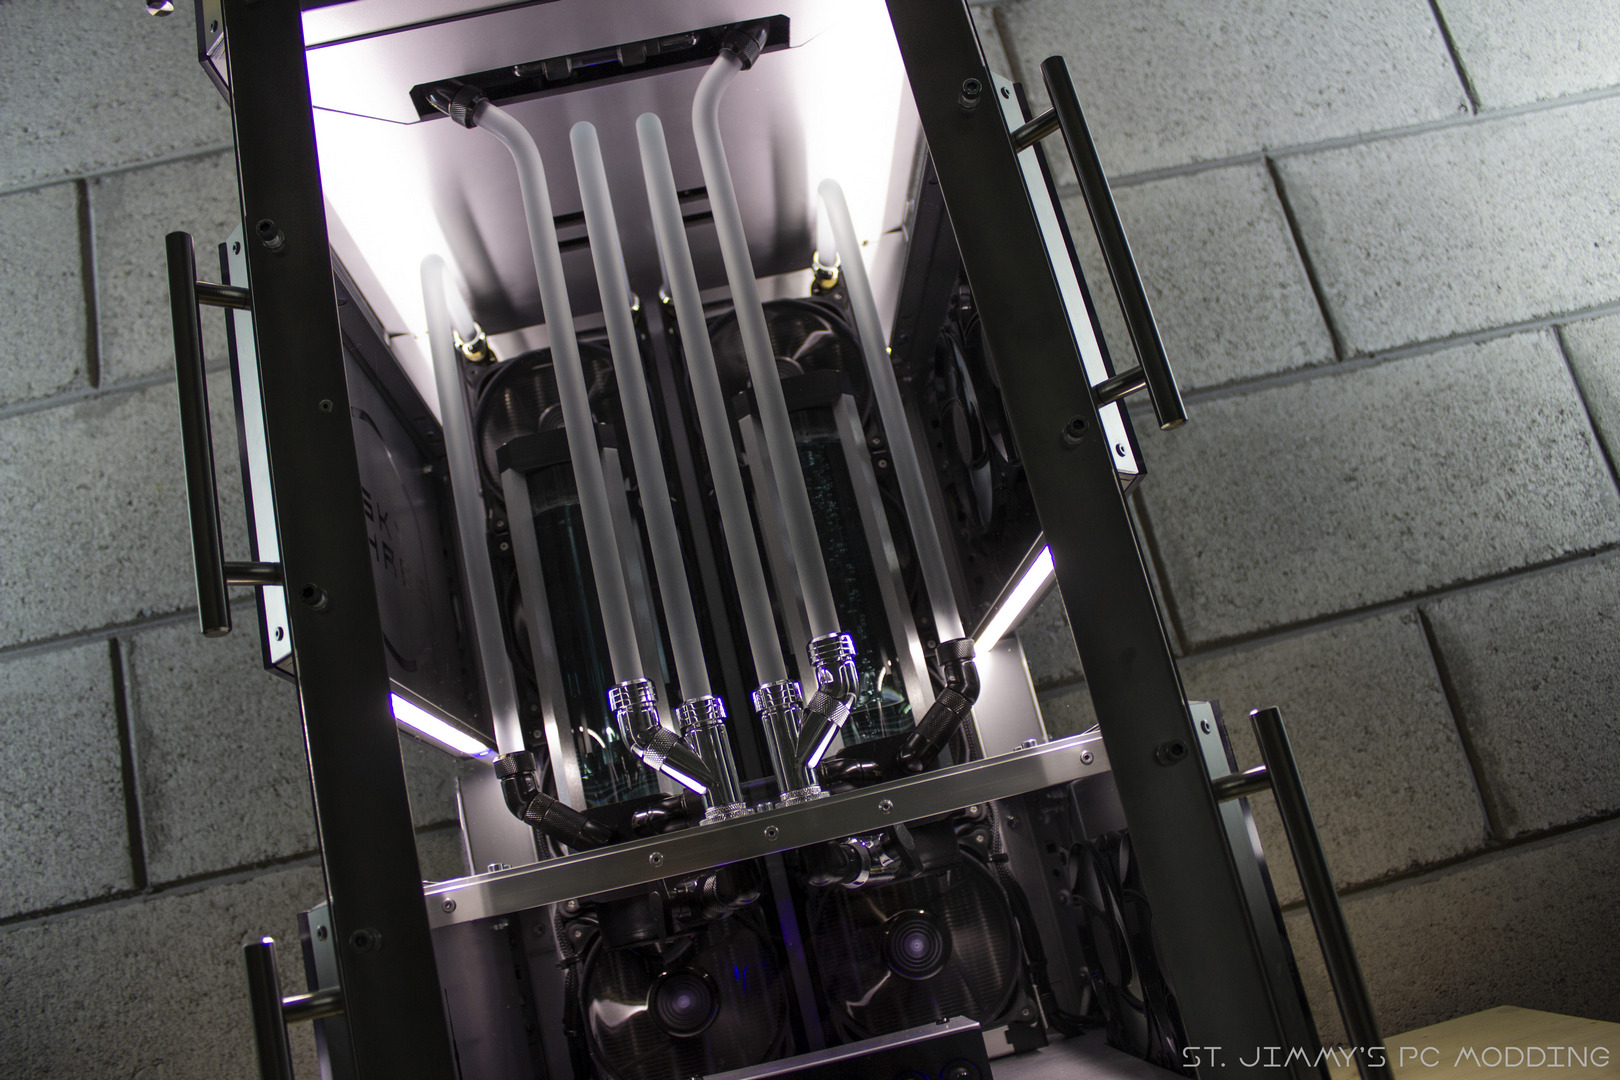
Reservoir: 2x Heatkiller Tube 200 D5
Radiator: 2x Heatkiller HTSF2 480mm LT
Fittings and Tubing: Alphacool Eiszapfen + Alphacool Eisrohr 13/10 Satin
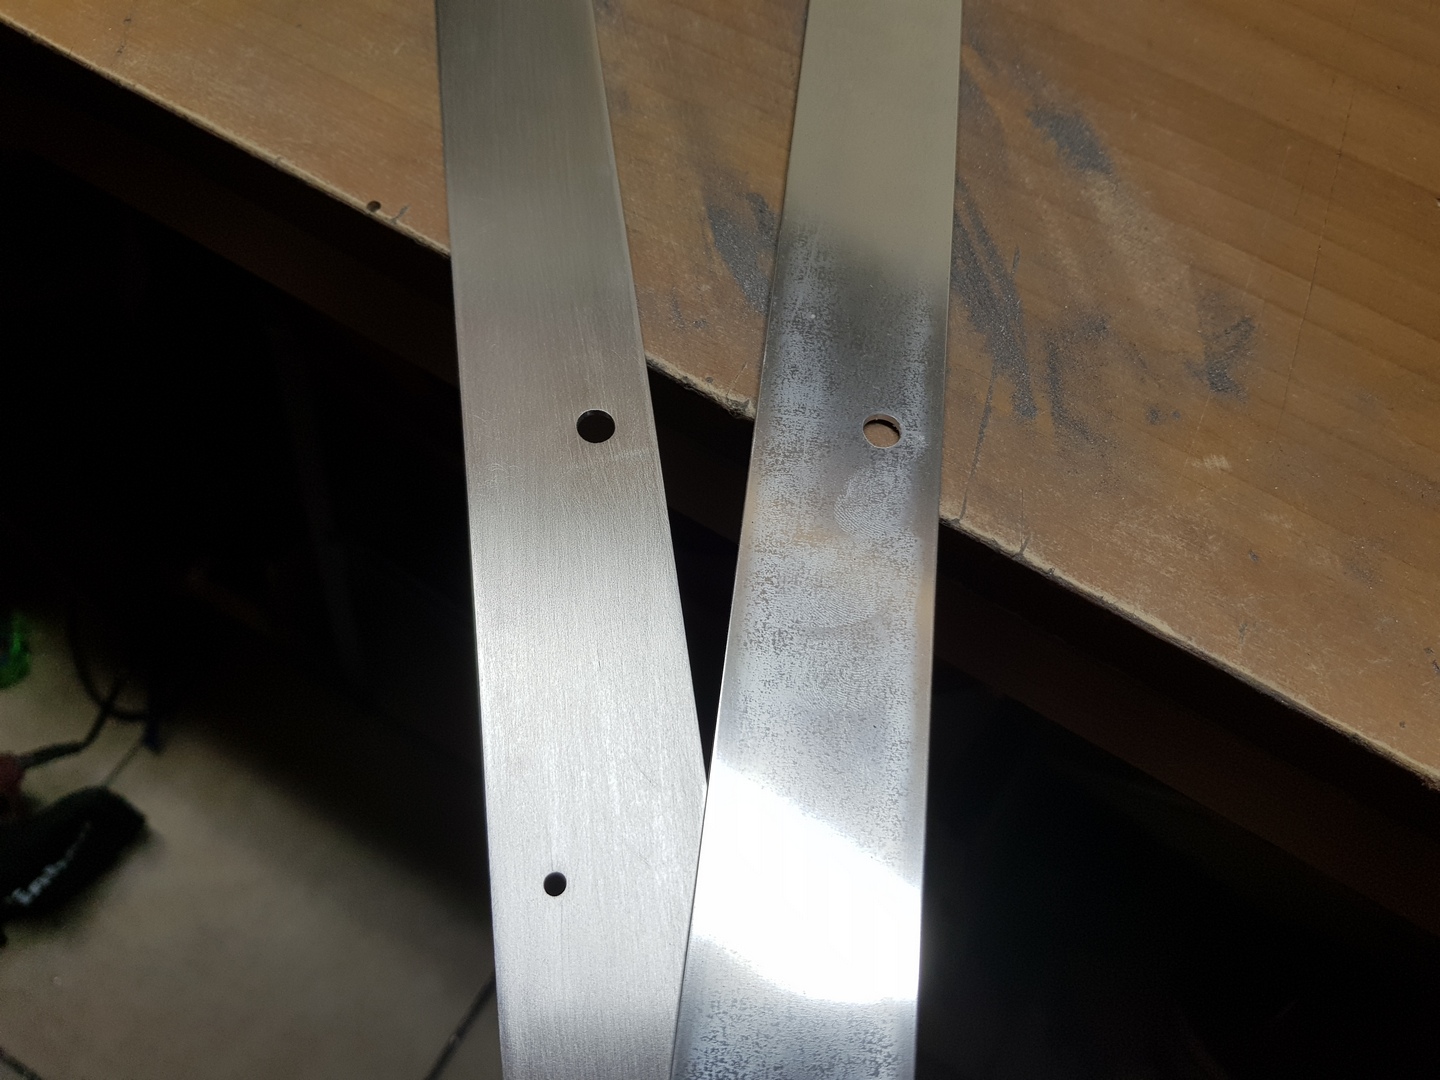
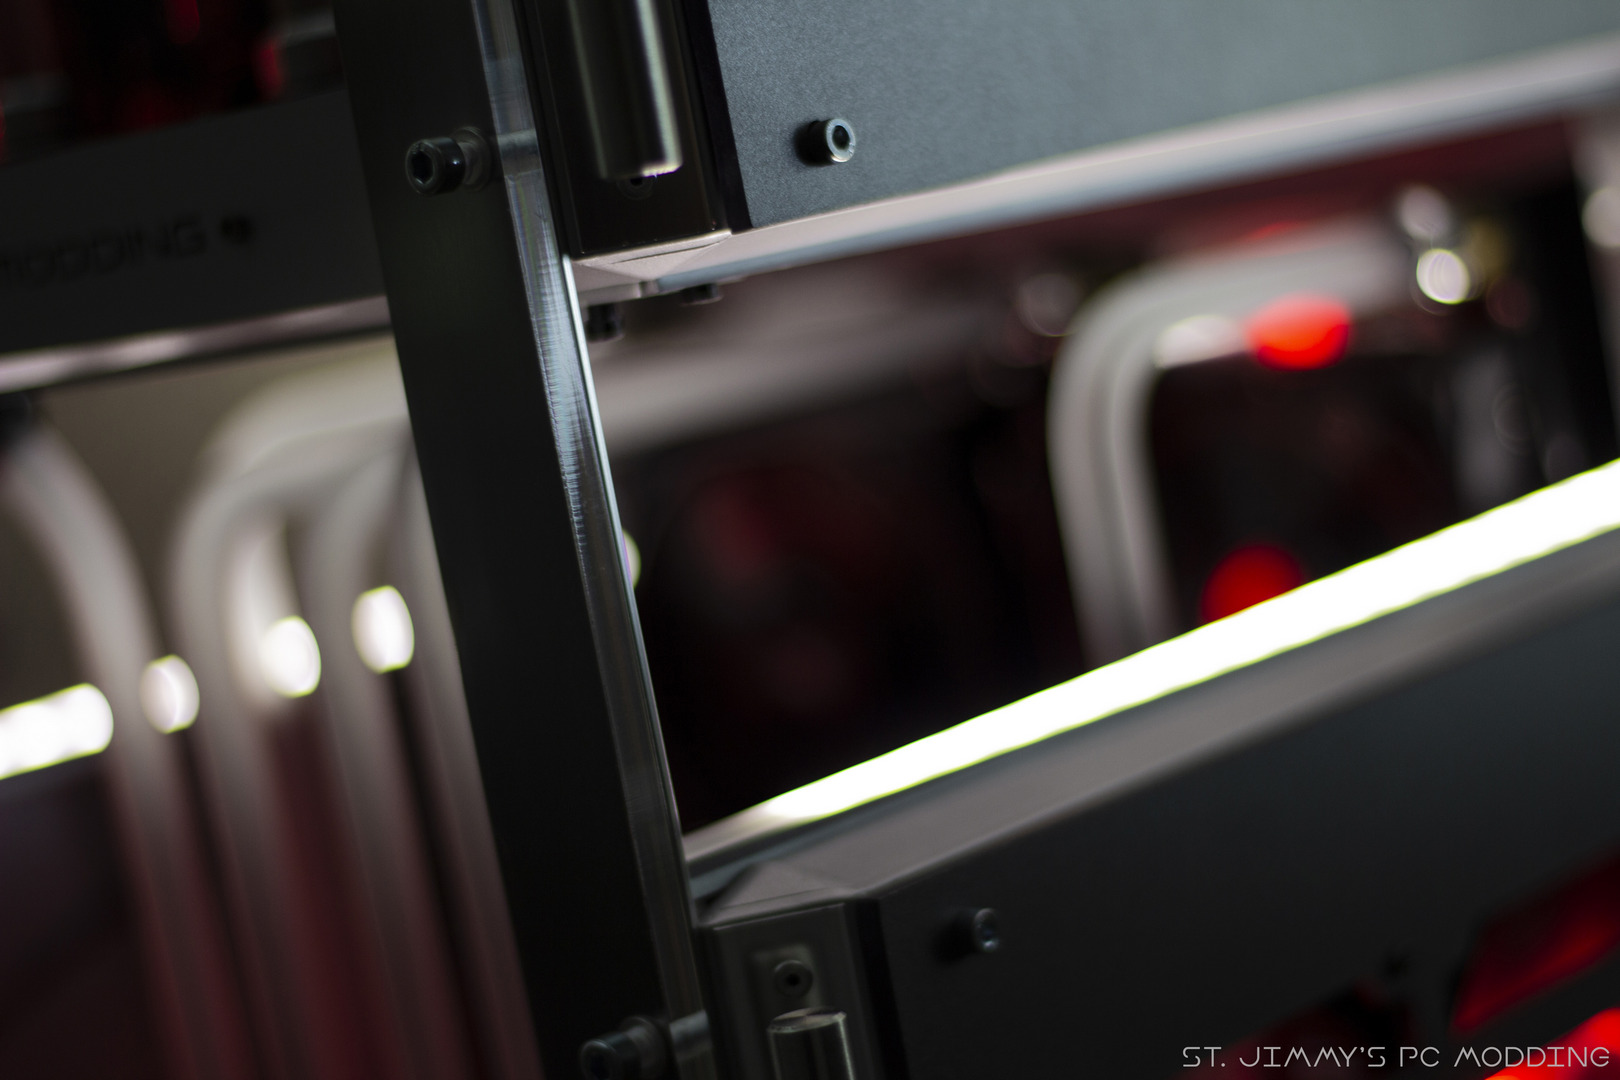
Realizzazione della struttura principale–>
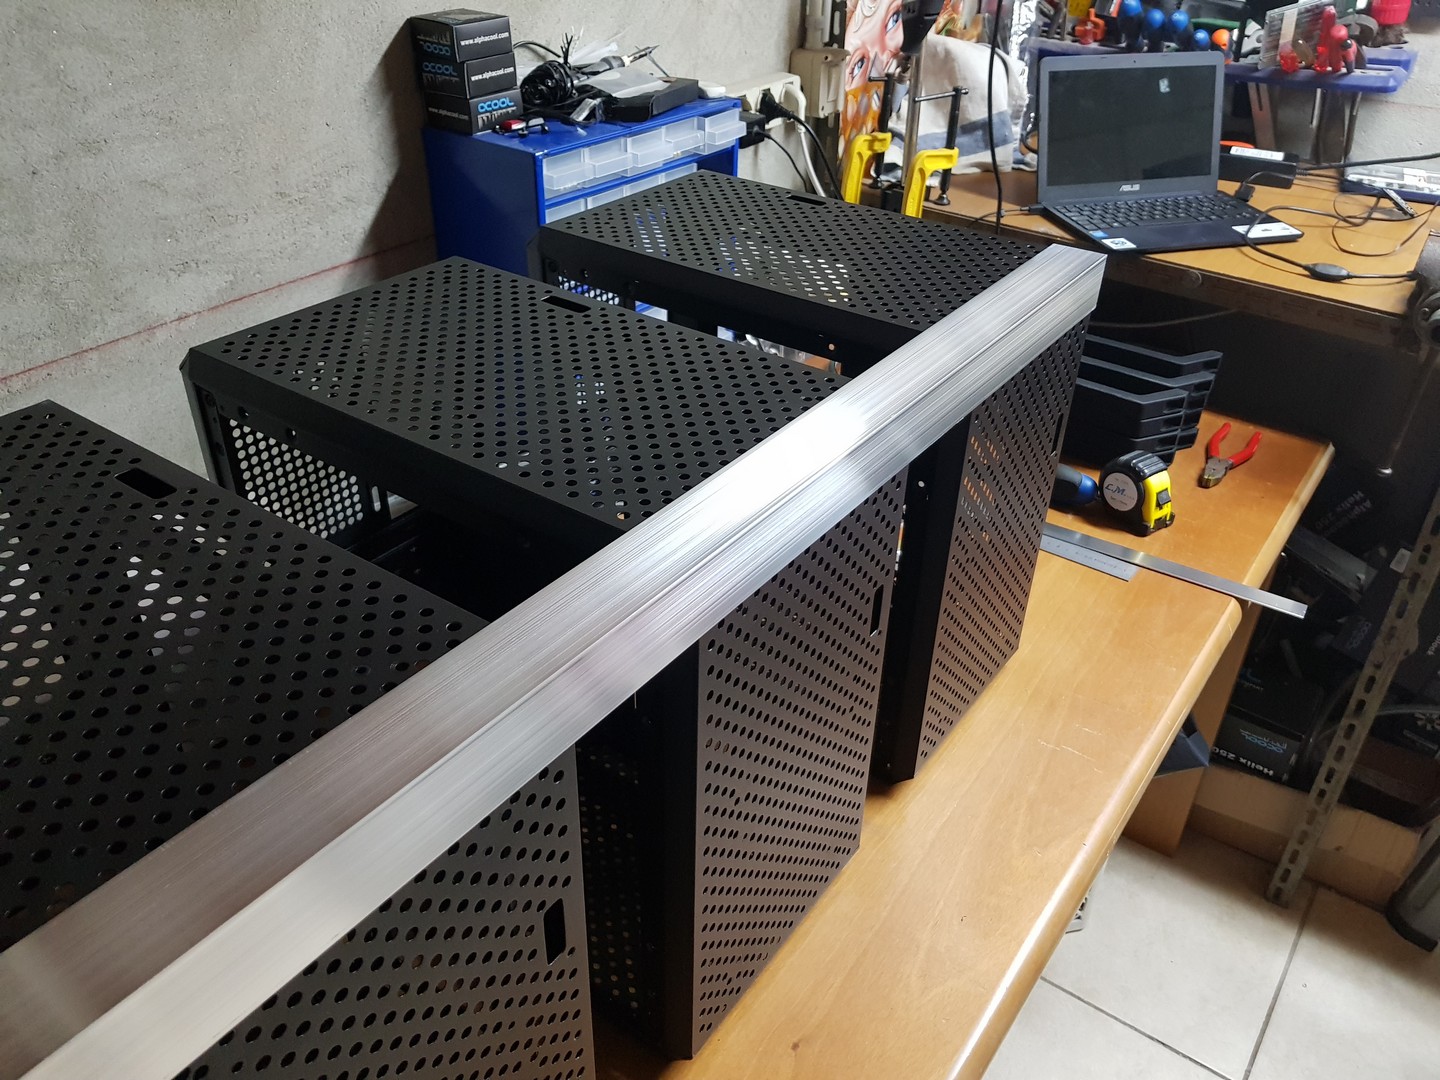
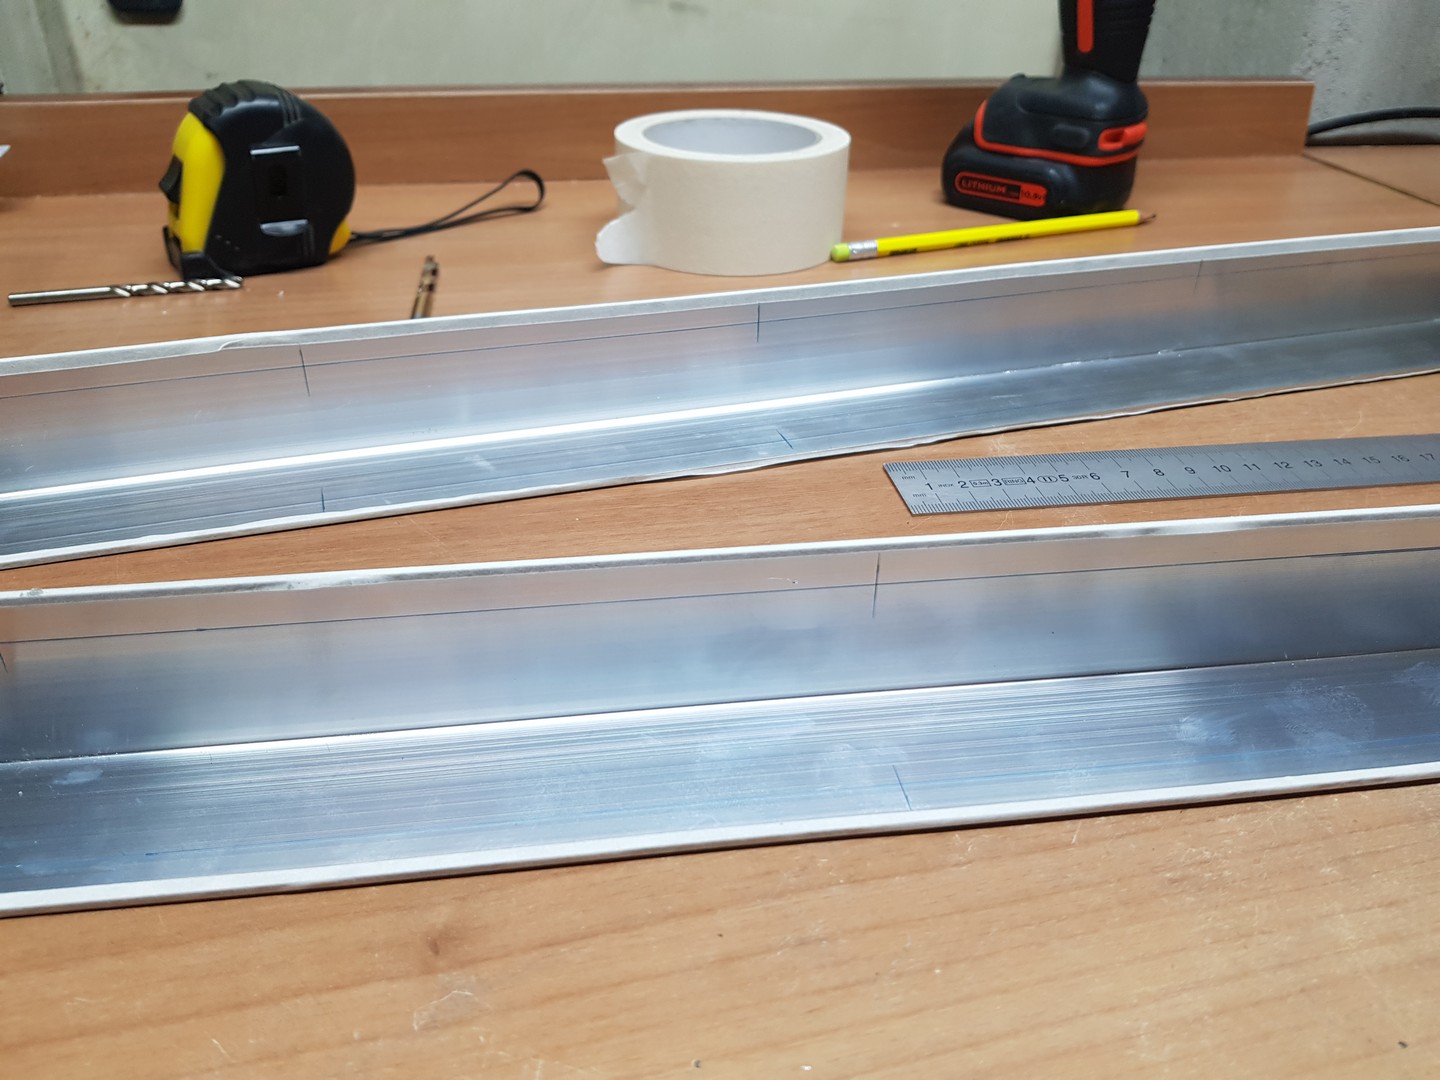
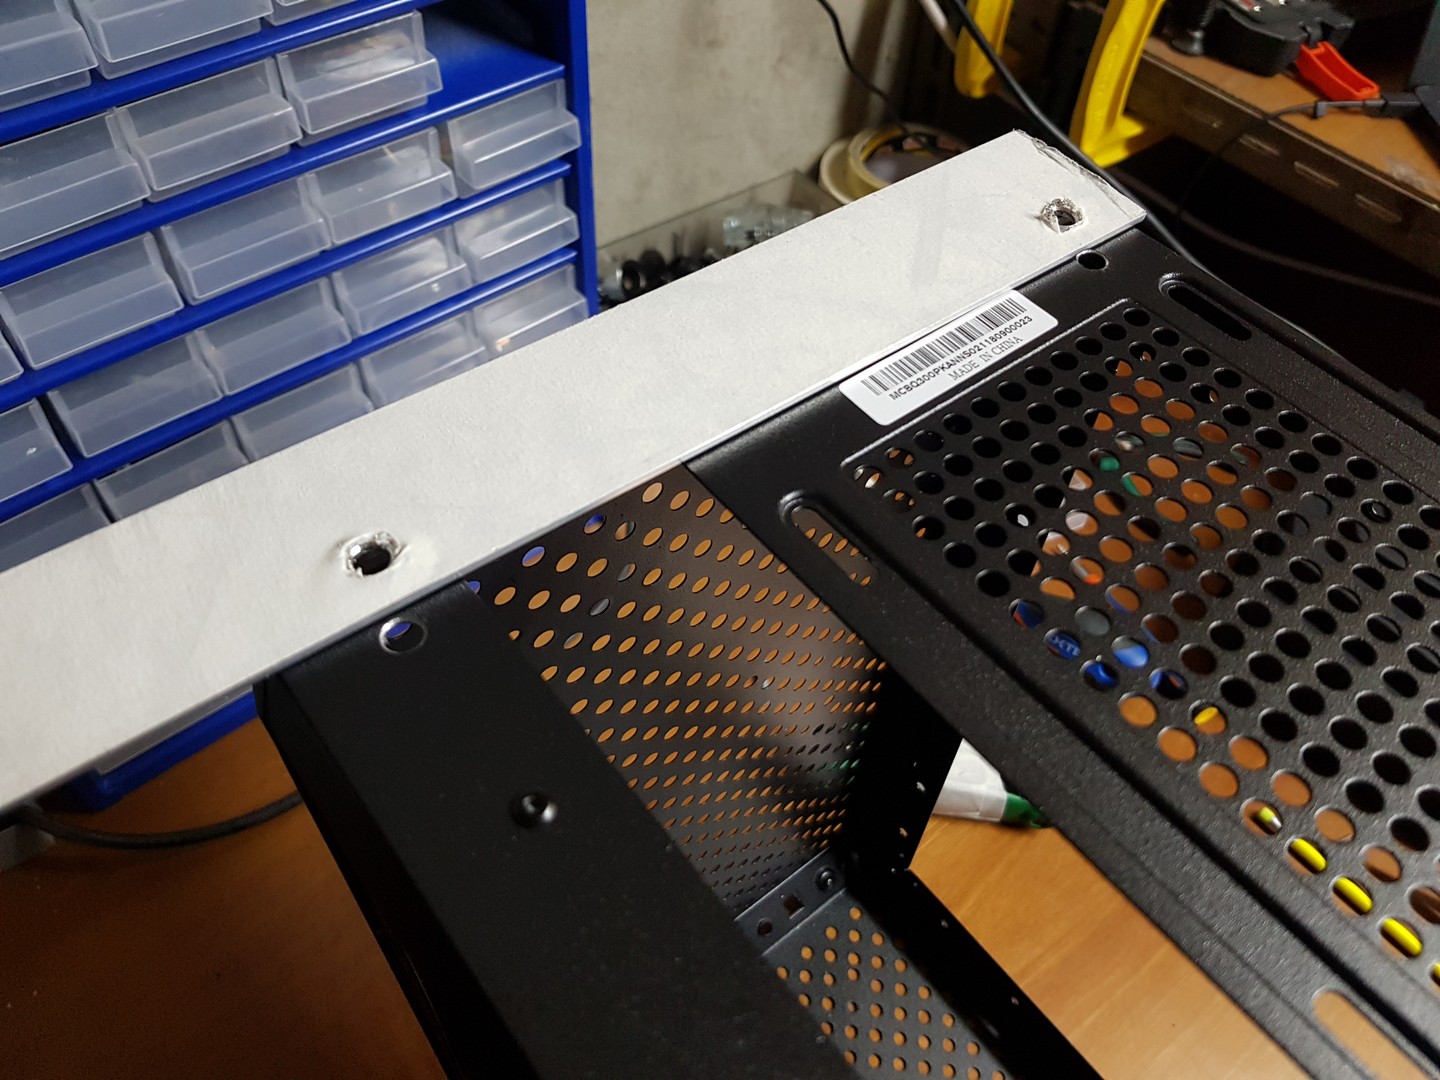
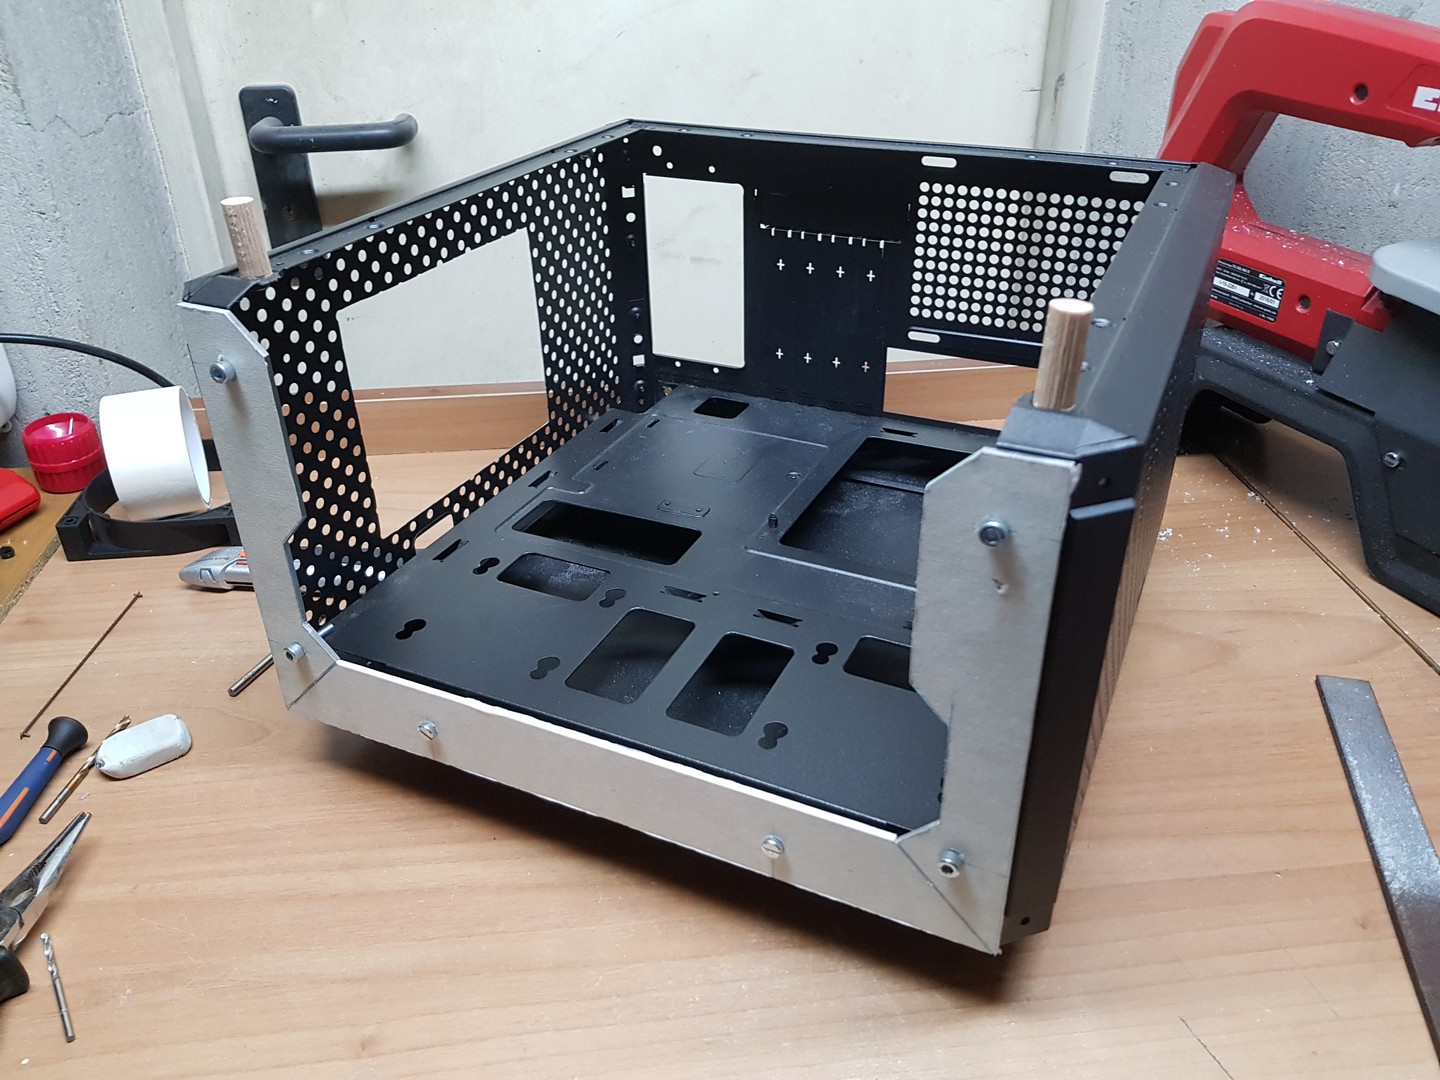
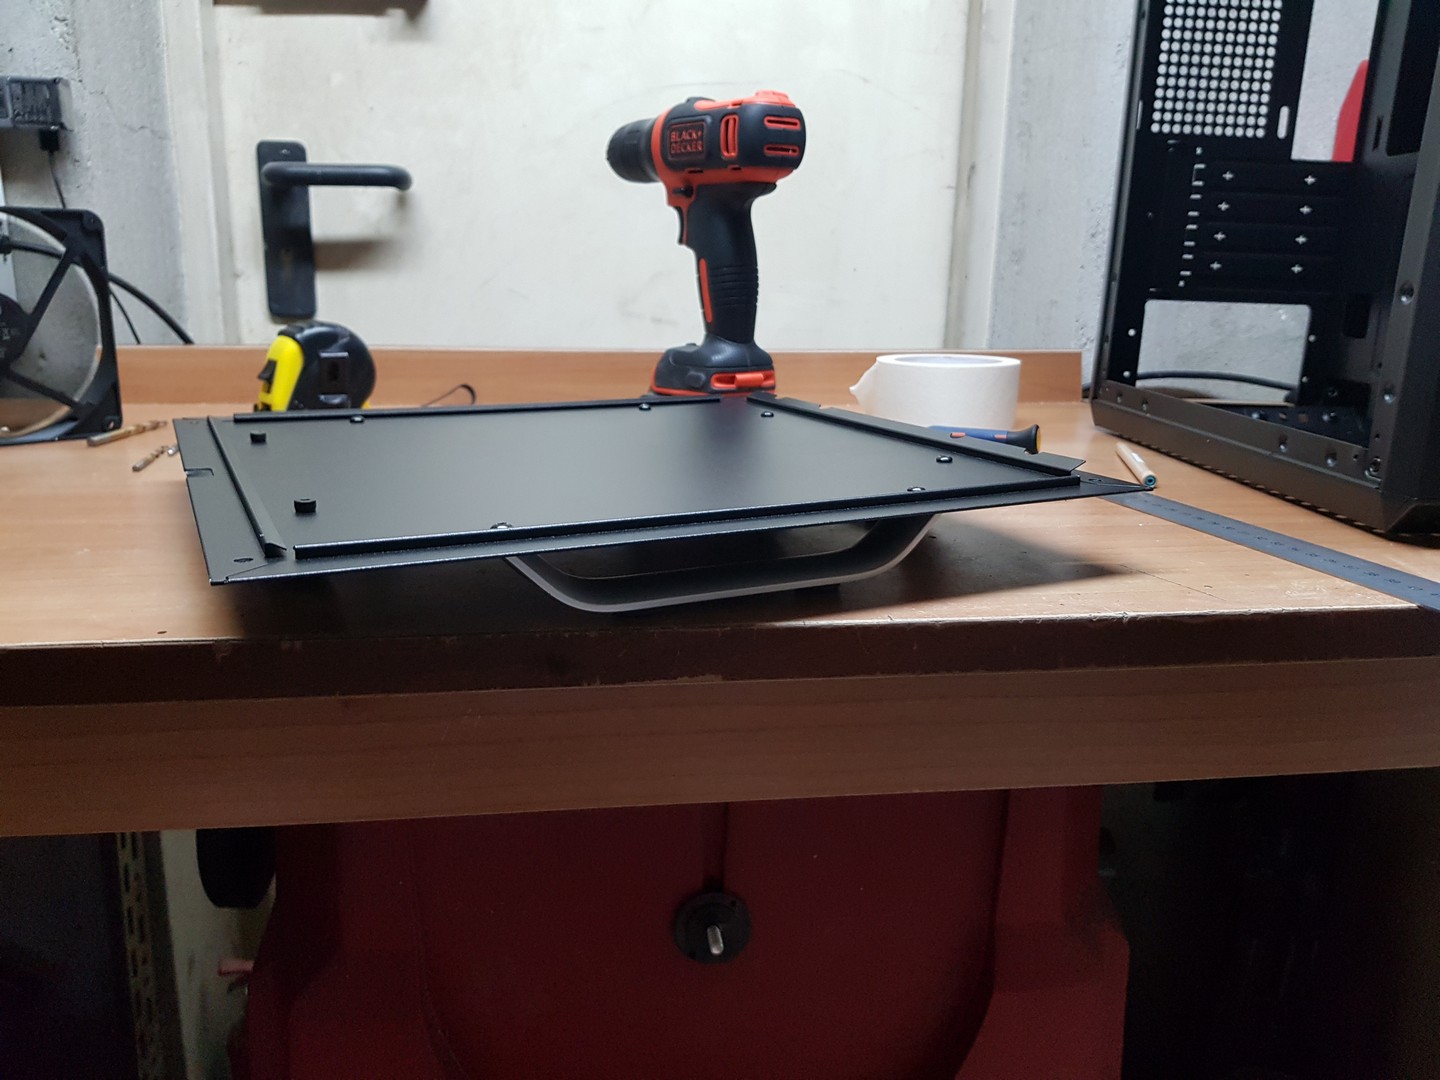
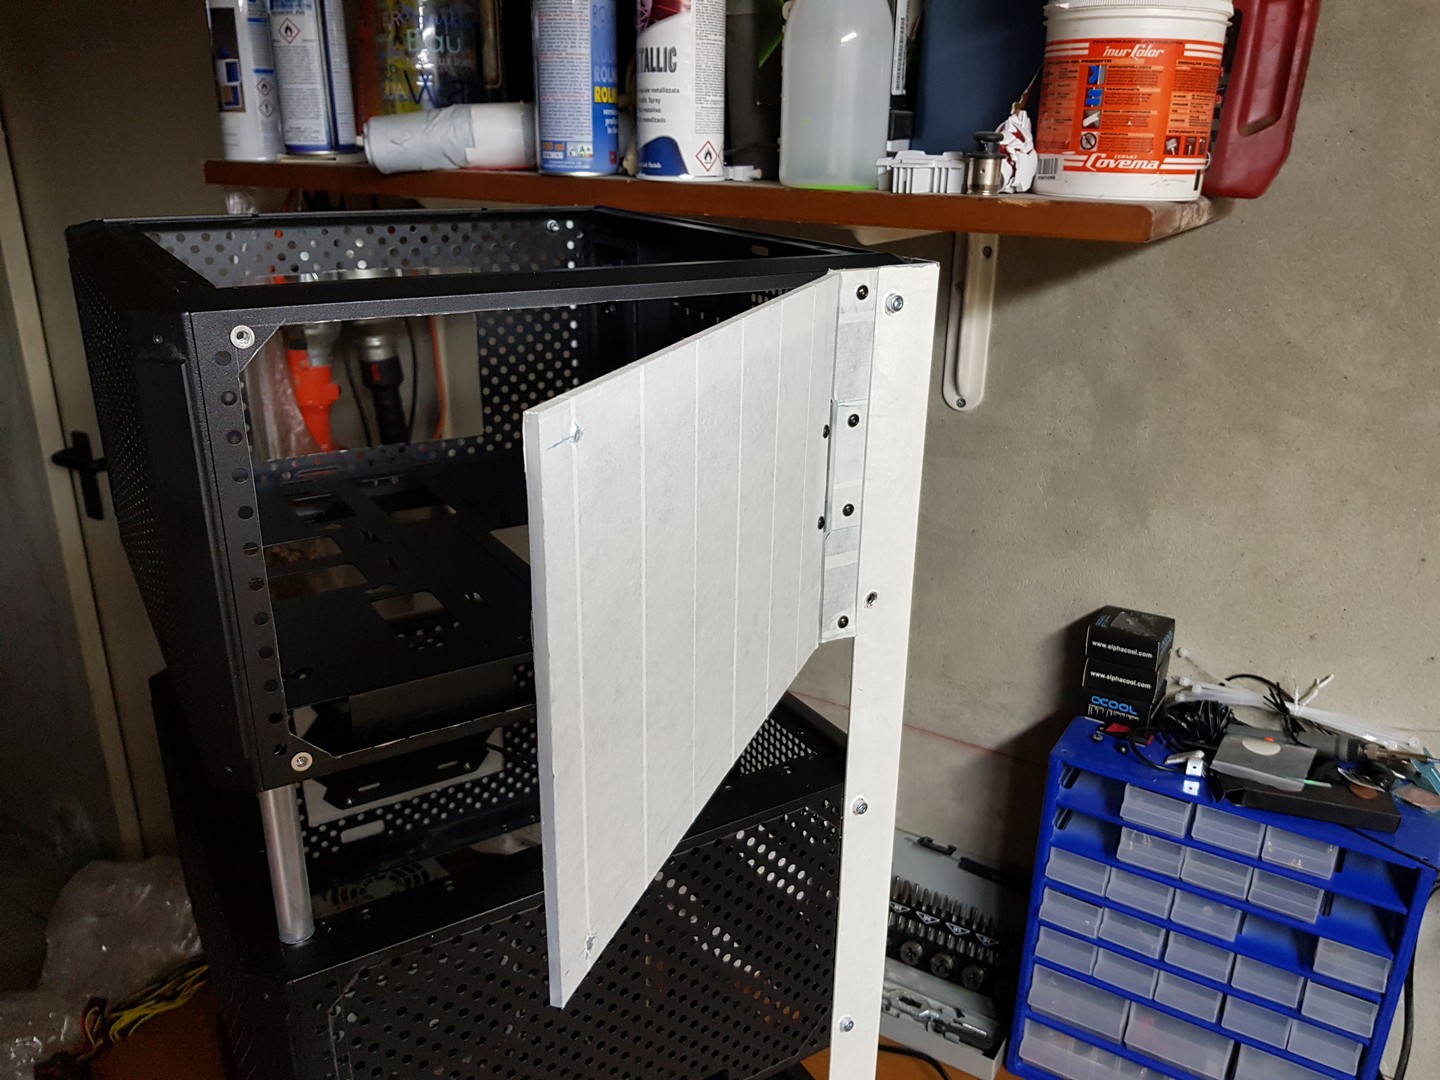
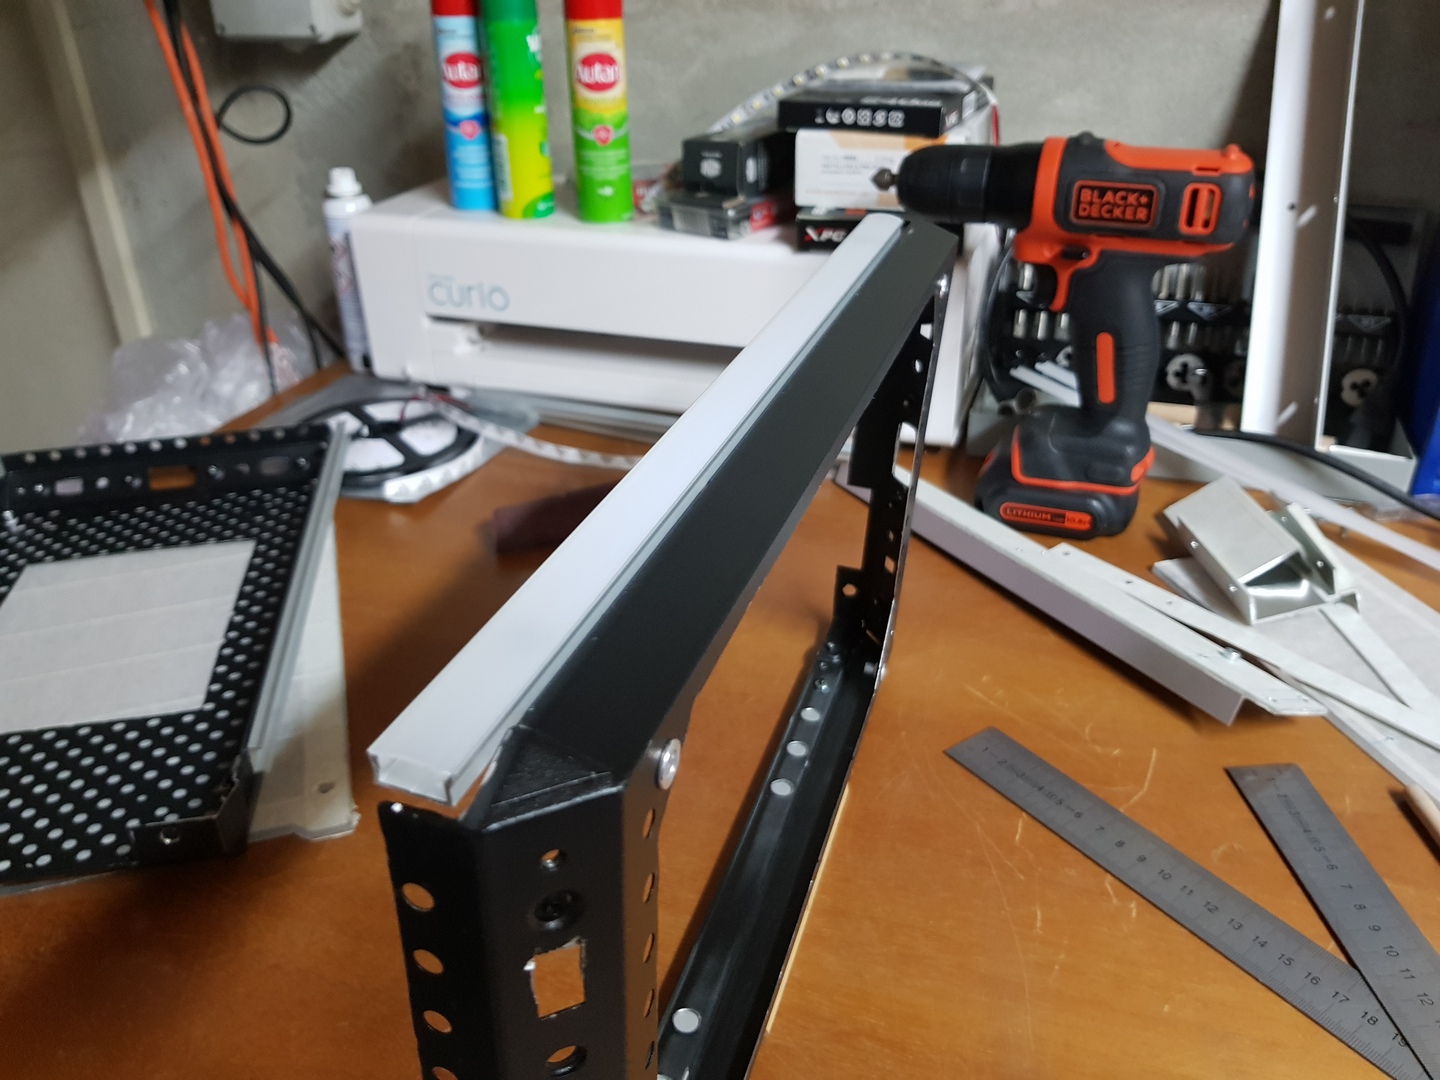
Per cominciare, in un progetto simile, è necessario mettere le basi per poter lavorare, quindi la realizzazione della struttura è la primissima cosa sulla lista. Come ho anticipato, per fissare i tre case vengono utilizzati dei profili a L e piatti in alluminio. Prima di arrivare alla soluzione finale, è stato necessario effettuare vari test, con tubi in alluminio, diverse combinazioni di profili e altro, ma alla fine i due profili a L posteriori e i due dritti frontali si riveleranno essere l’opzione migliore. Ma questo lo vedremo più avanti!
[ENG]
First of all, in such a project, it’s mandatory to get the base structure done in order to be able to work on the other parts, so let’s take a look at that. As I anticipated, aluminum profiles were used to fix the three cases together. Before getting to the final layout, it was necessary to try some other options and do some testing with aluminum tubes, other profiles combos and so on, but eventually the combo with two L-profiles at the back and two flat ones at the front will be the best bet. But we’ll save that for later!
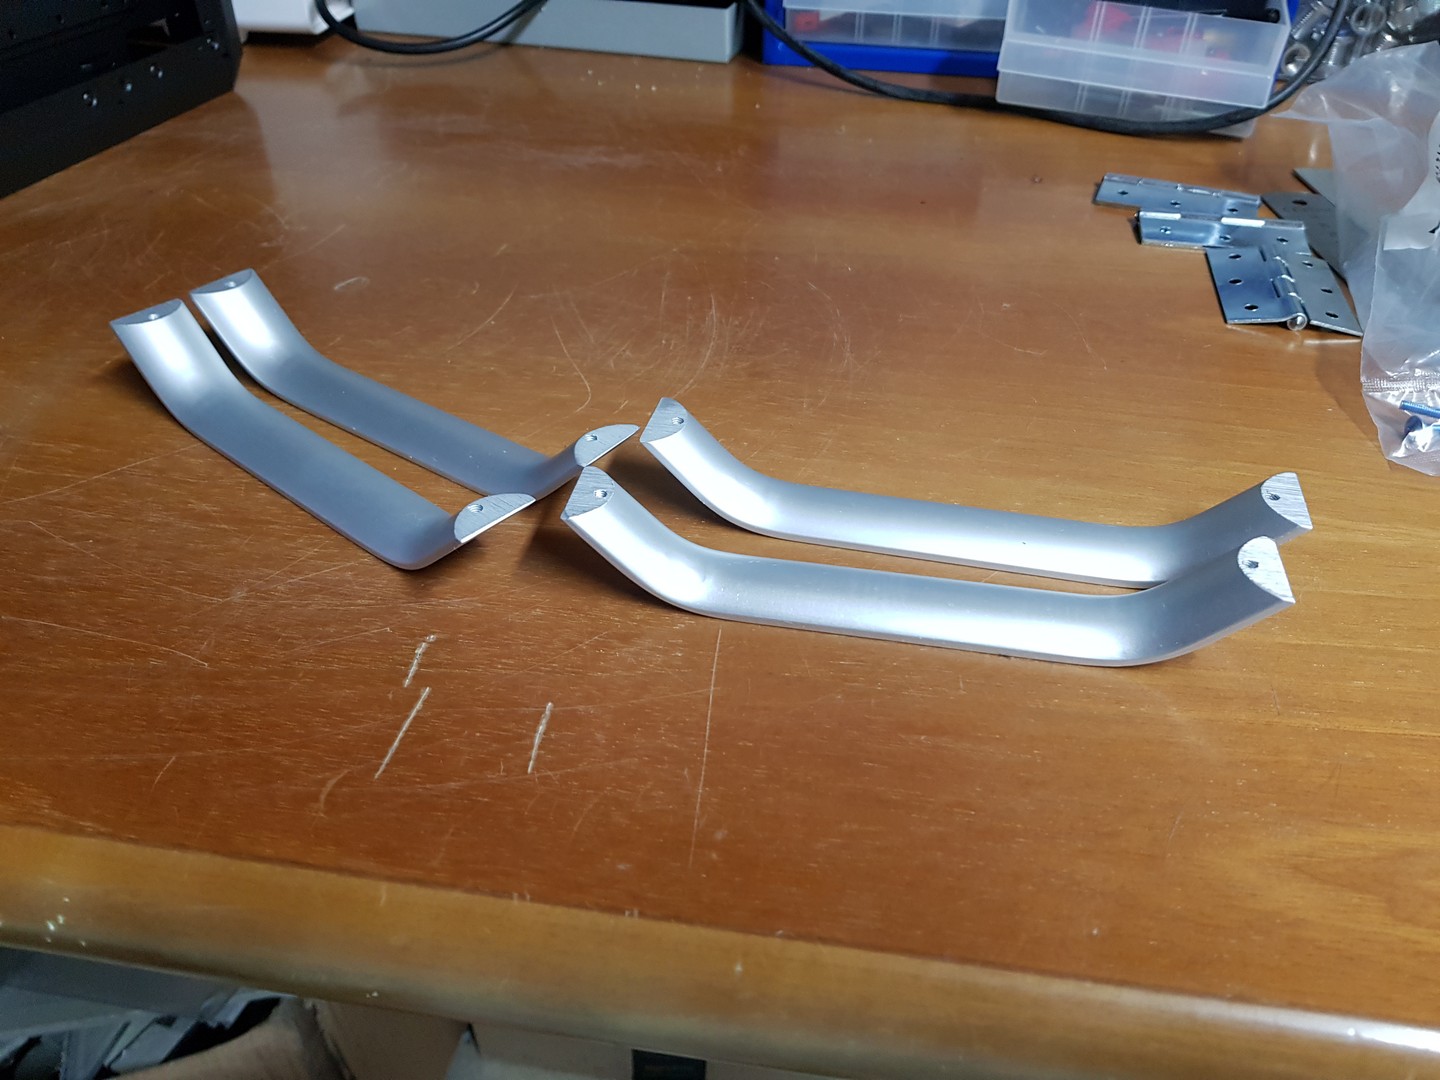
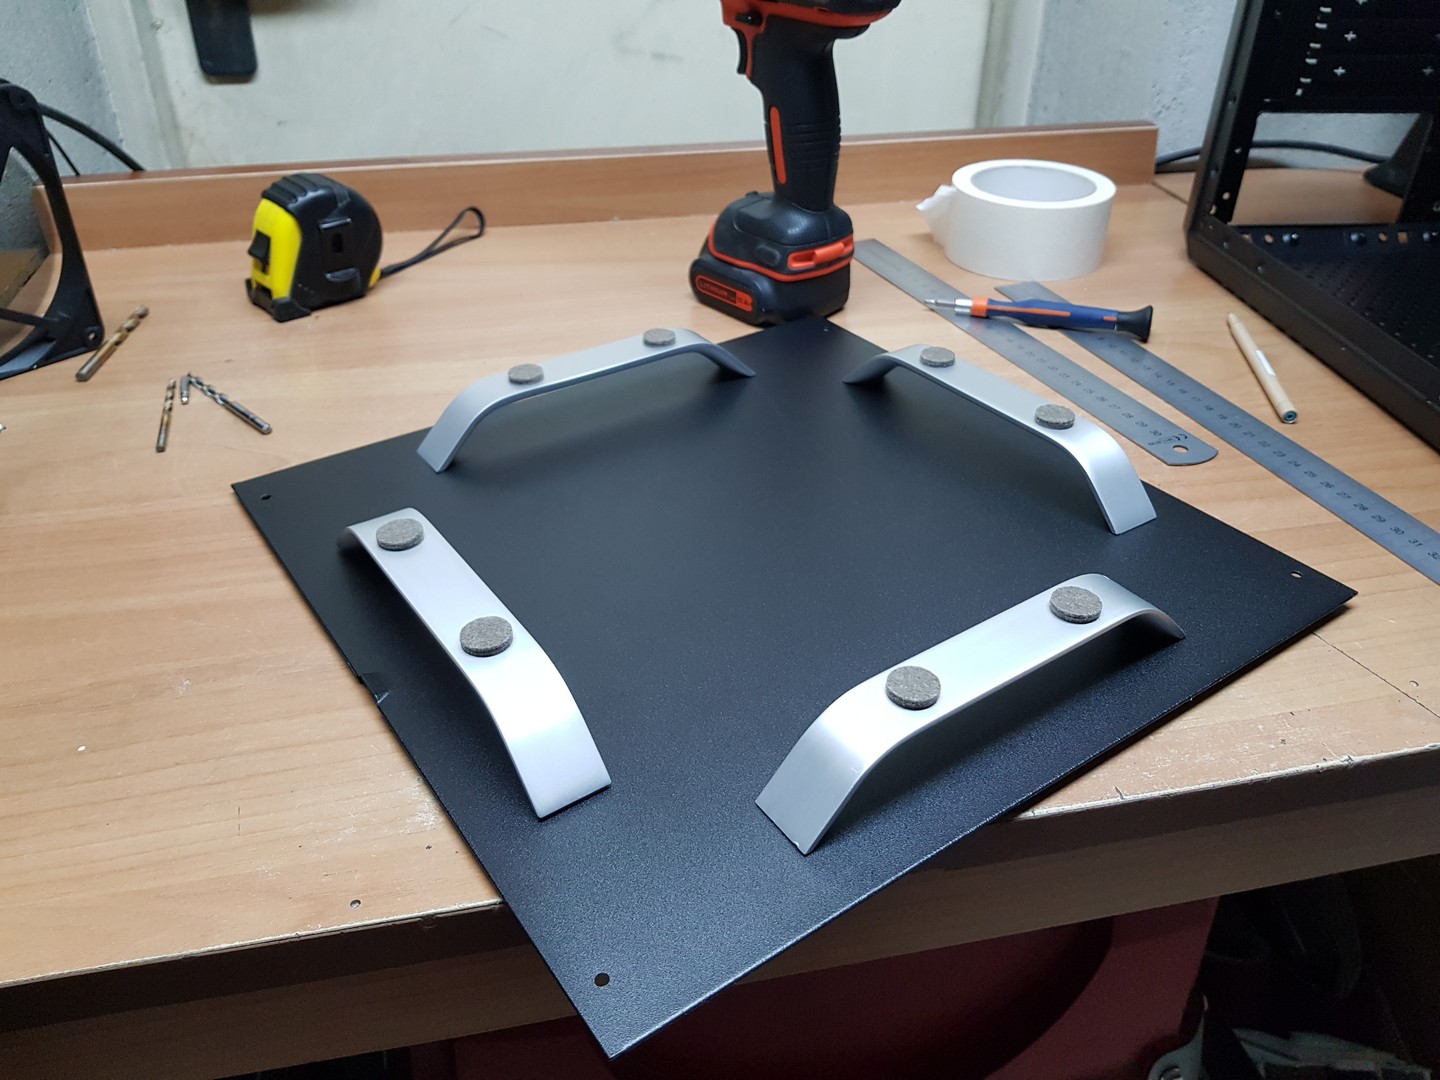
I piedini del case sono un’altra parte importante, realizzati con delle semplici maniglie per mobili!
[ENG]
Case’s feet are another important part, made with simple furniture handles!
Realizzazione dei pannelli–>
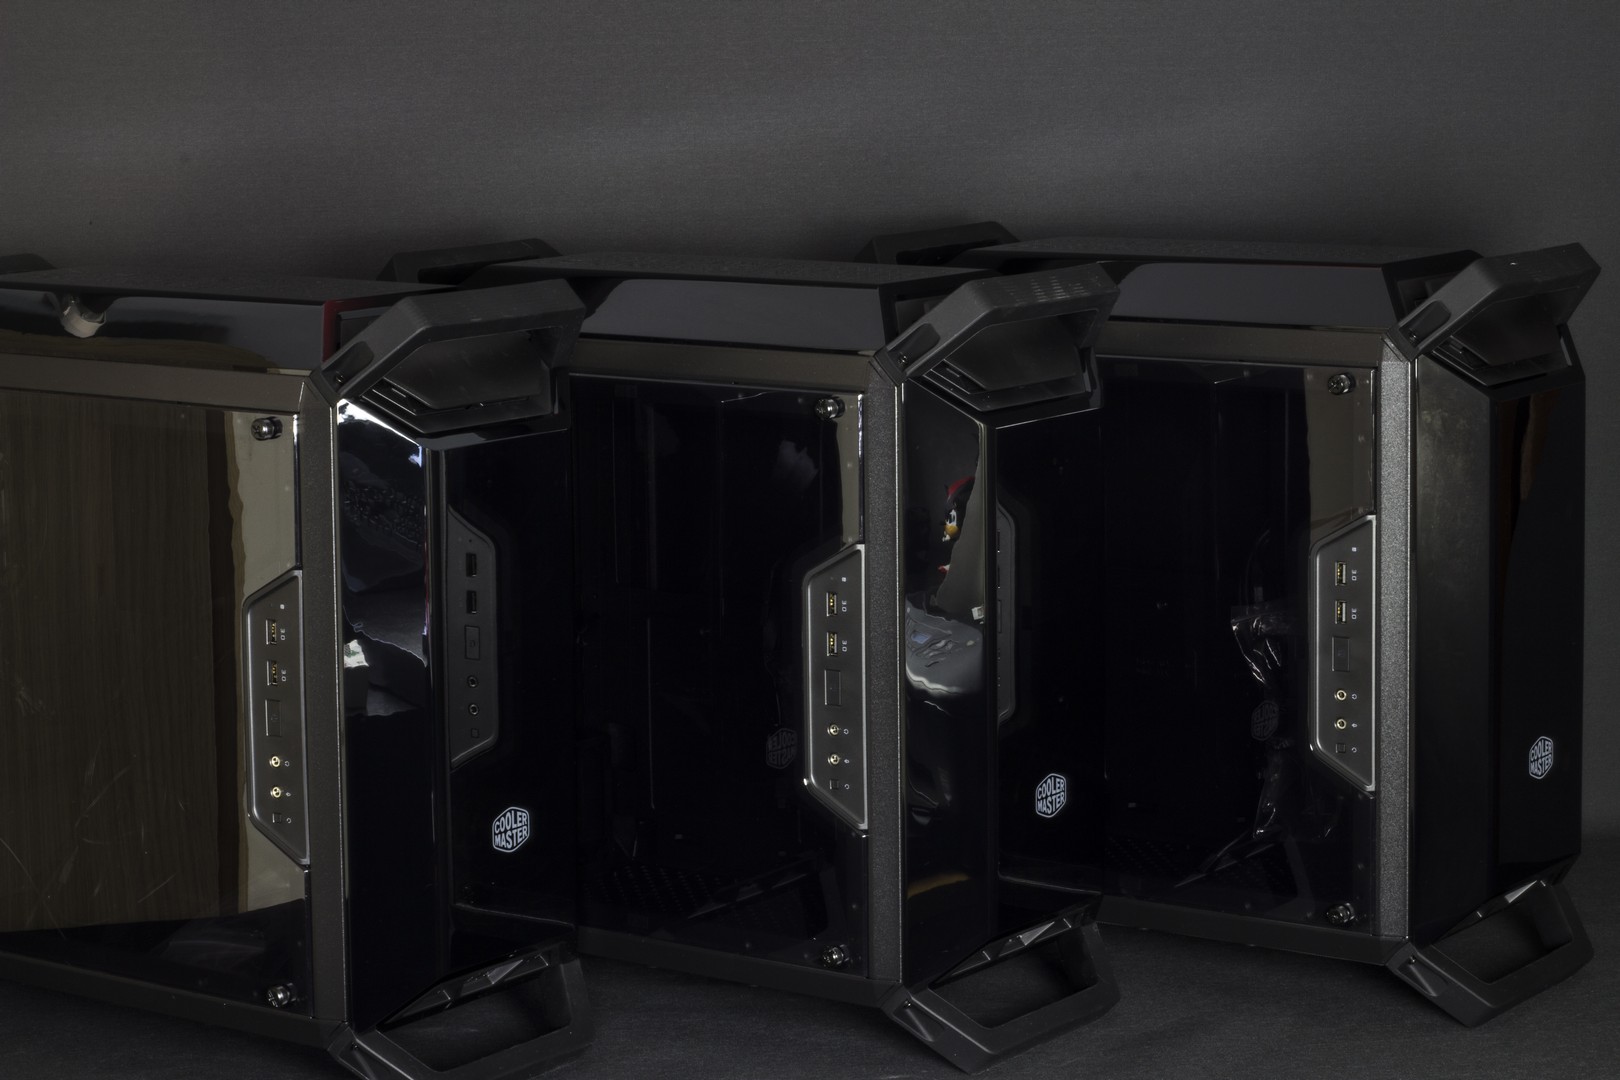
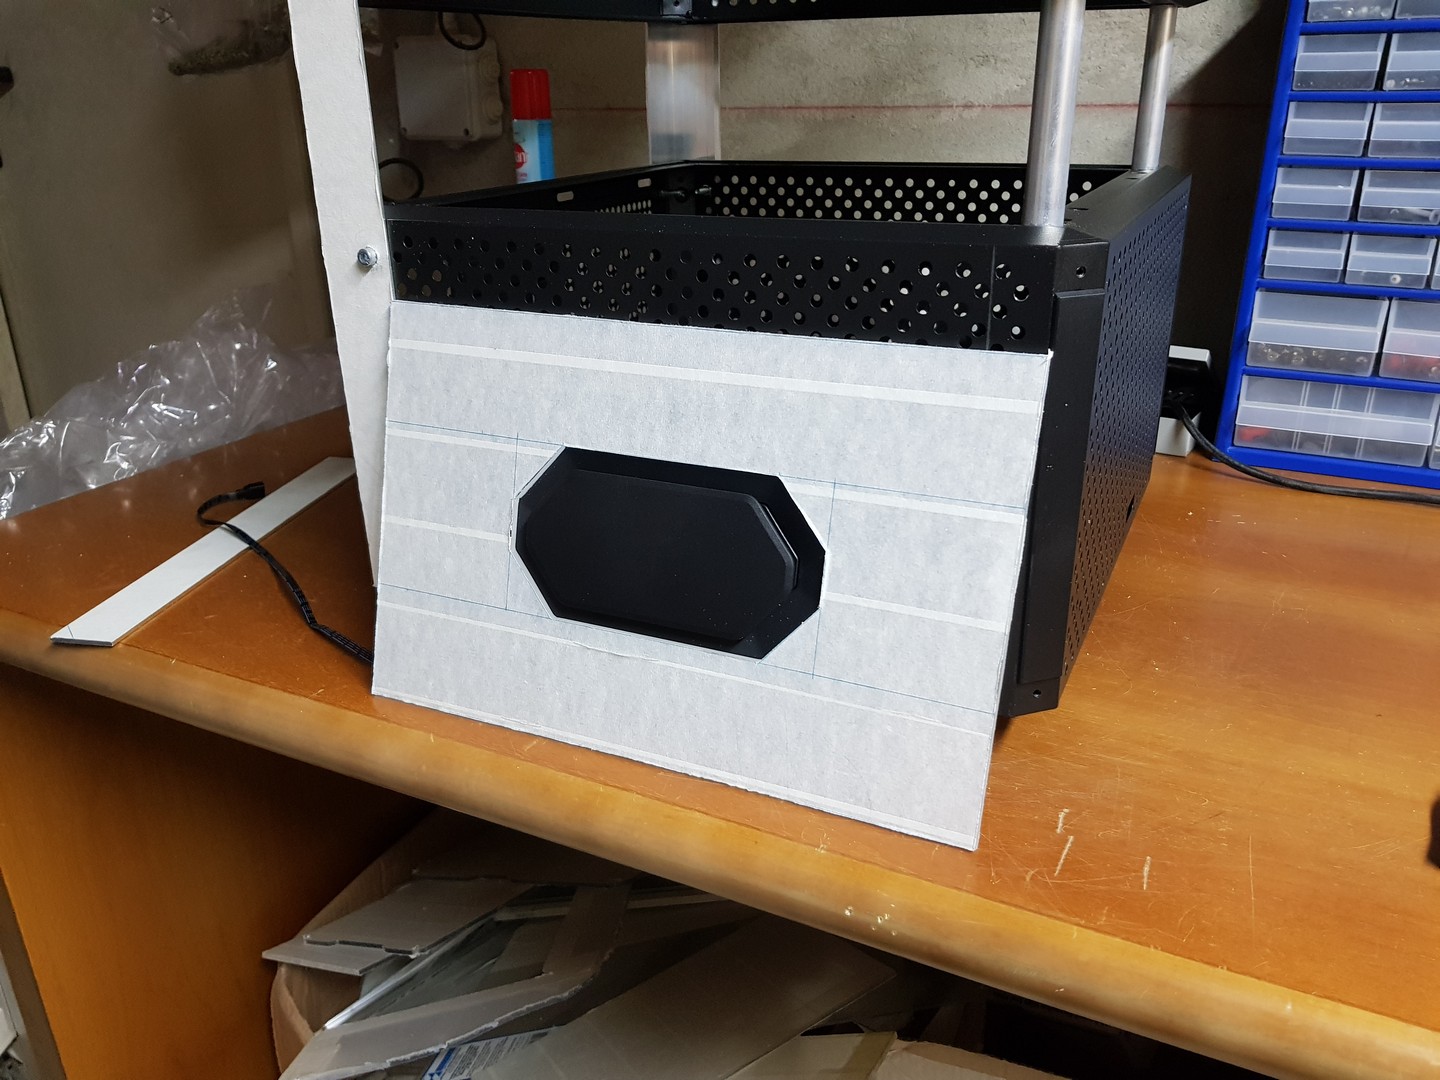
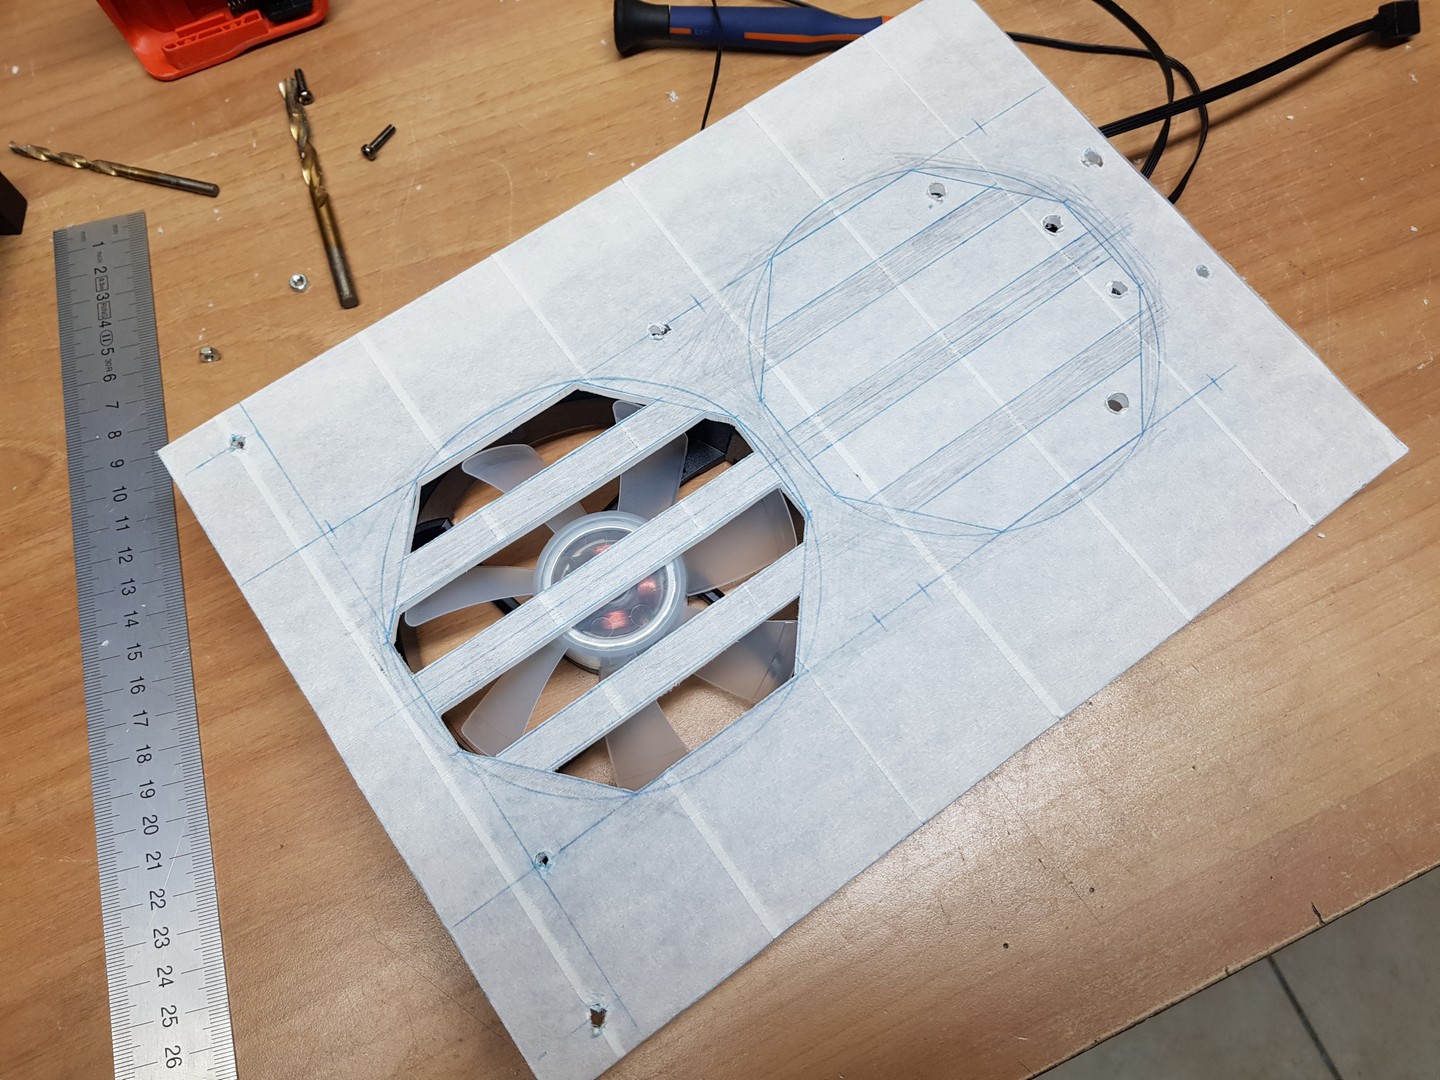
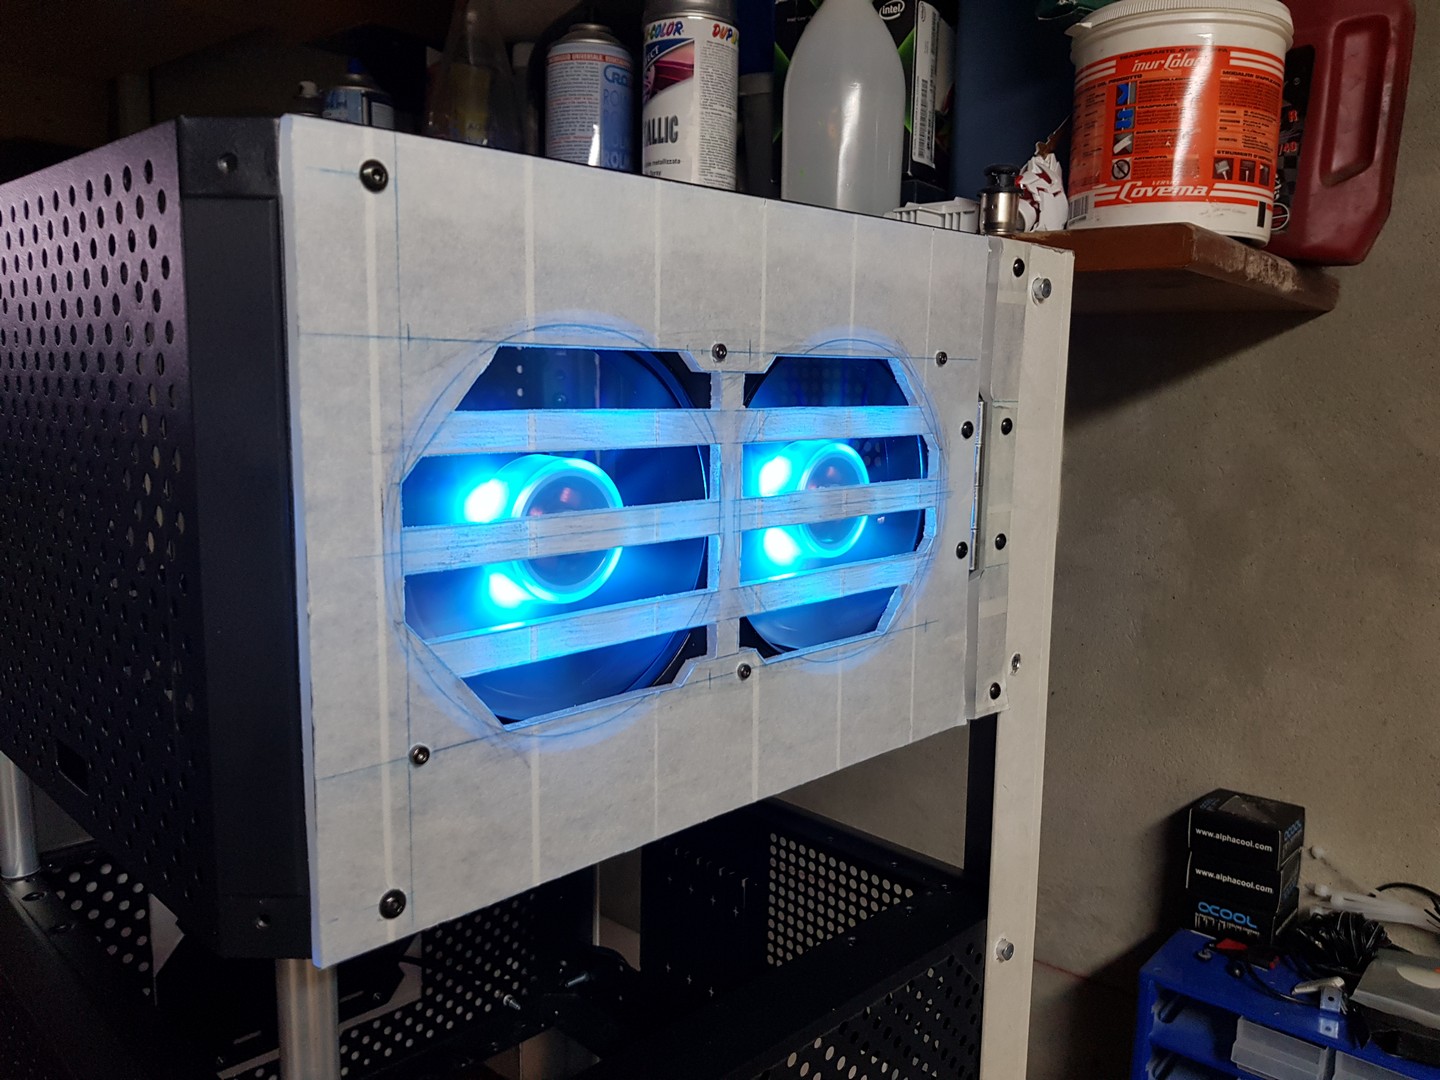
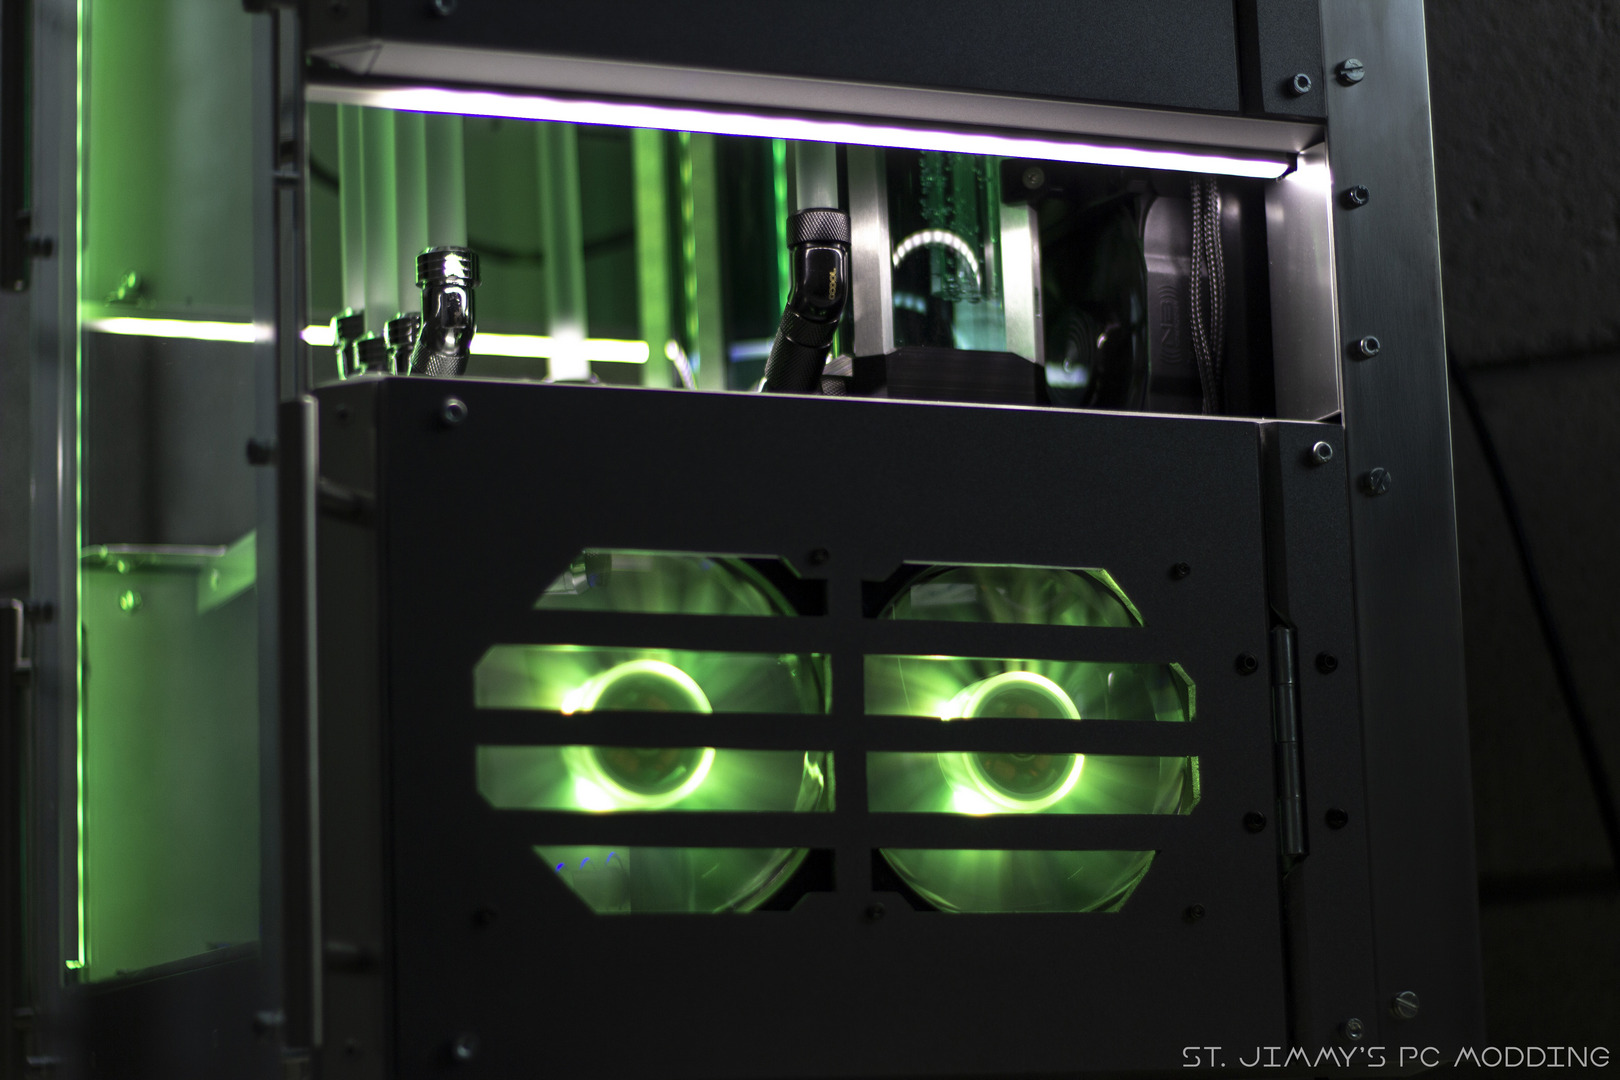
A questo punto, le cose iniziano a farsi interessanti. Inizia la realizzazione dei vari pannelli in plexi. All’esterno, tre pannelli su un lato ospiteranno i frontalini luminosi dei Q300P, mentre dall’altro lato vi saranno le ventole RGB sempre provenienti dai bundle dei case.
[ENG]
At this point, things start to get interesting. Fabrication of acrylic panels starts. Externally, three panels on one side will accomodate the luminous front panels from the Q300Ps, while there will be the RGB fans on the other side, which also came from the cases bundle.

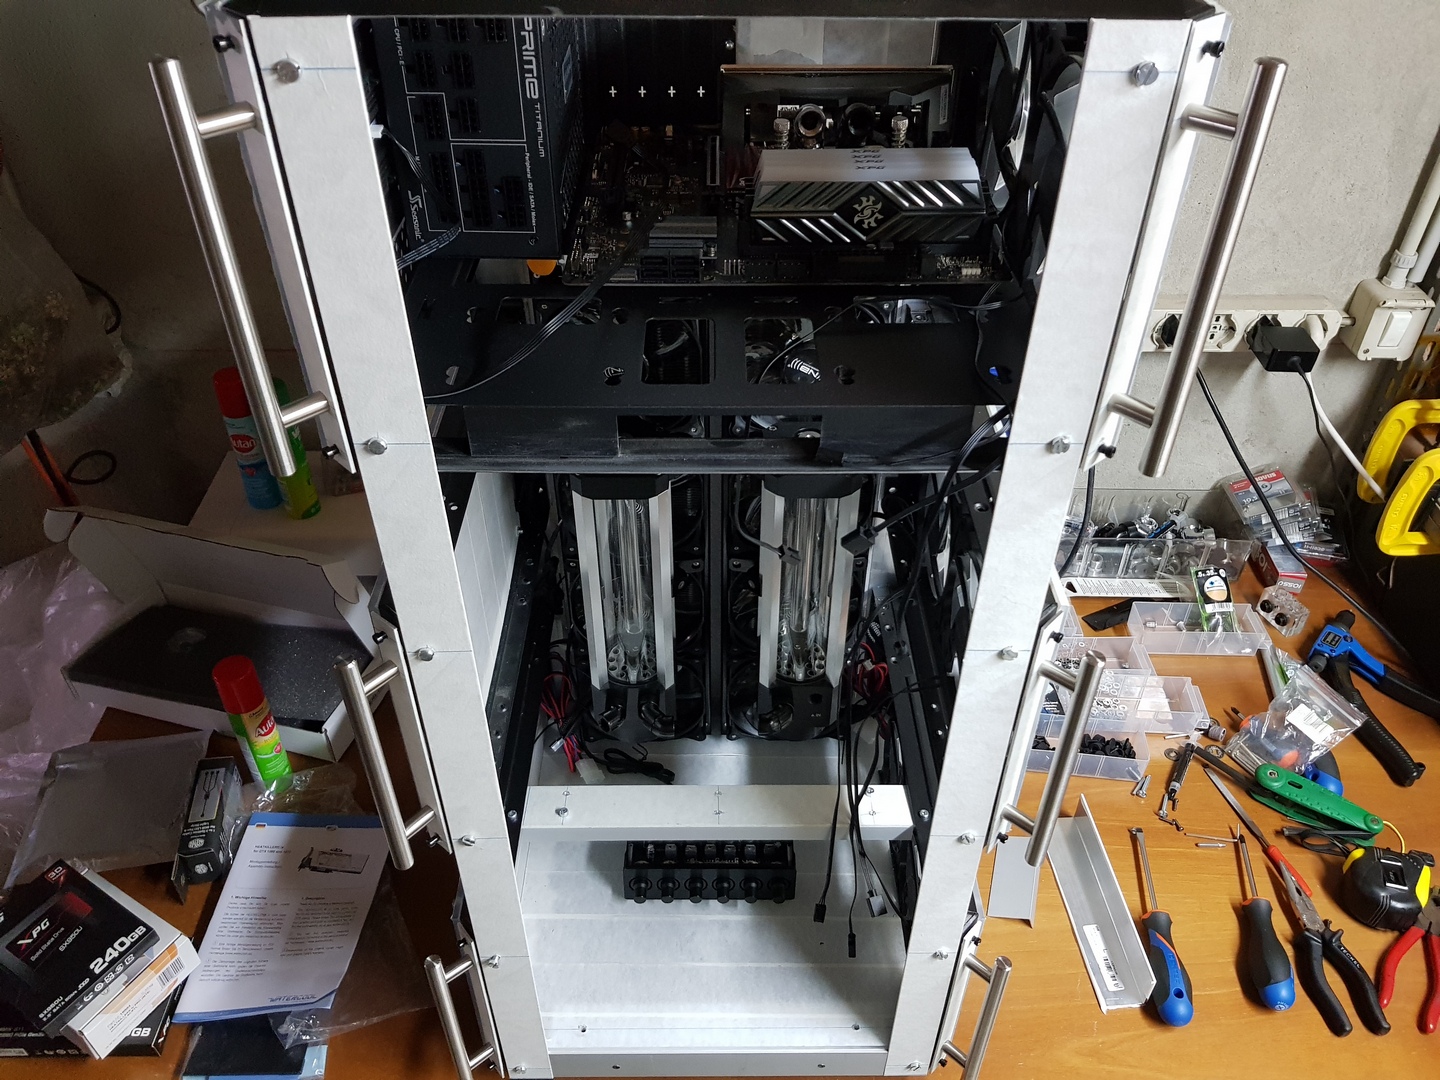
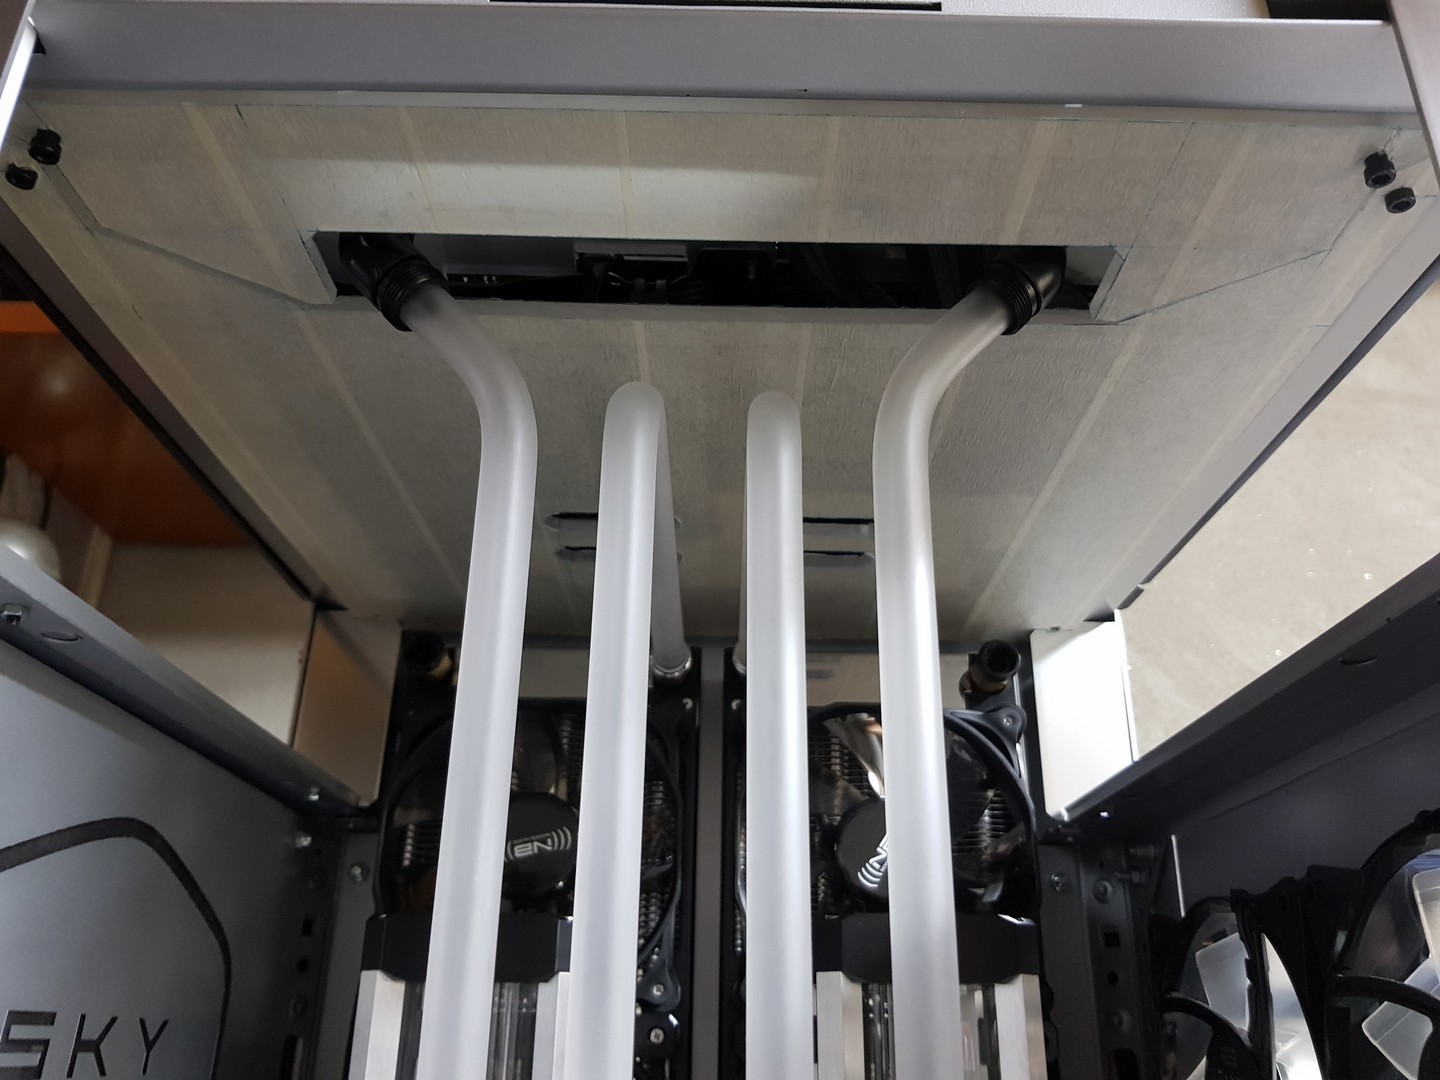
Il prossimo passo è il taglio del pannello posteriore che è possibile vedere nell’ultima foto qua sopra. Si tratta di un pannello in plexi fumé da 8mm, e fungerà da montaggio per i due enormi radiatori, con tanto di ventole e combo vaschette/pompe!
[ENG]
The next step is cutting the back panel that can be seen in the last picture up here. It’s an 8mm smoked acrylic panel, and it will be used as mounting for the giant radiators, with all the fans and res/pump combos!
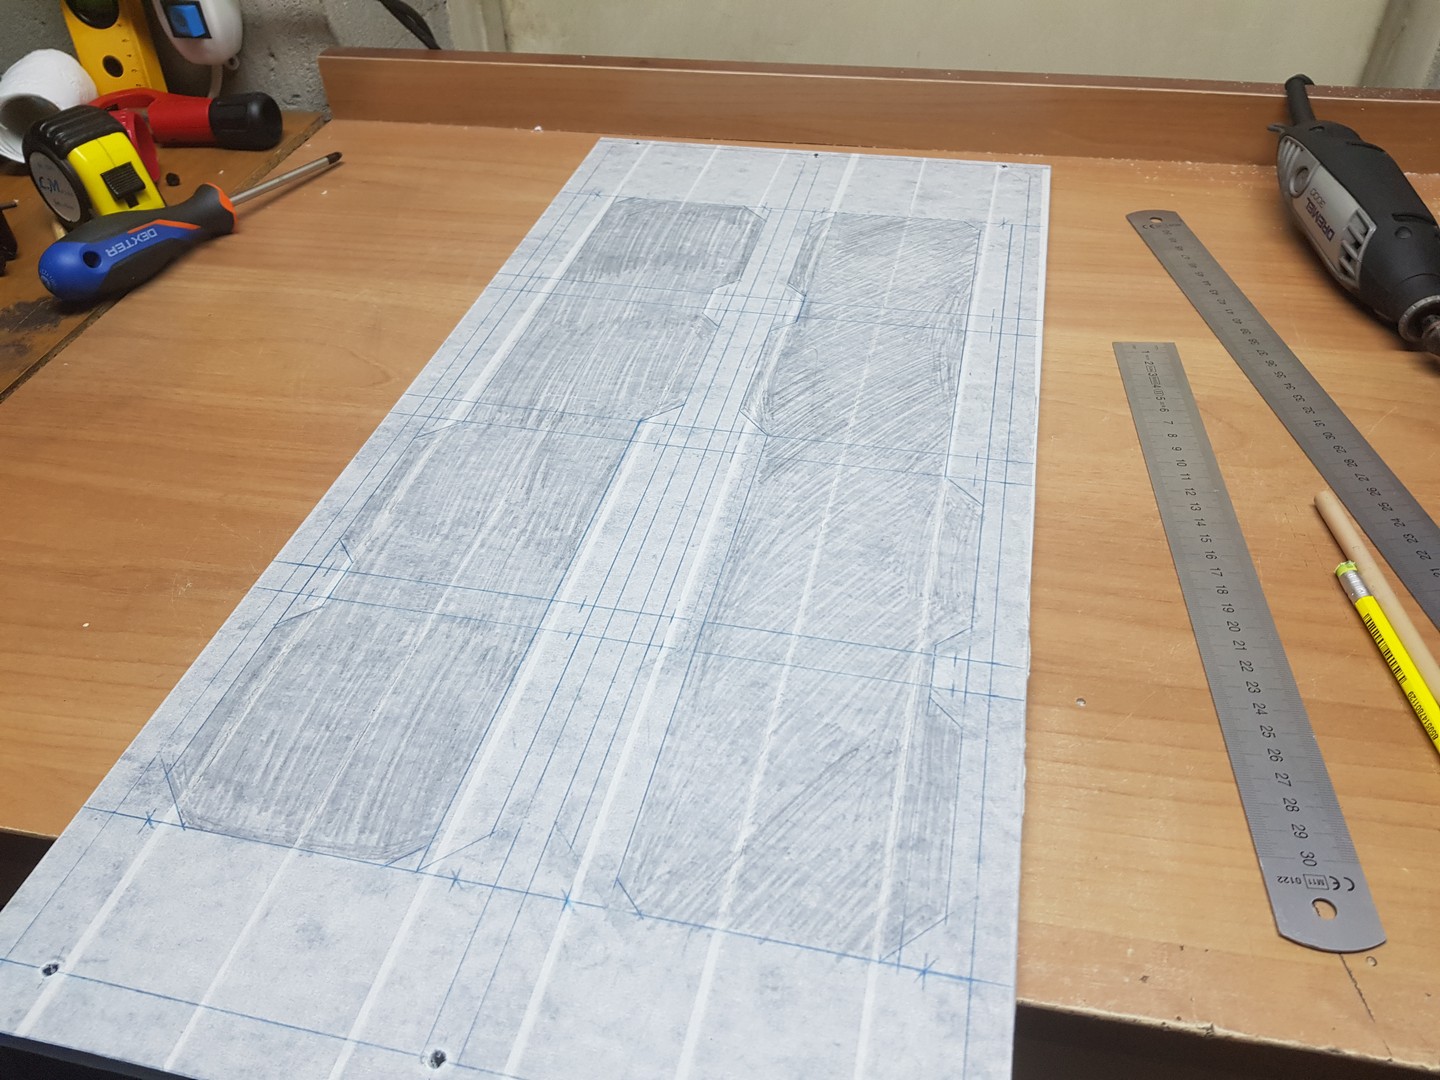

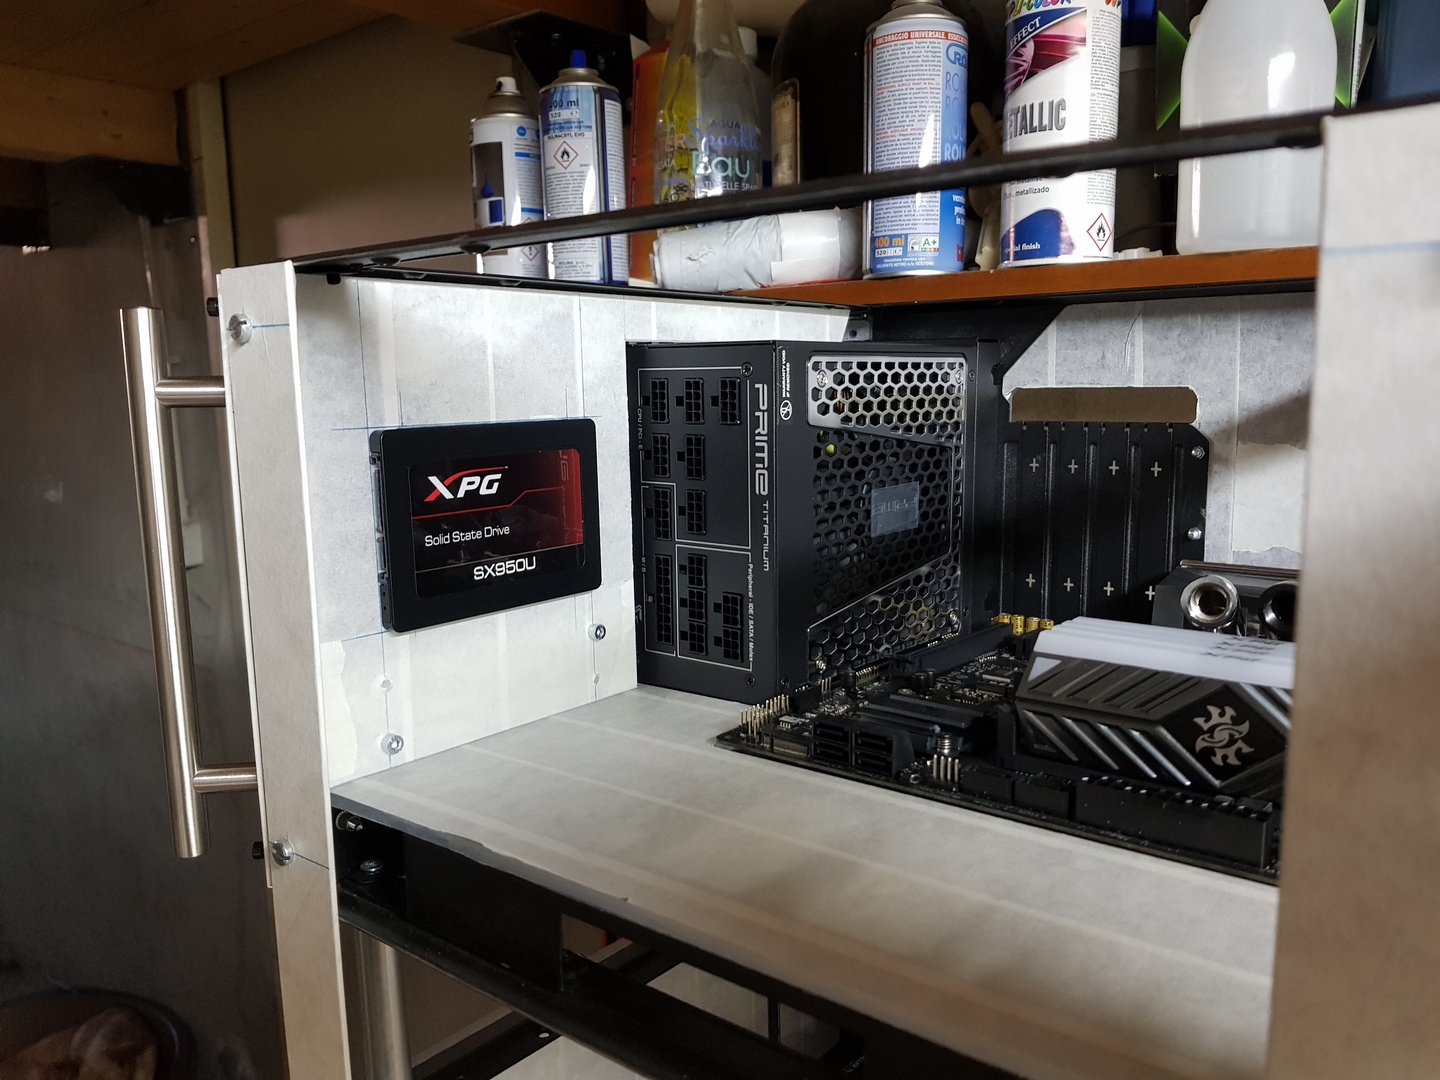
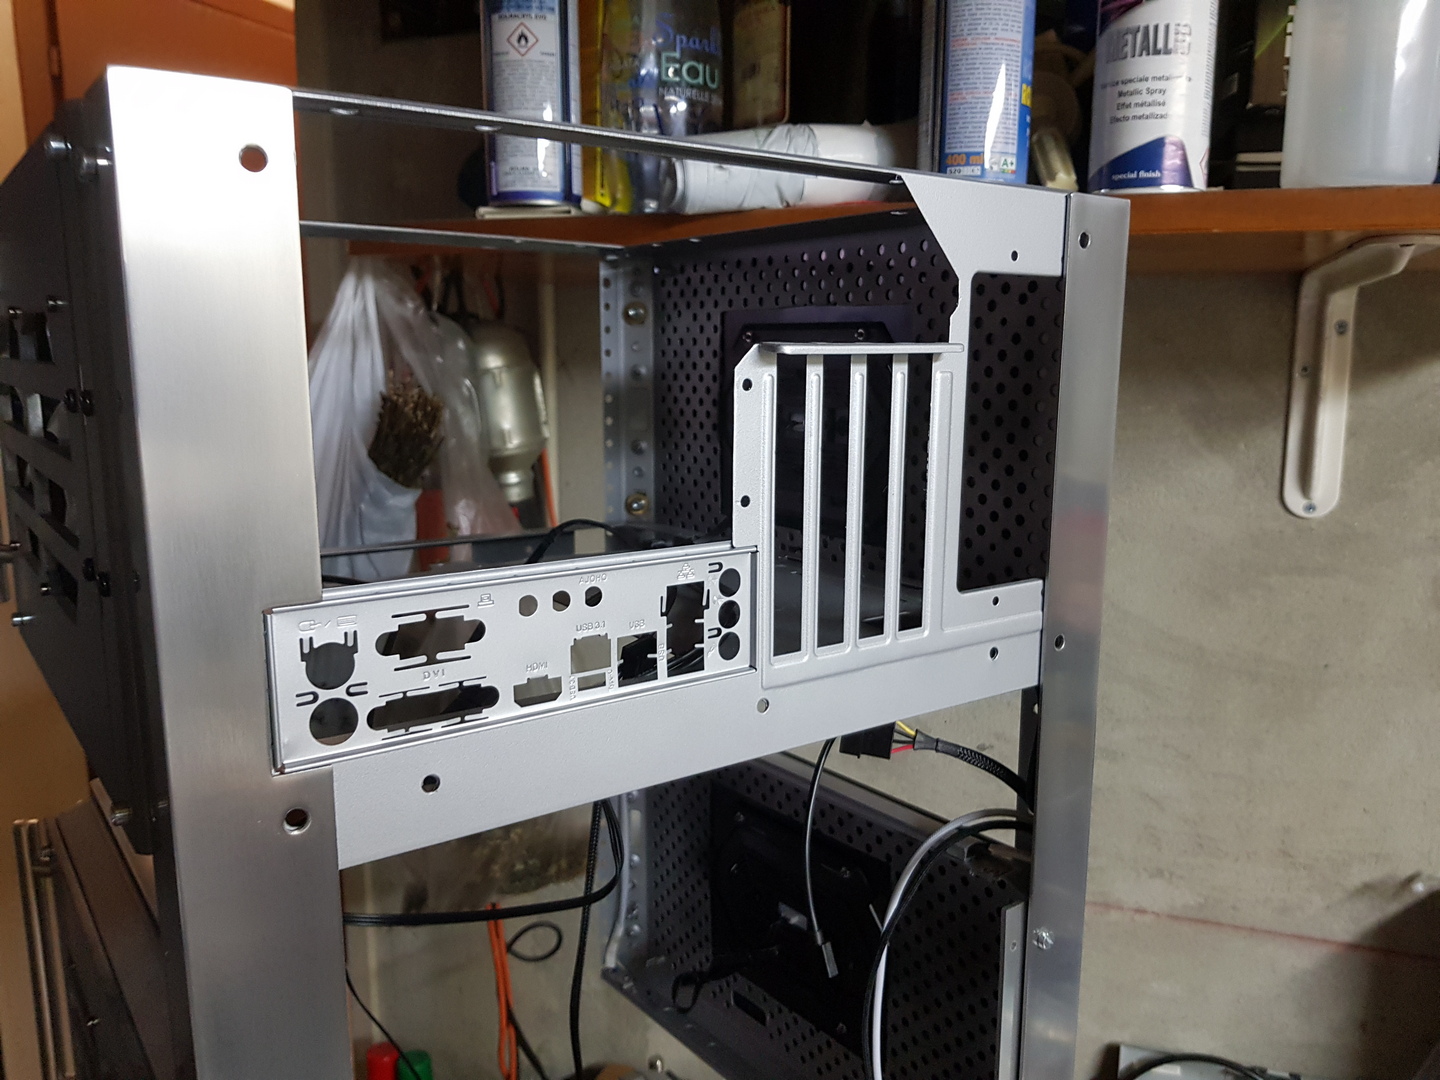
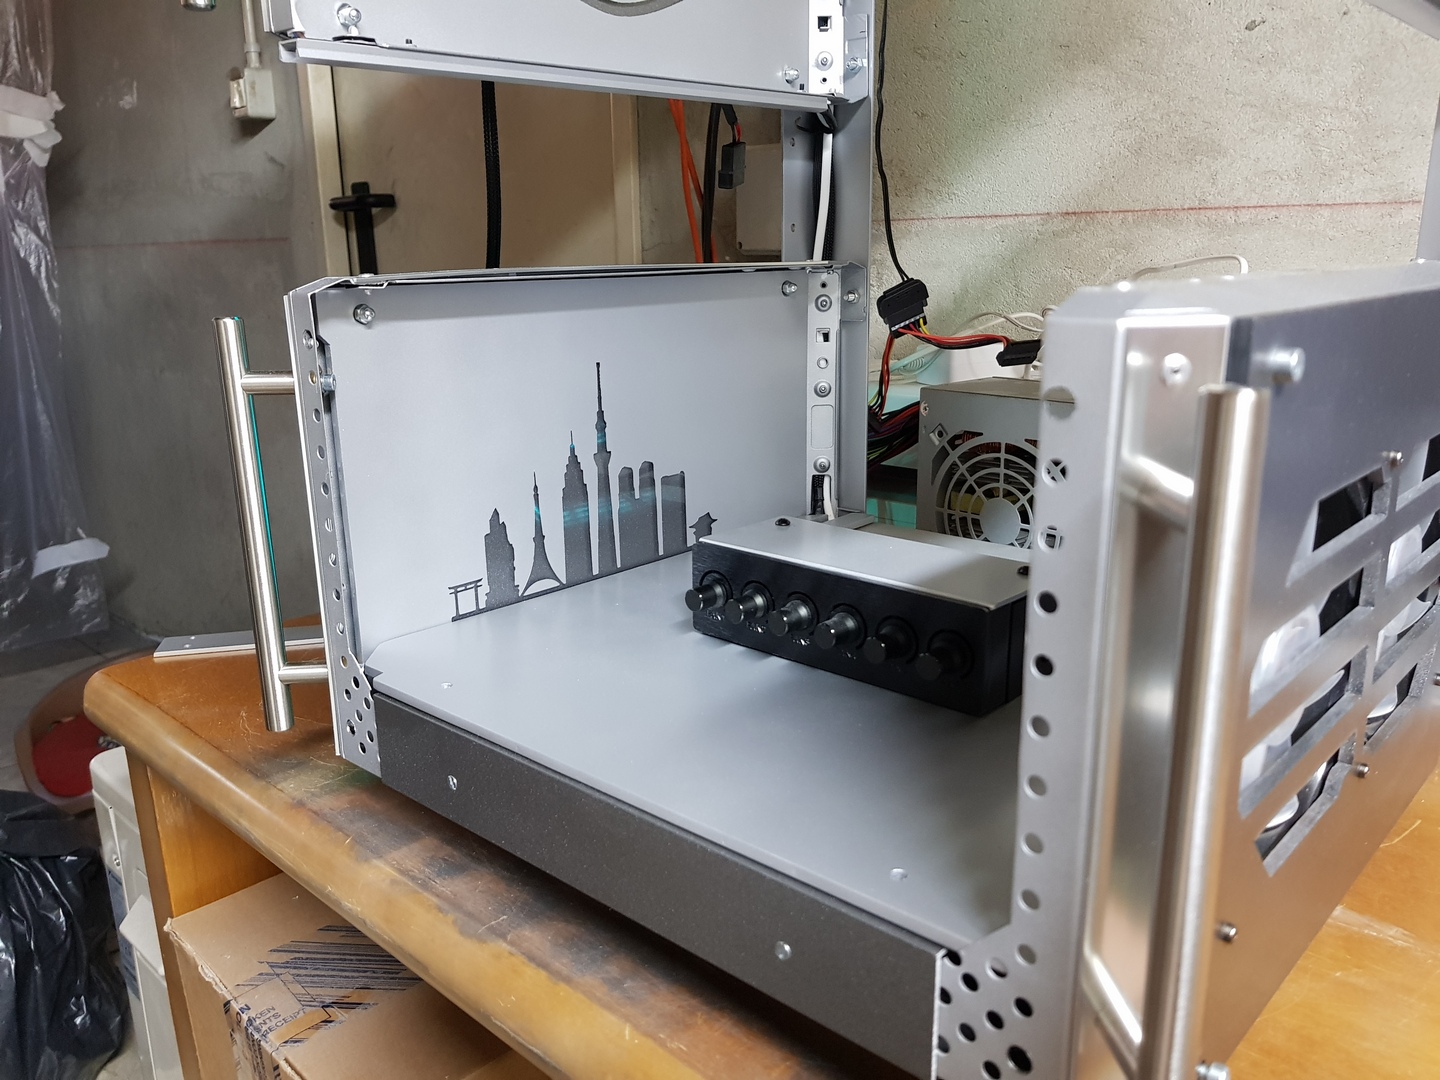
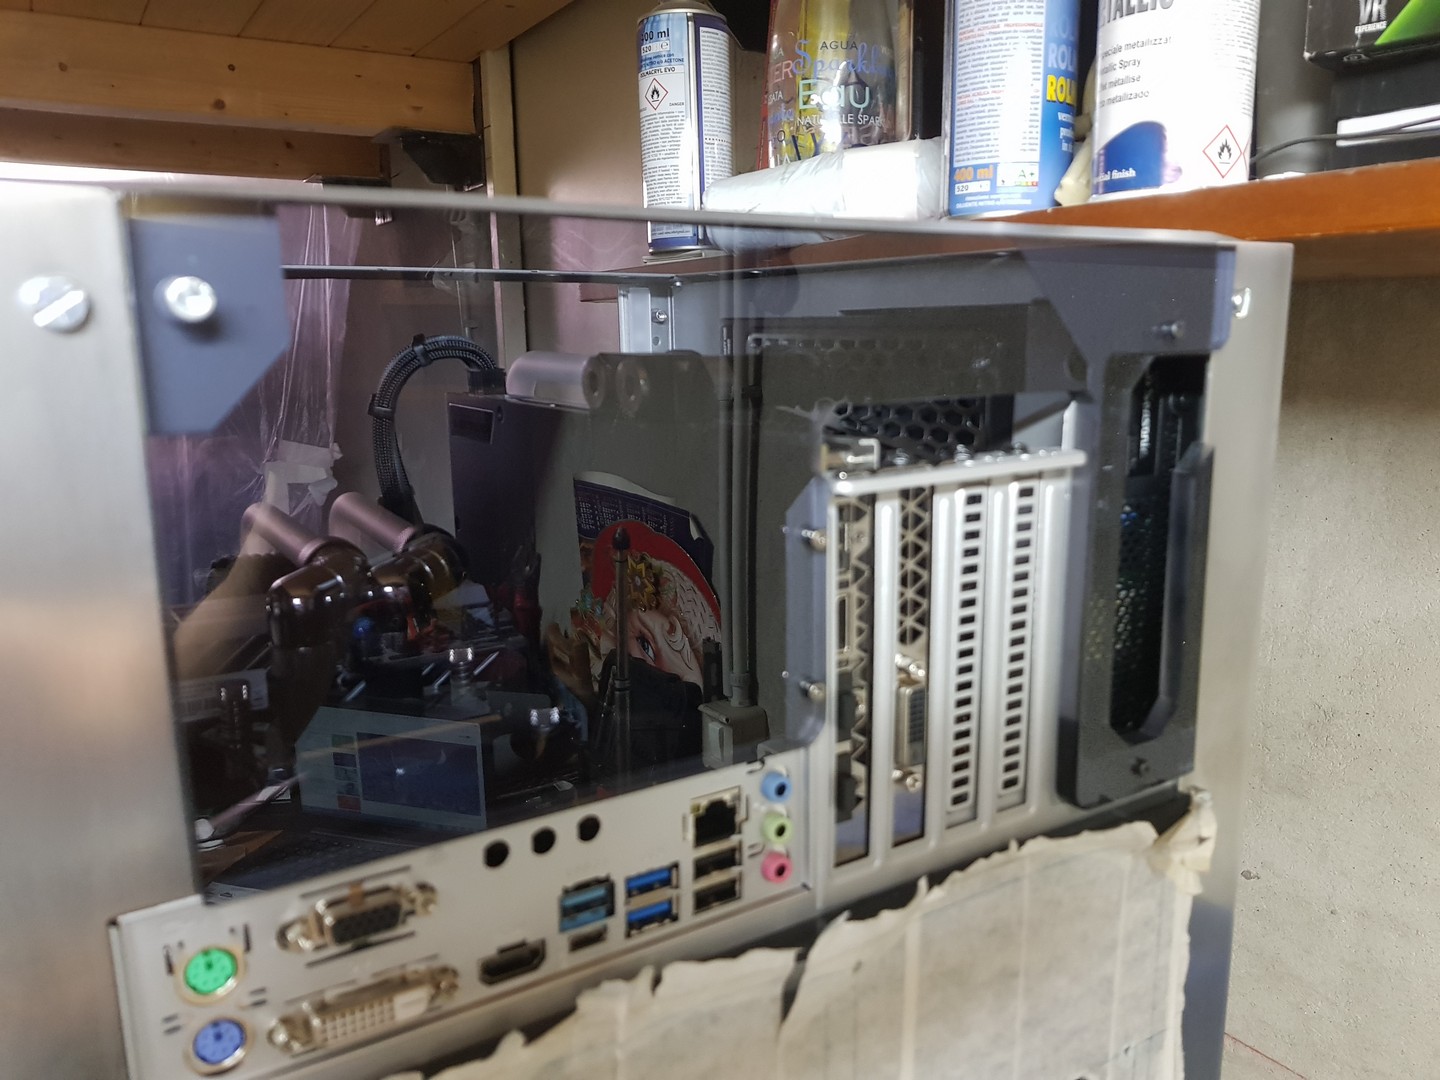
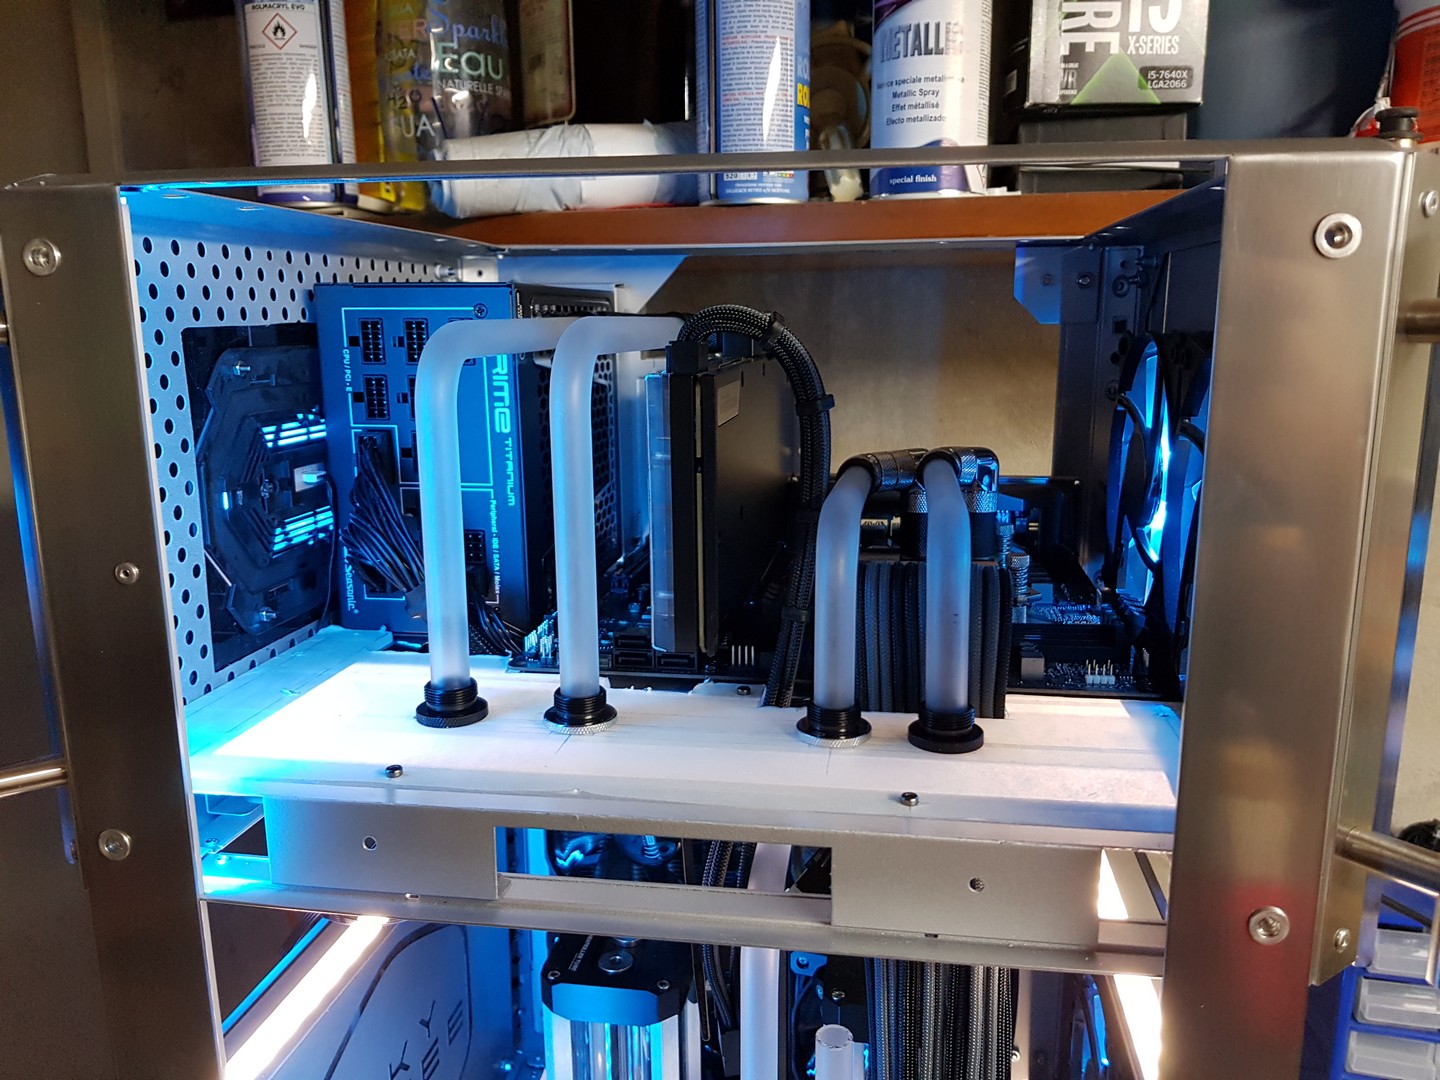
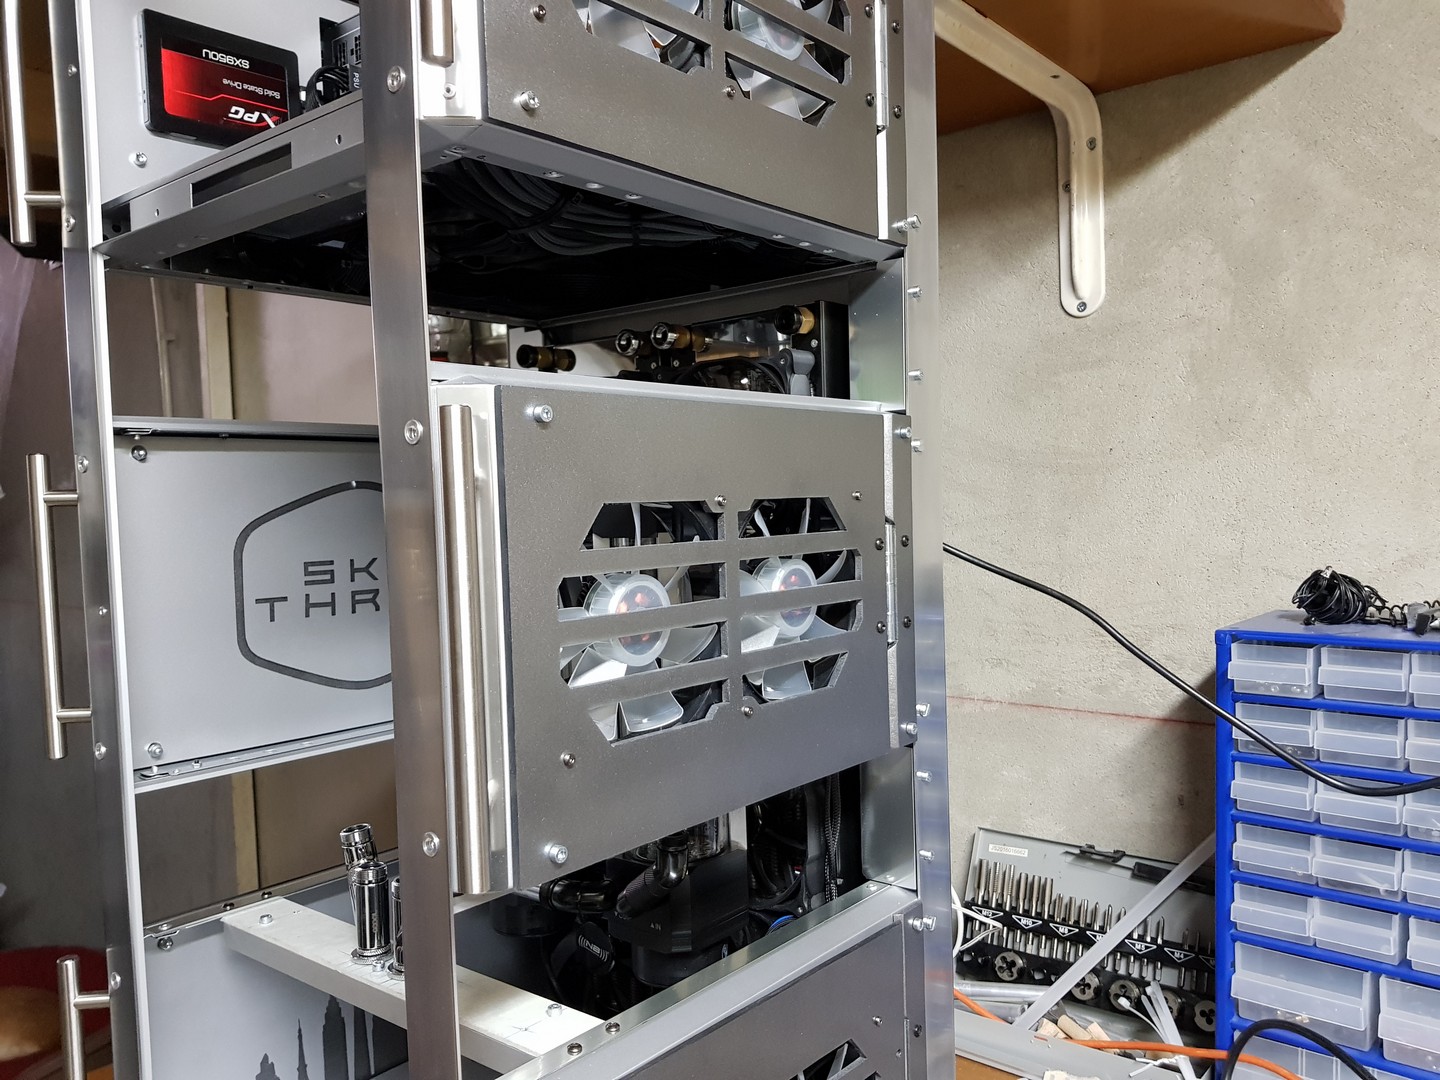
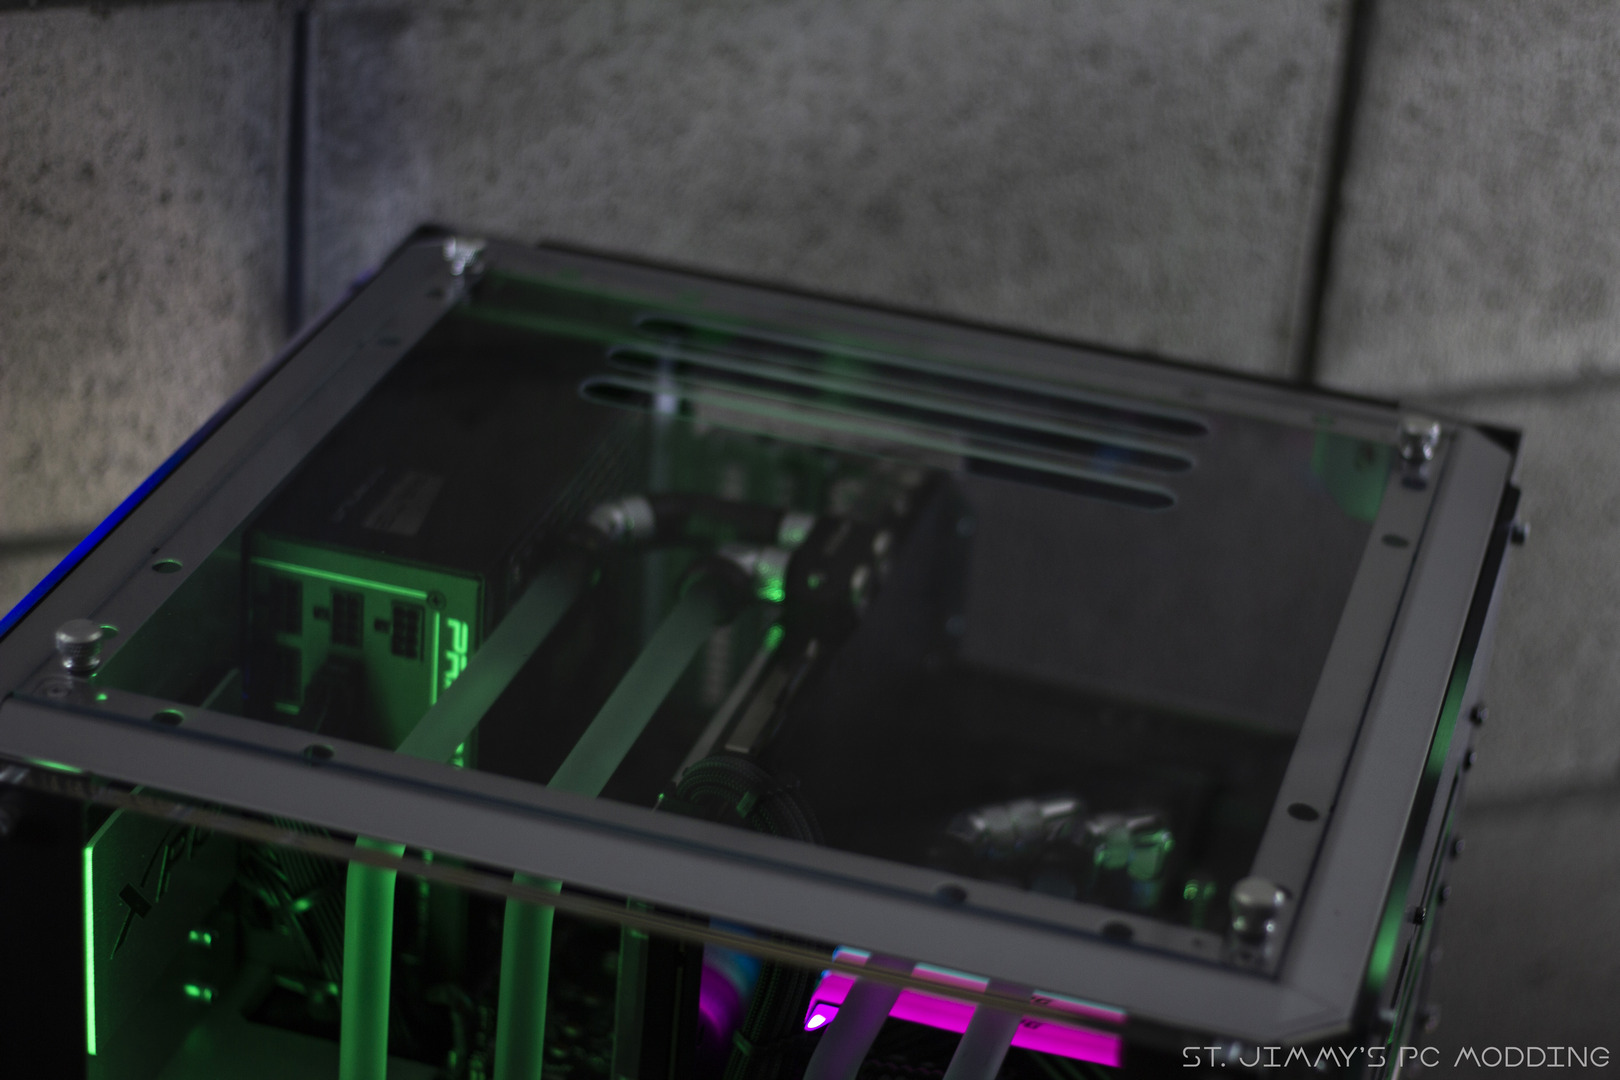
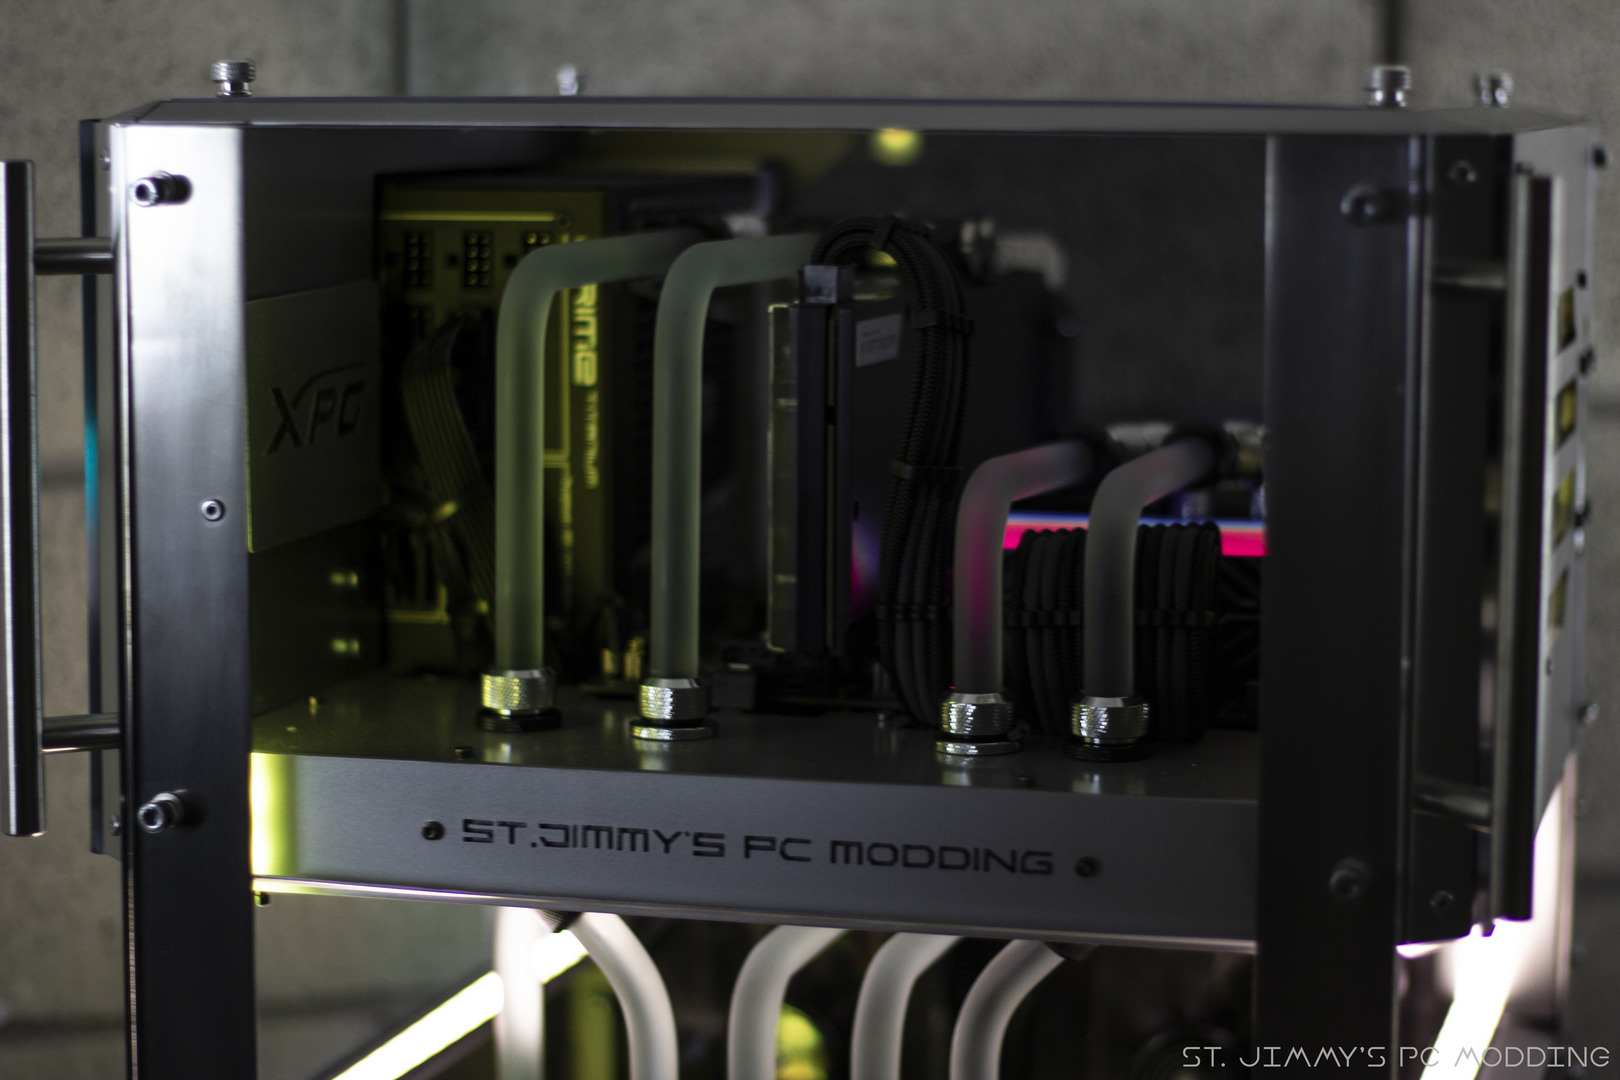
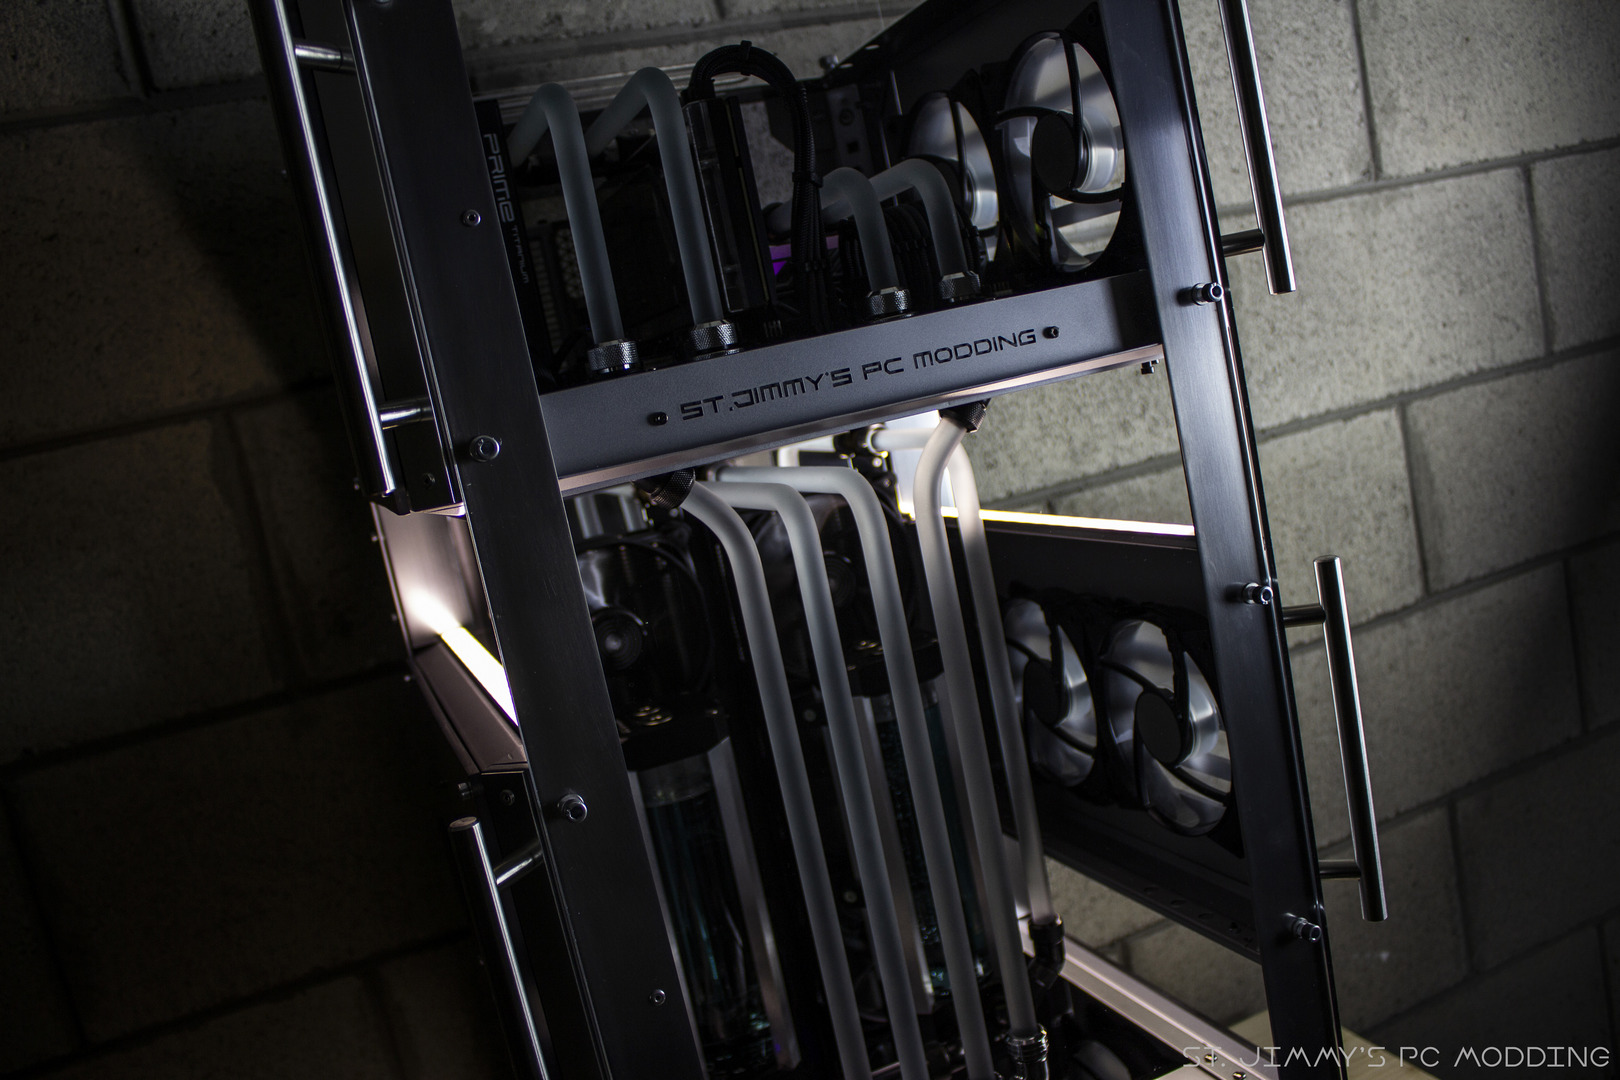
Continuando con i pannelli, si passa alla base che verrà utilizzata per il cablaggio di ventole, led e pompe. Dopodiché vari pannelli per il case superiore, che ospiteranno SSD e passapareti per i tubi. Dettaglio piccolo ma che farà la differenza, anche delle cover da montare tra i case per coprire i cavi che passeranno lungo tutta la struttura.
[ENG]
Going on with the panels, it’s time for the base which will be used for fans/led/pumps cable management. After that, various panels for the upper case, which will accomodate the SSD and pass-through fittings for the tubes. Little detail but one that will make the difference, also some covers to mount between the cases that will hide the cables that are going to run all along the structure.
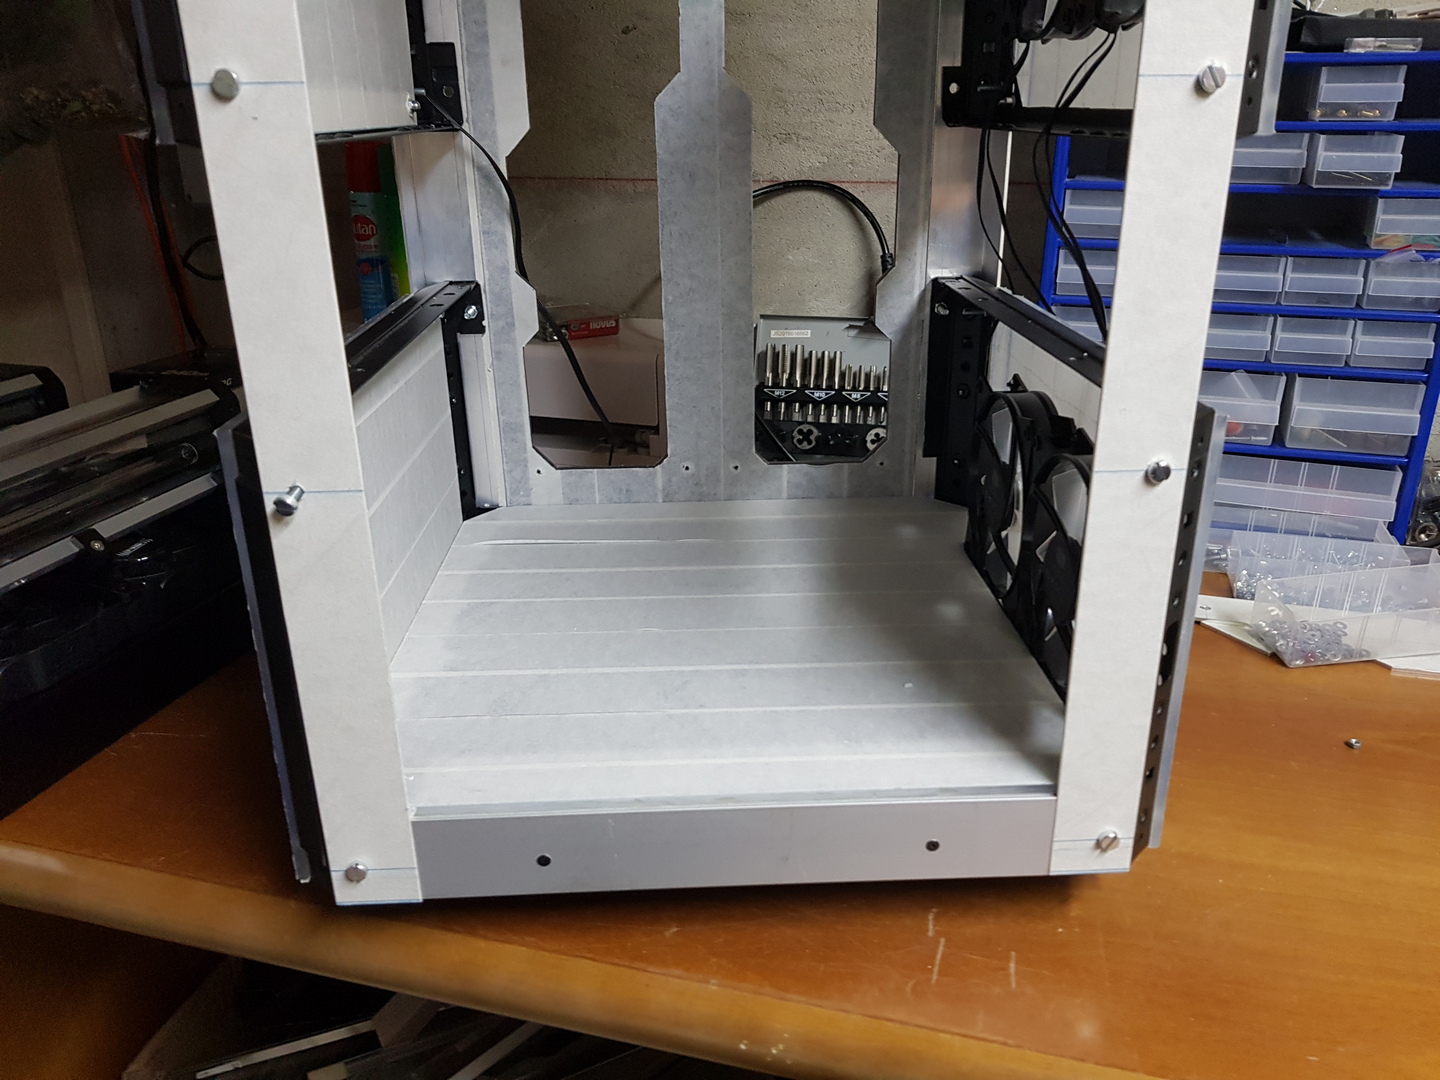
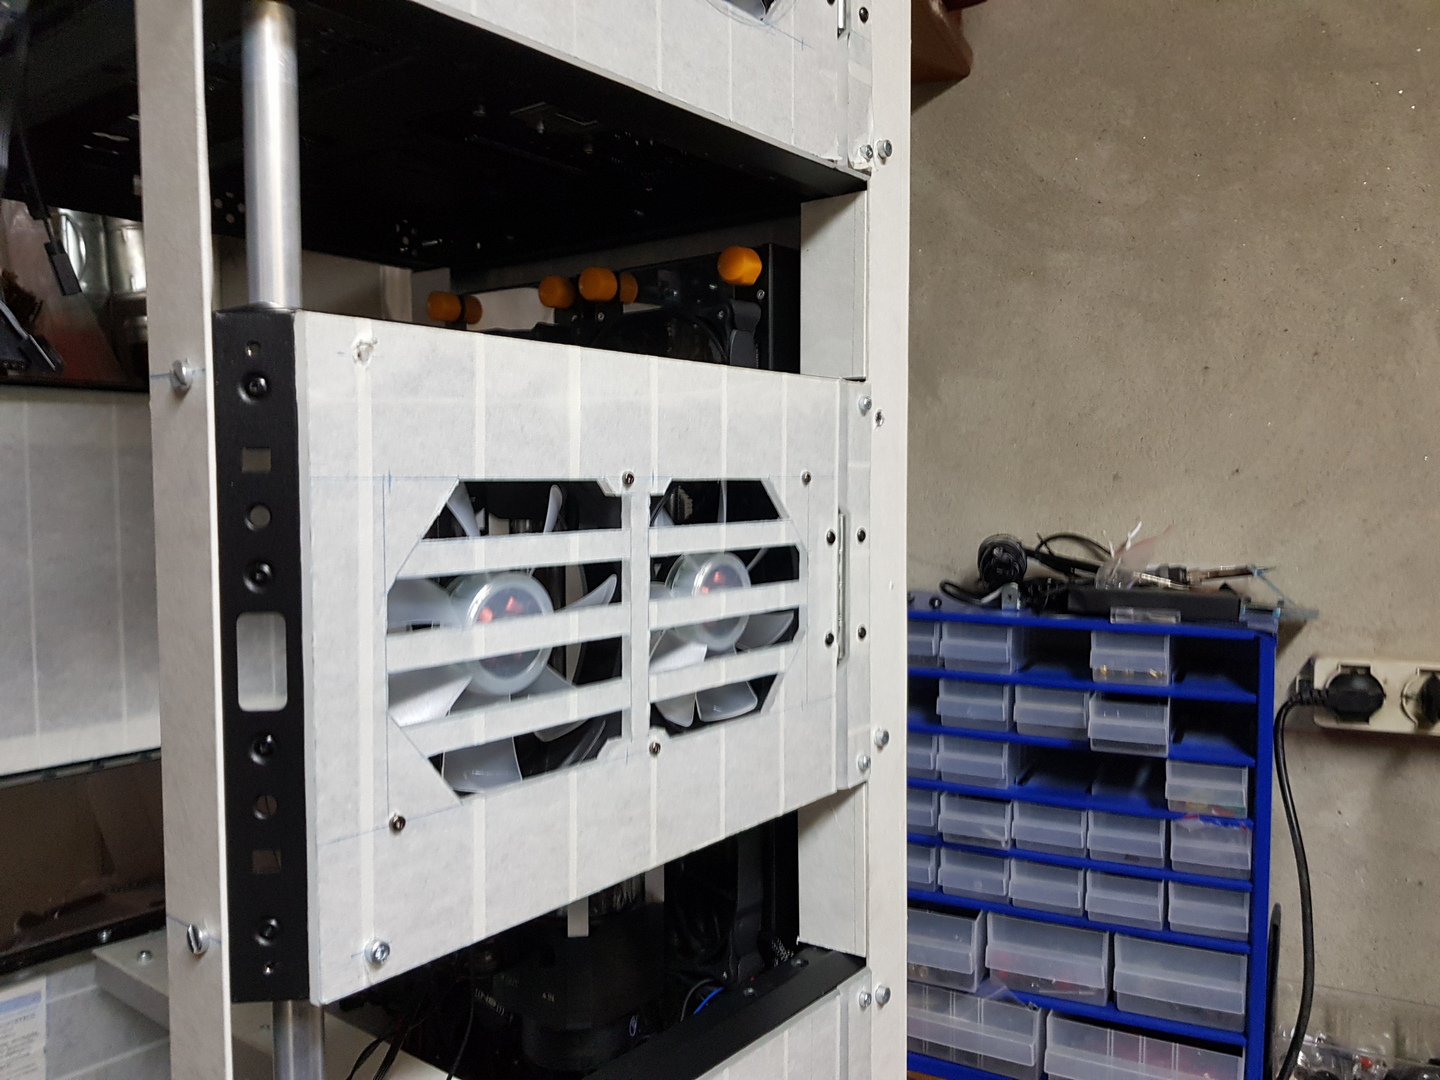
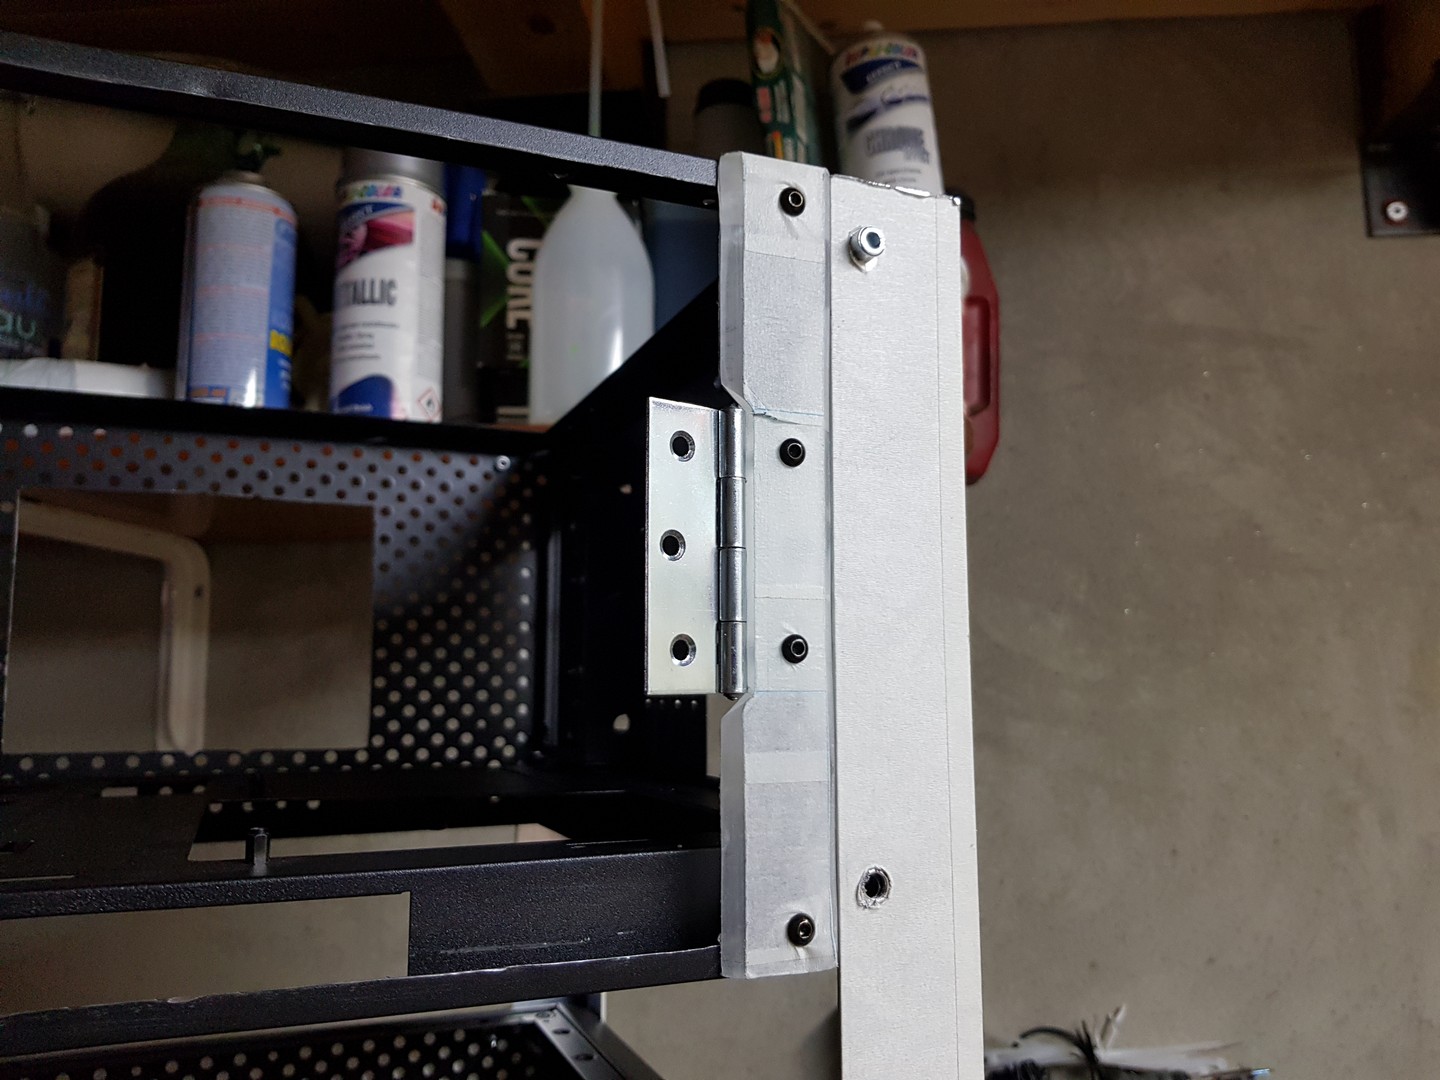
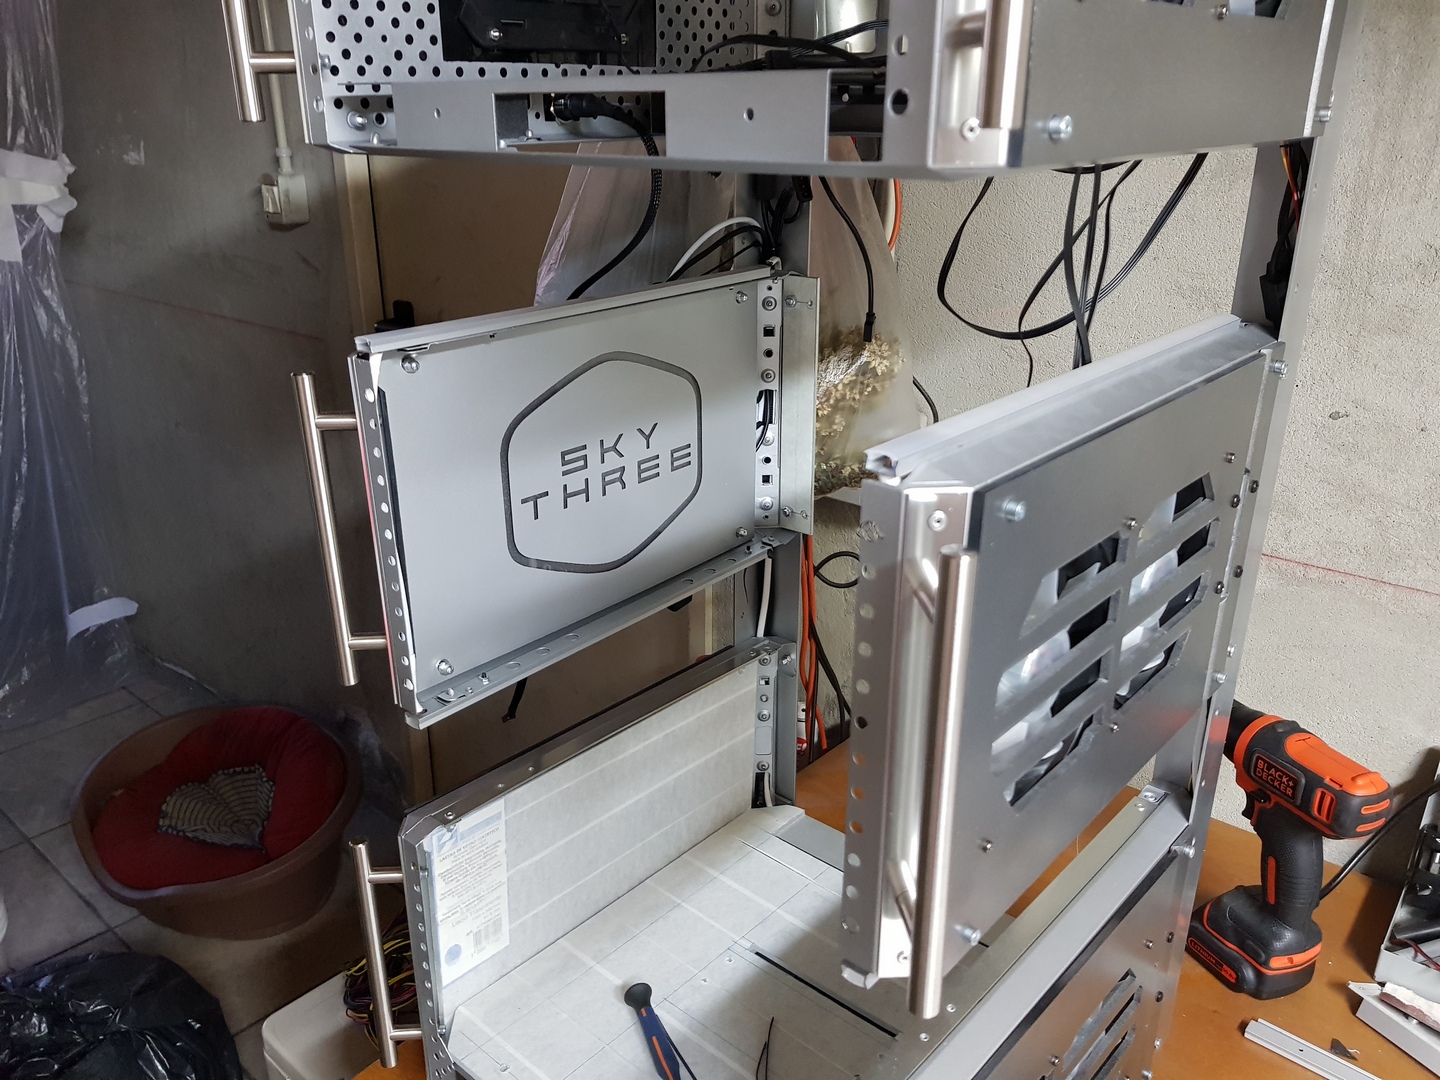
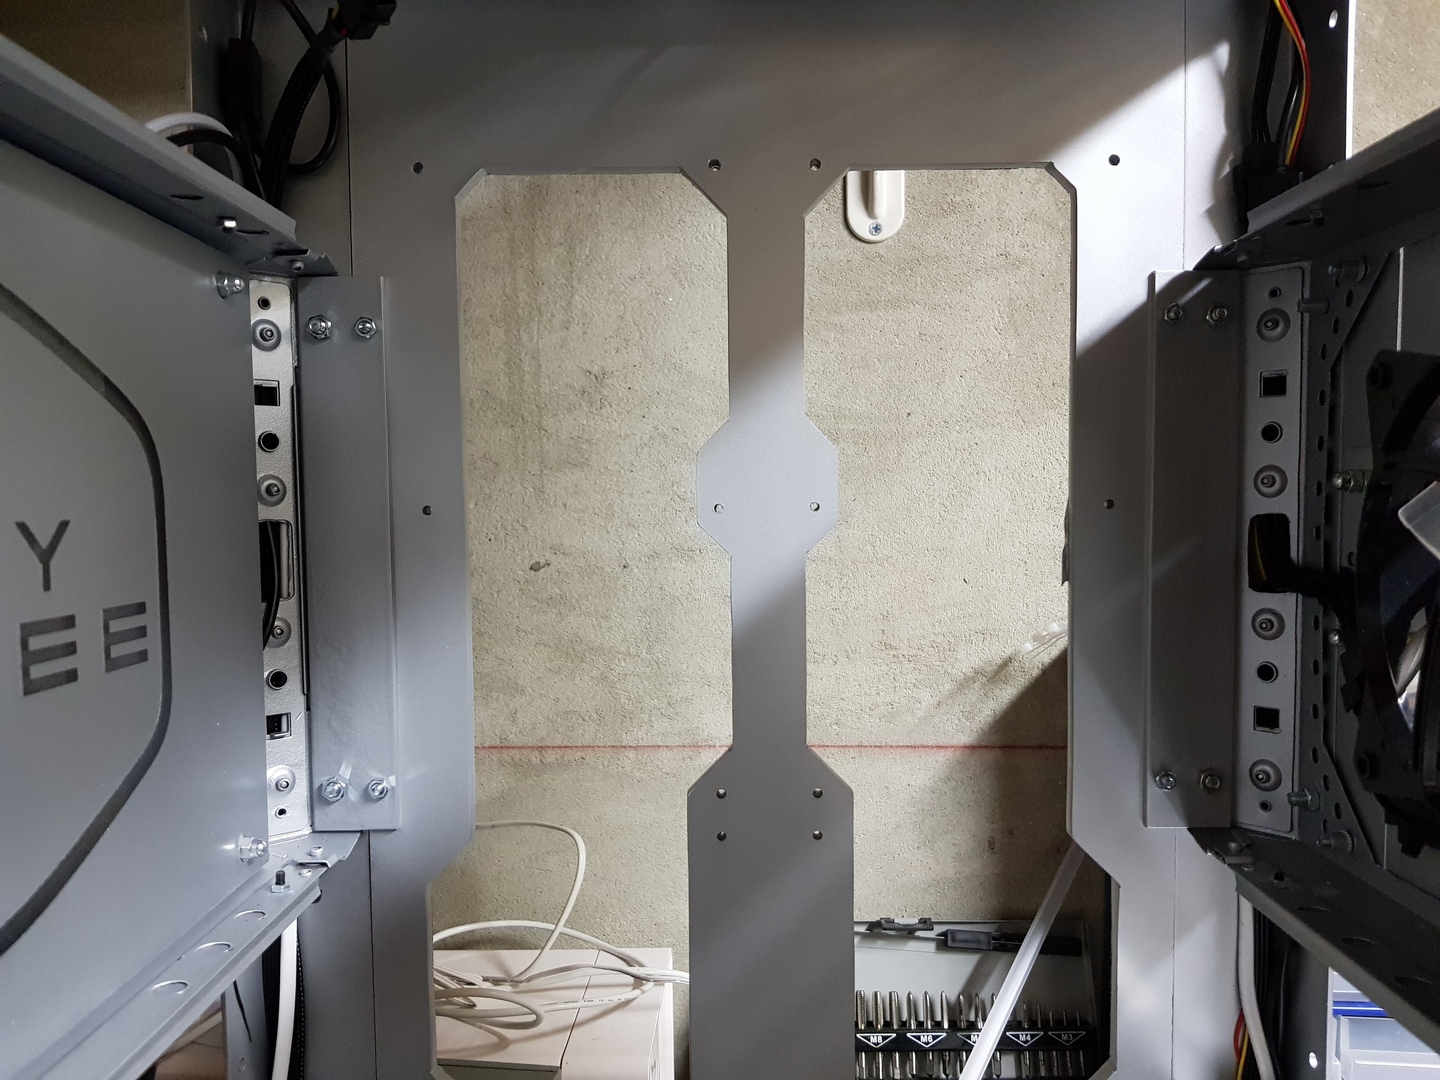
Sostituite le maniglie originali dei Q300P per delle nuove più luccicanti e a basso profilo. Inoltre, montati finalmente i due profili piatti frontali e due pannelli interni per coprire il lato sinistro dei case! Visibile anche una piastra che unisce la parte superiore del case alla base, ma vedremo più tardi a cosa servirà.
[ENG]
Replaced the original Q300P handles with new sparkly and low profile ones. Moreover, finally mounted the two flat front profiles and two inner panels to cover the left side of the cases! Also visible, a plate that connects the upper part of the lower case, but we’ll see what it’s there for later.
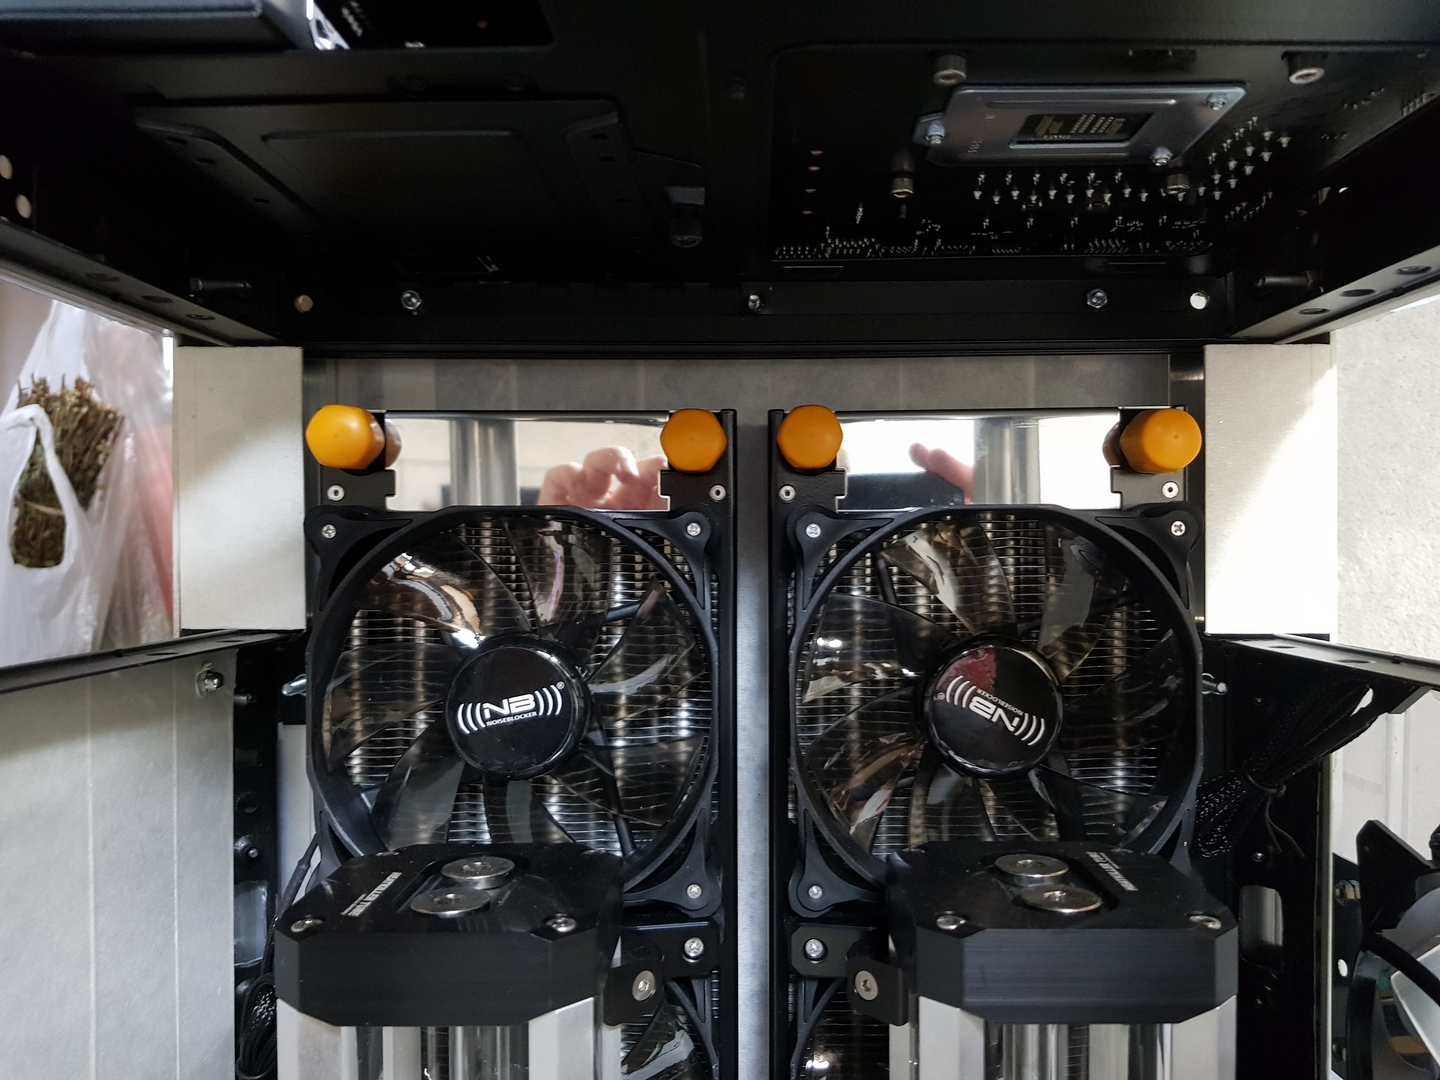
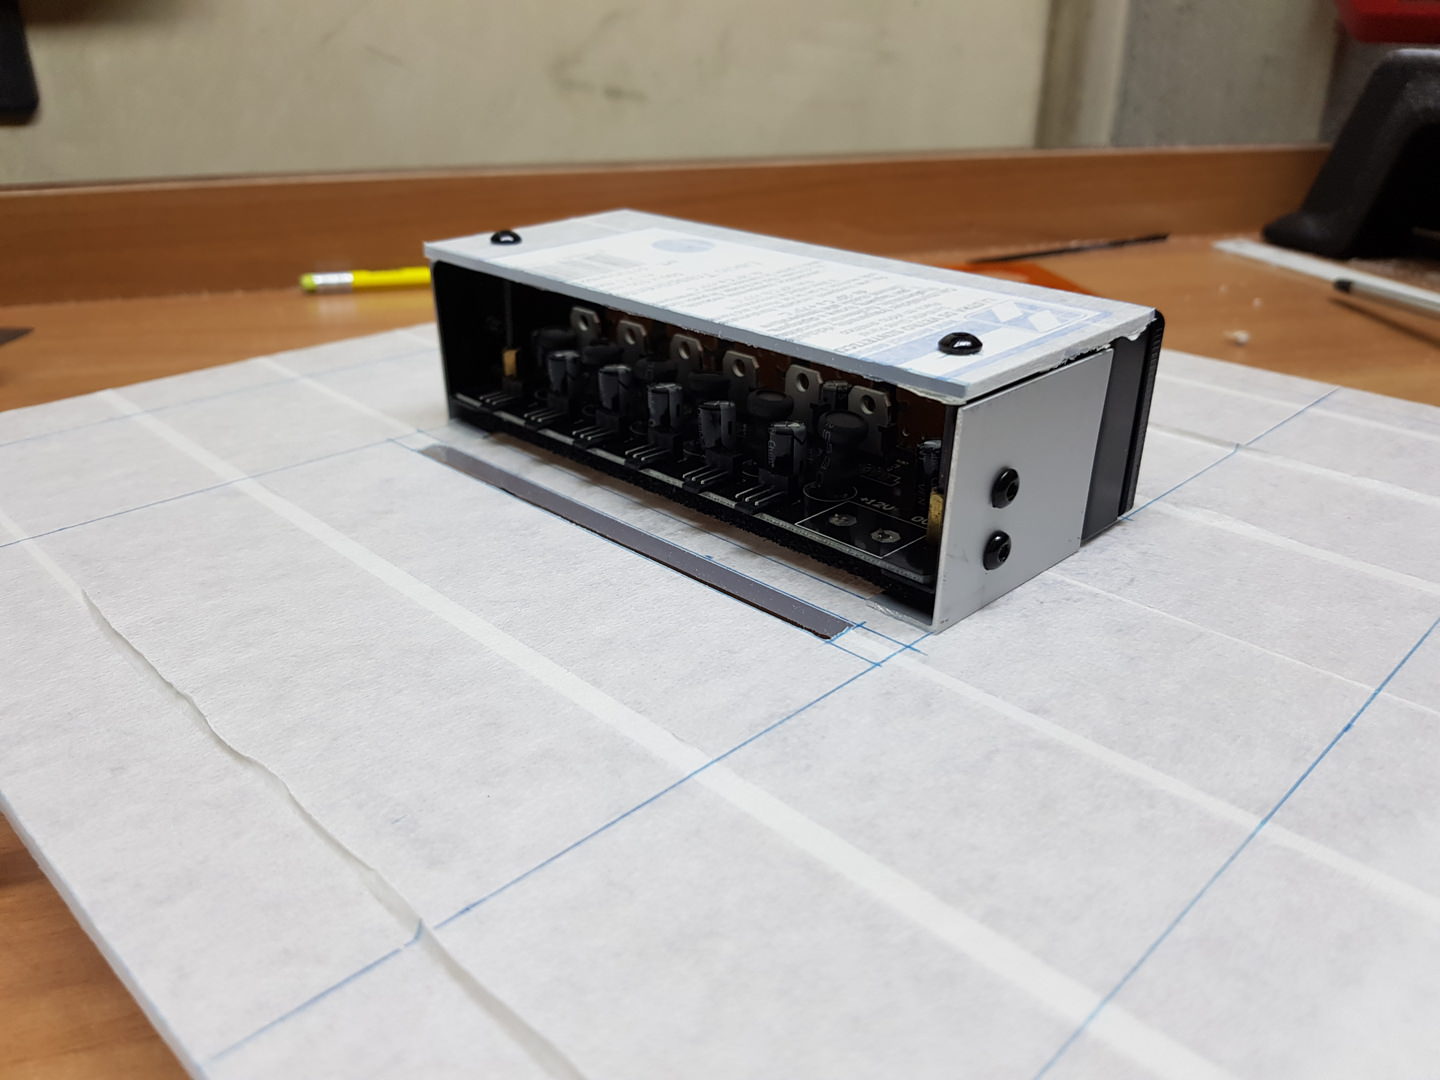
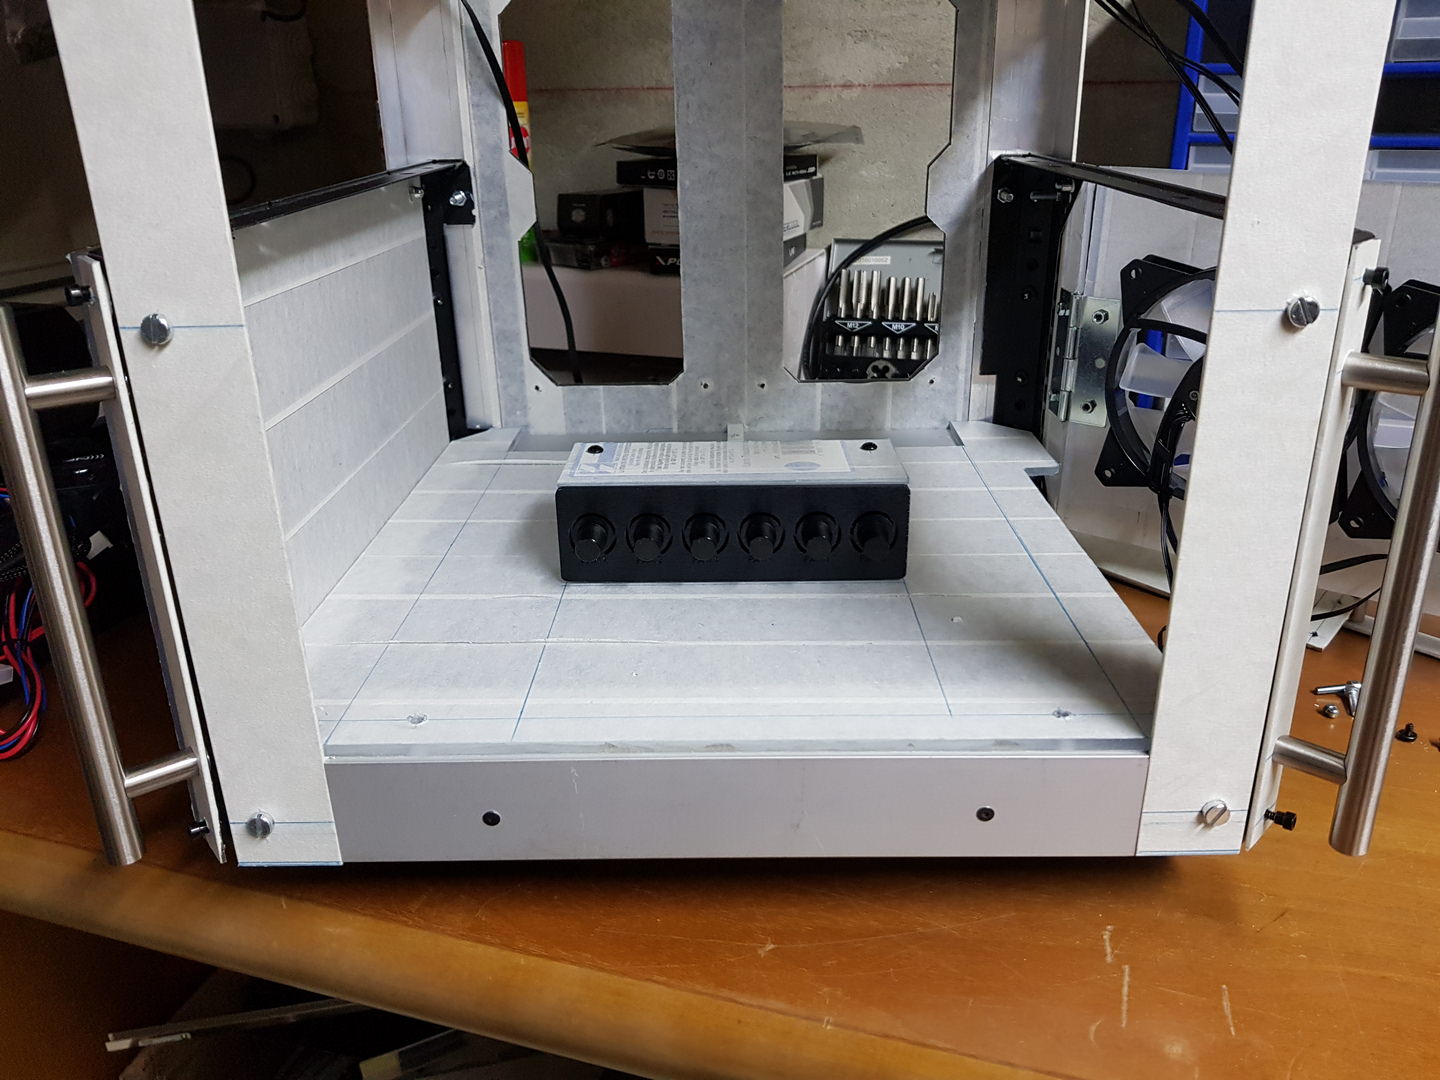
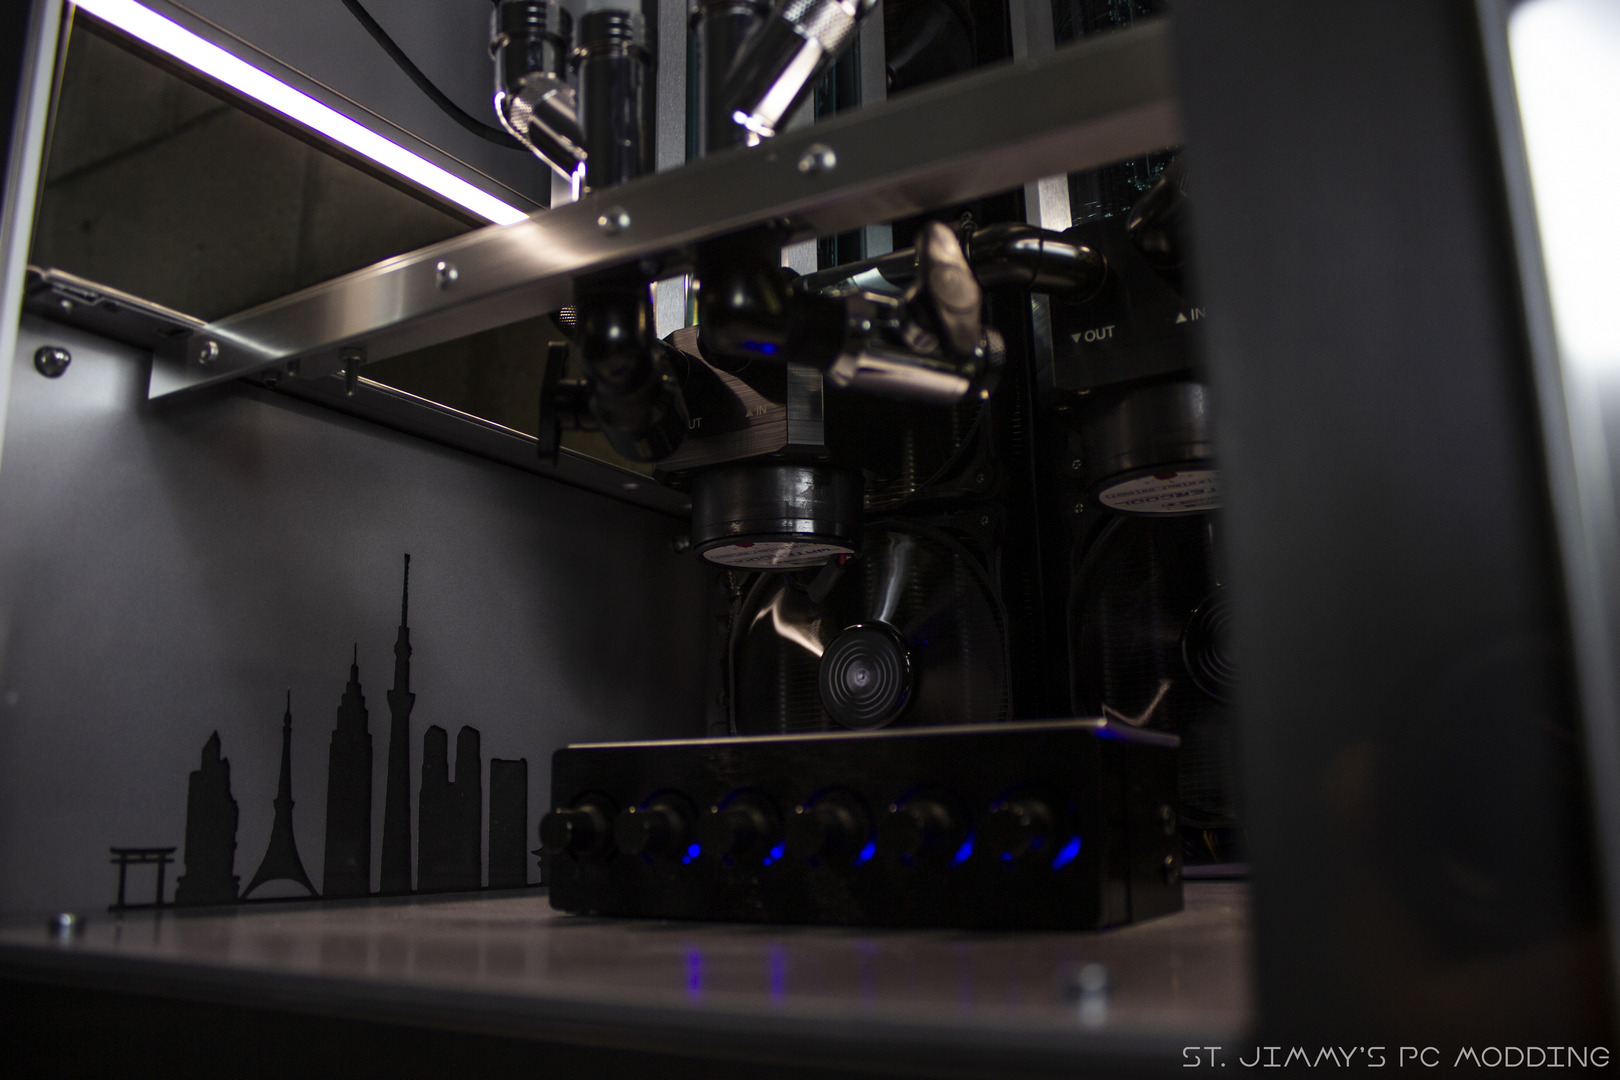
Ultimi ma non meno importanti, fissaggio e trattamento estetico per il fan controller che si occuperà di tenere a bada le 15 ventole montate nella build, e profili per strisce LED da montare sul case centrale.
[ENG]
Last but not least, fixing and esthetic treatment for the fan controller which will manage the 15 fans mounted in the build, and profiles for the LED strips to mount on the central case.

Verniciatura e assemblaggio–>
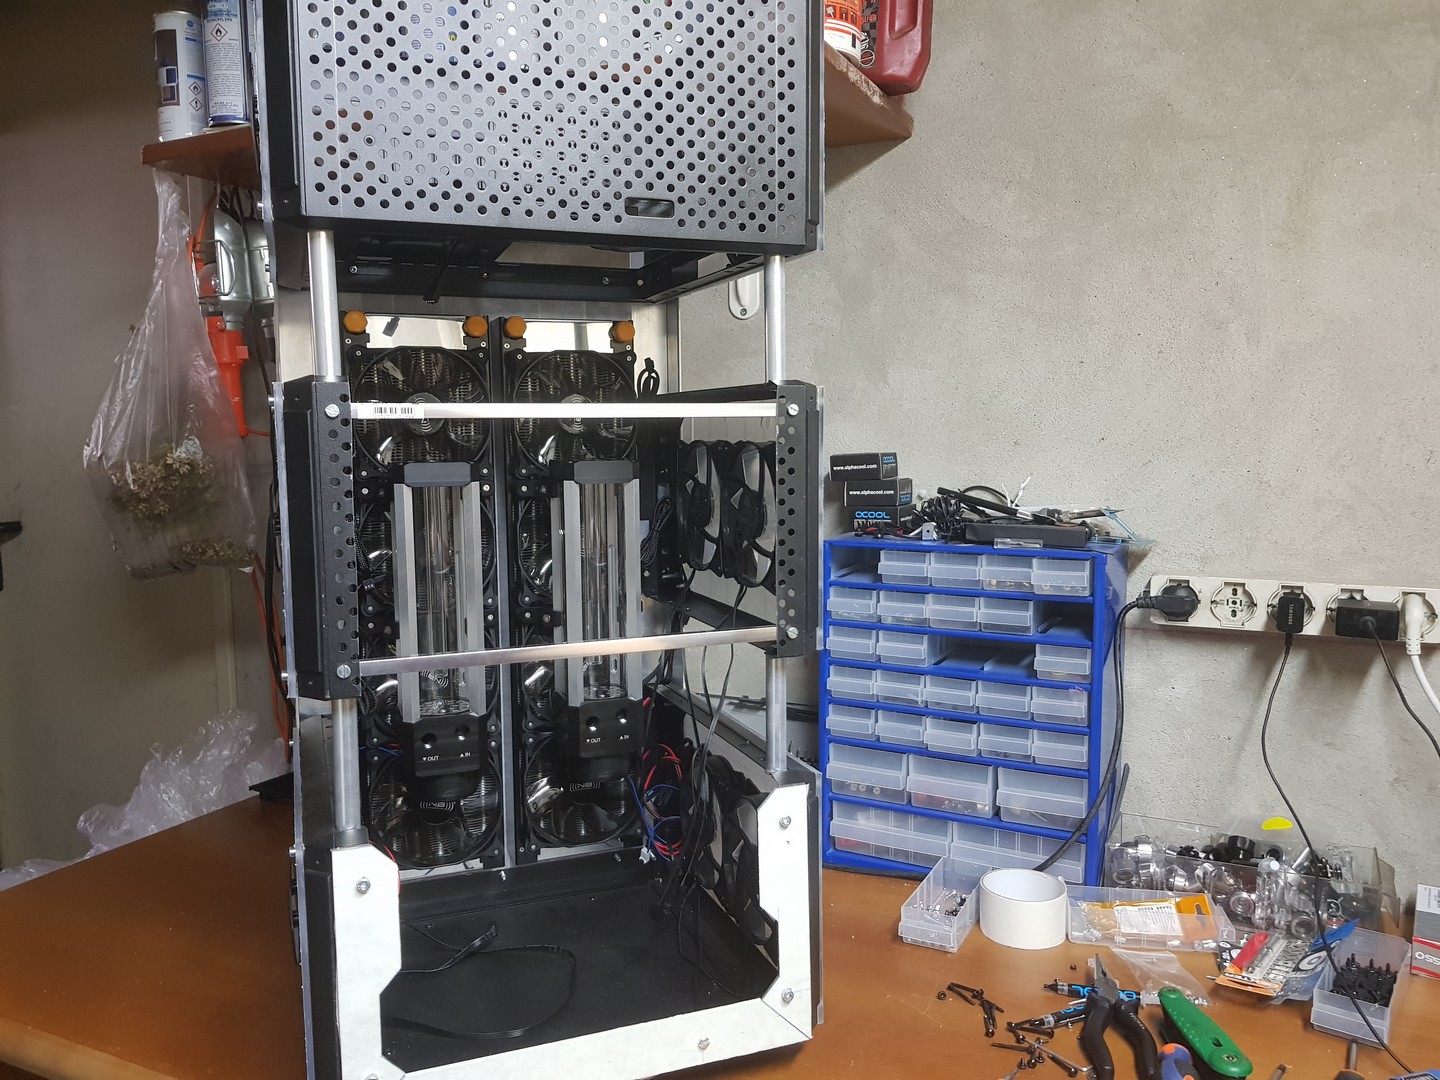
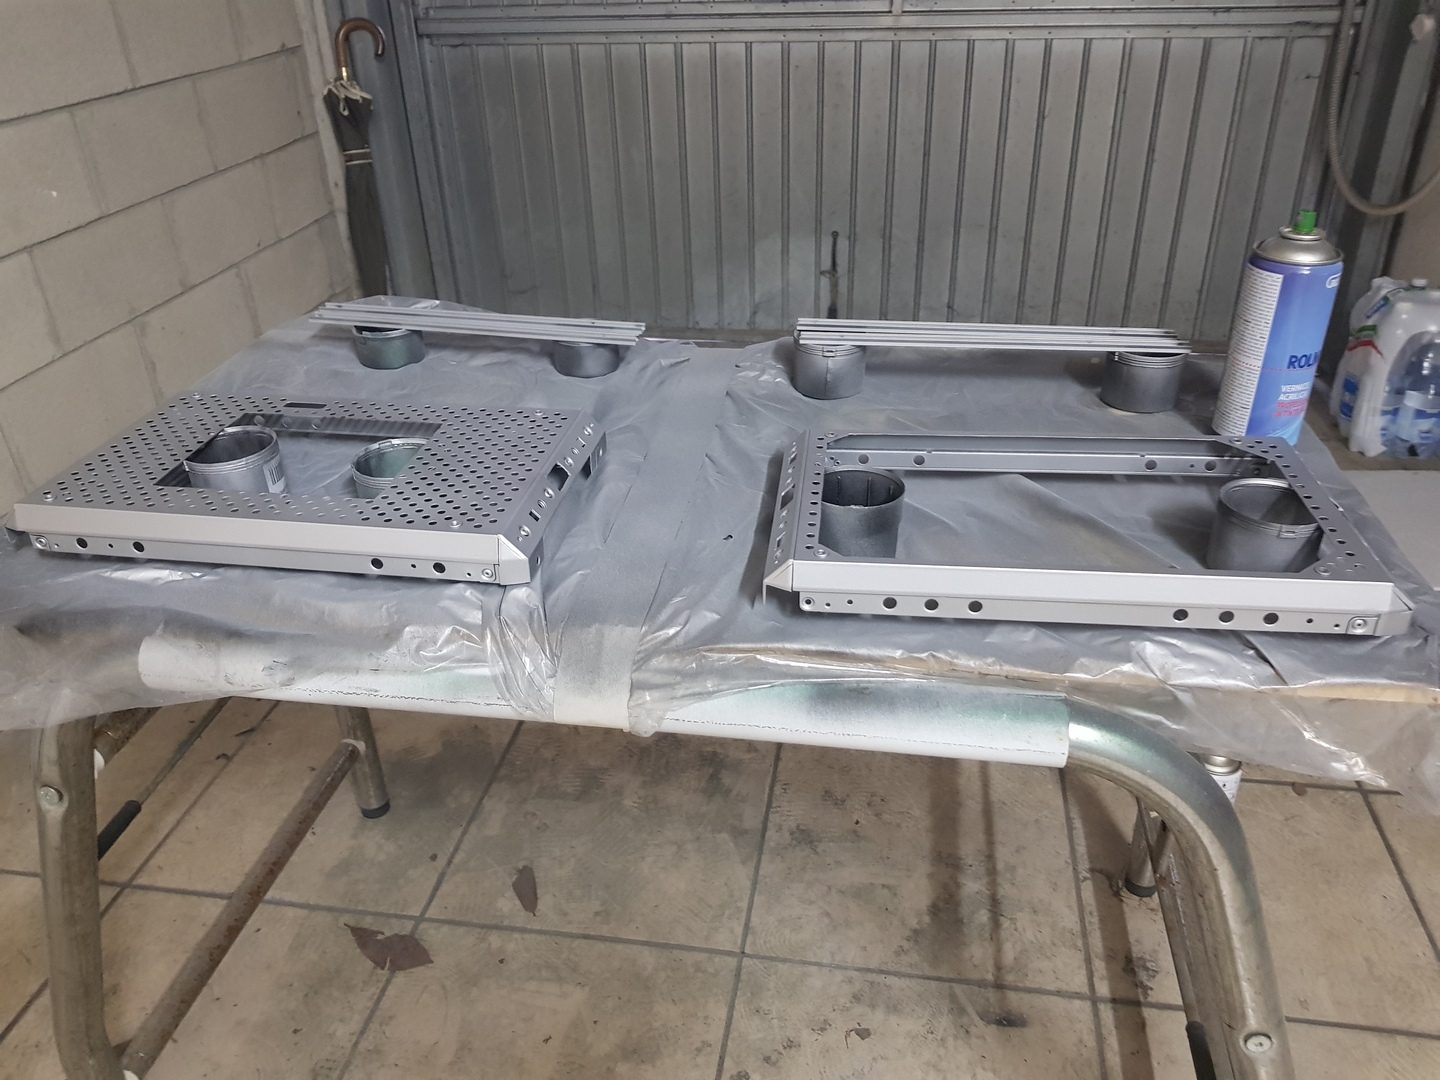
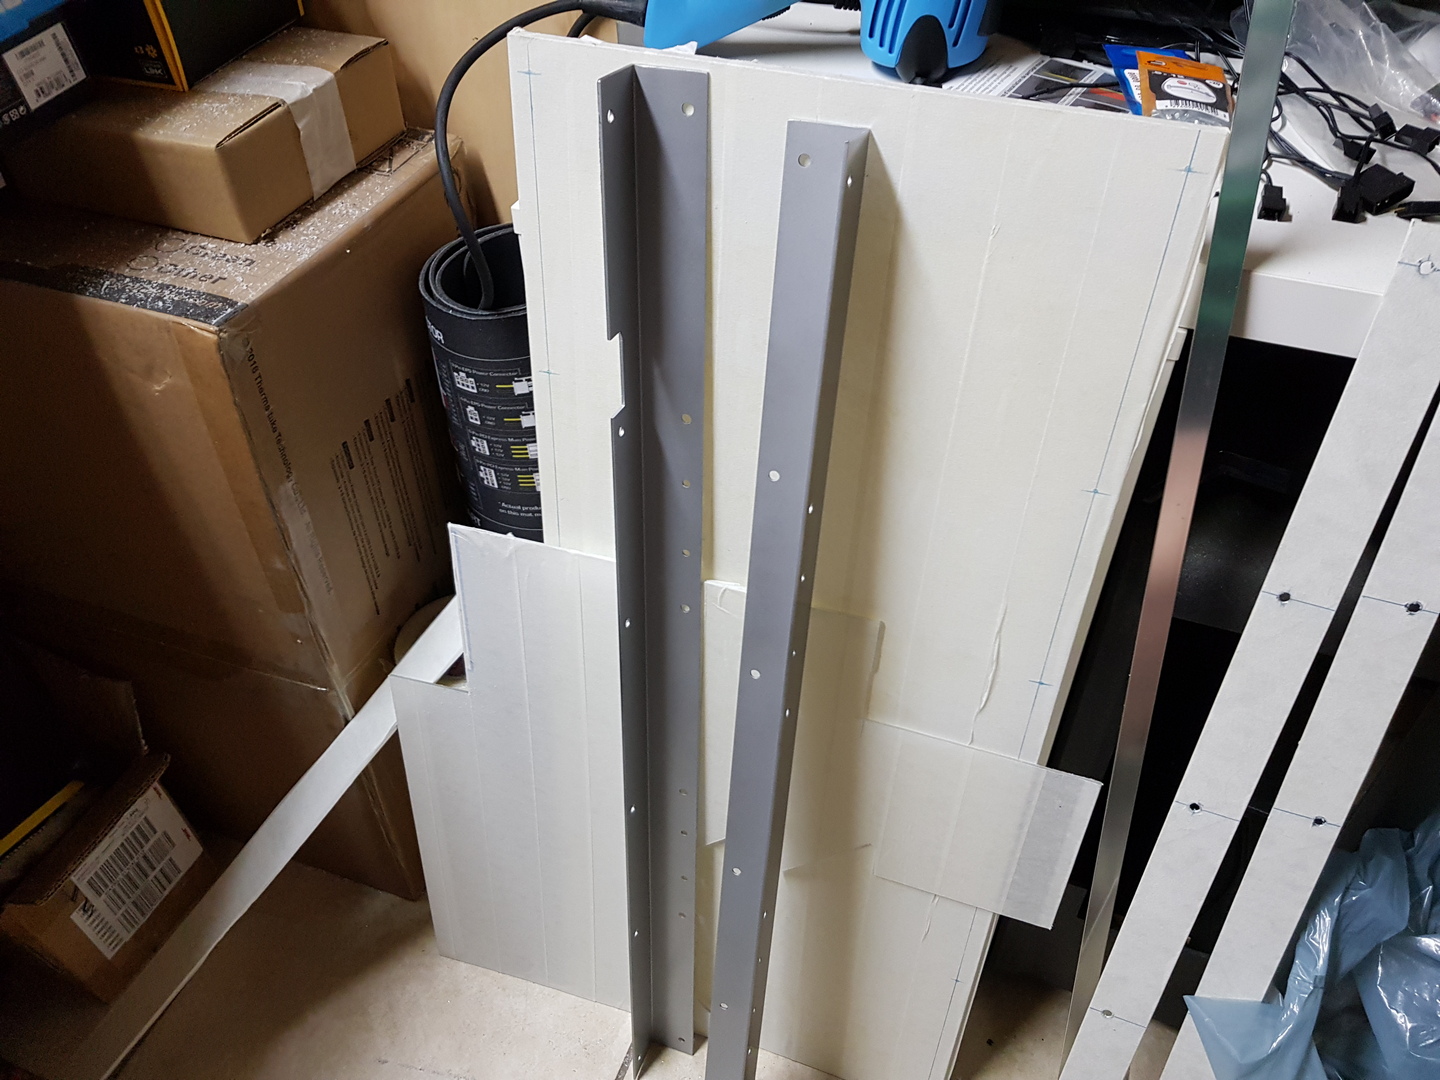
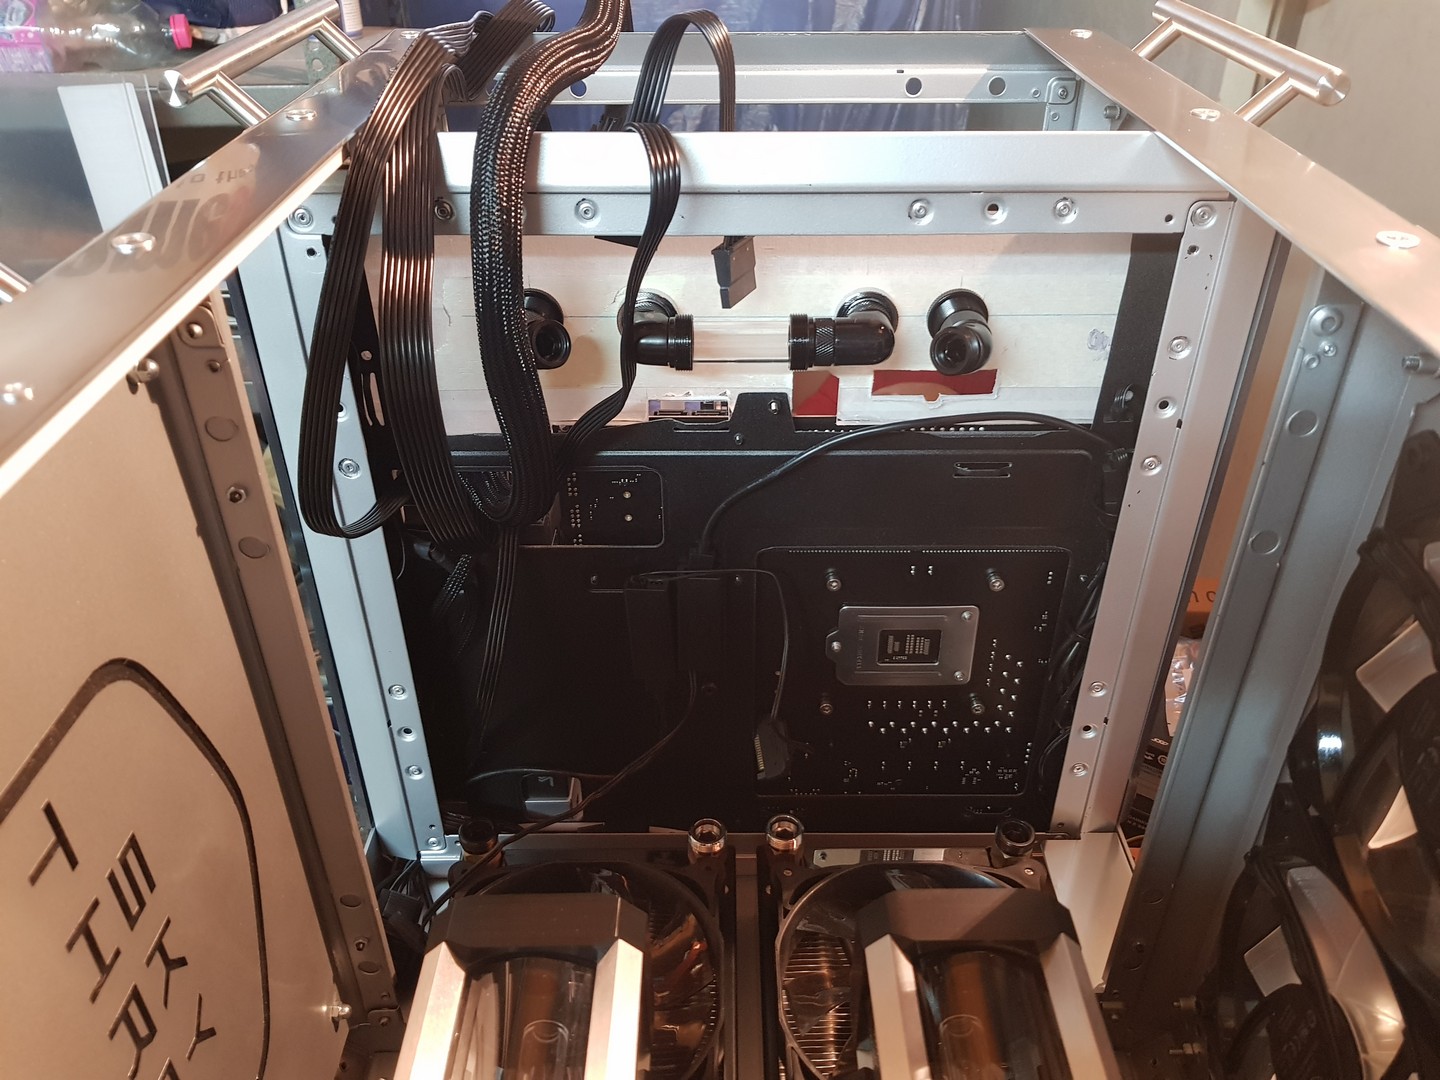
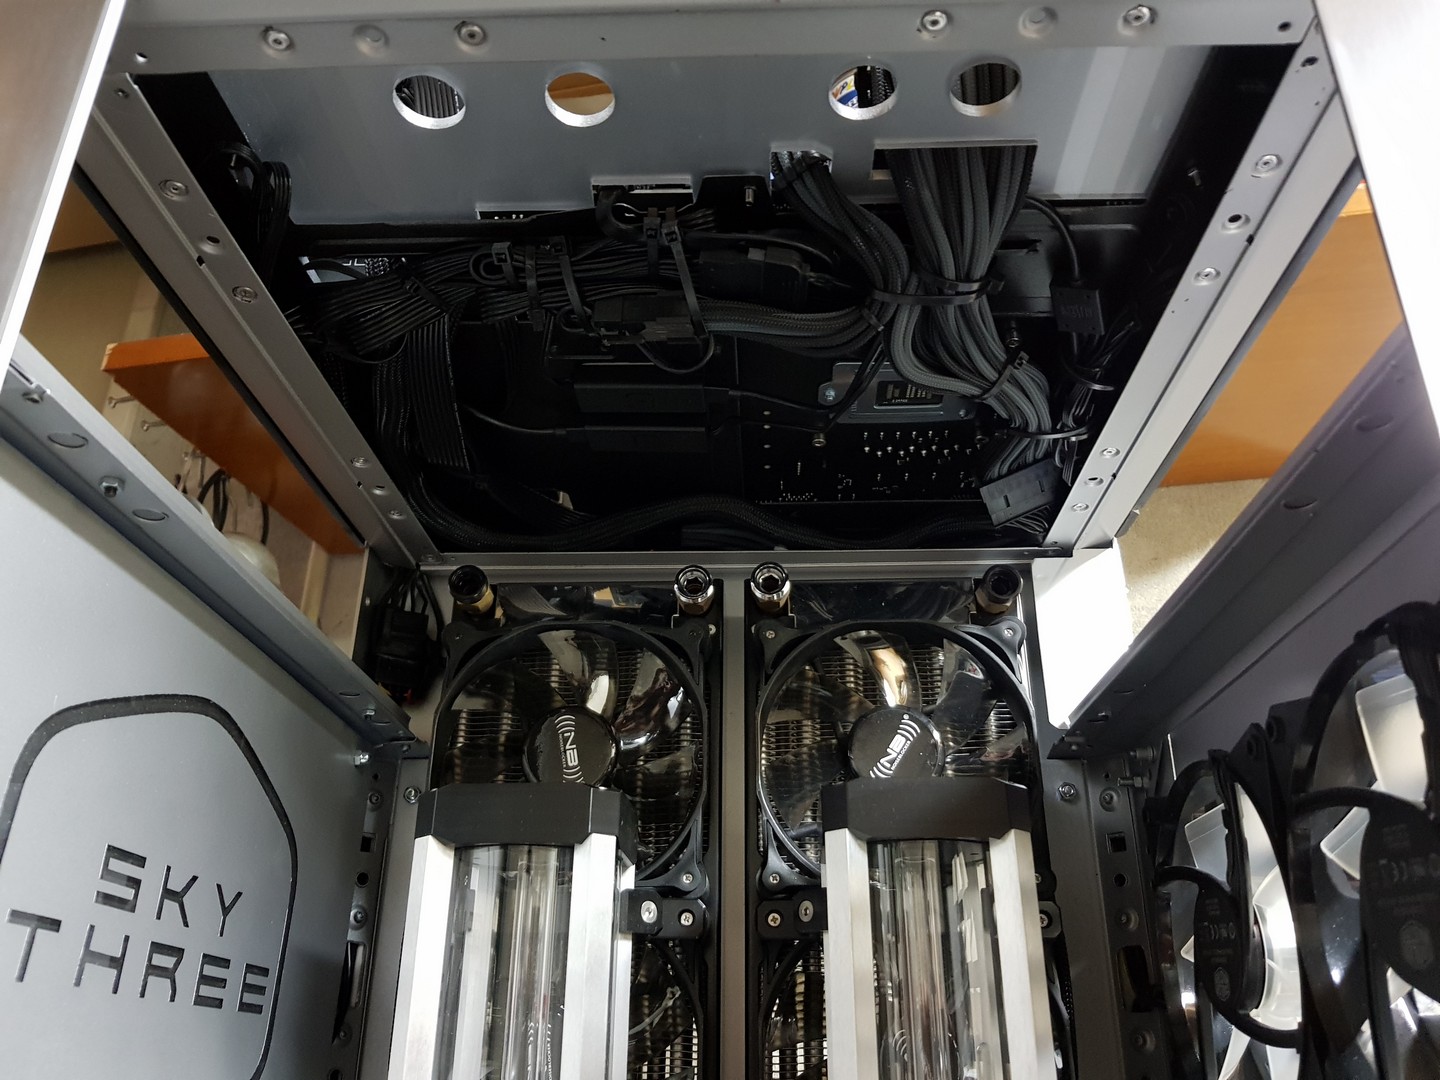
Ora che la maggior parte dei pannelli e del layout generale sono completi, si può passare allo smontaggio totale e alla preparazione per la verniciatura e la lucidatura delle parti in alluminio. Chiaramente, man mano che essa procede, inizia anche l’assemblaggio finale. In questo caso, si inizia verniciando i case e lucidando i profili in alluminio strutturali. Durante l’assemblaggio della struttura è necessario far passare i primi cavi che passano attraverso i case. Questa credo sia una delle parti più interessanti del progetto!
[ENG]
Now that most of the panels and general layout are done, we can move on to the full dismantling e prepping for the paintjob and aluminum polishing. Clearly, as that proceeds, so does the final assembly. In this case, let’s start painting the cases and polishing the structural aluminum proiles. During the structure assembly, it’s needed to run the first cable that go through the cases. I think this is one of the most interesting parts of the project!


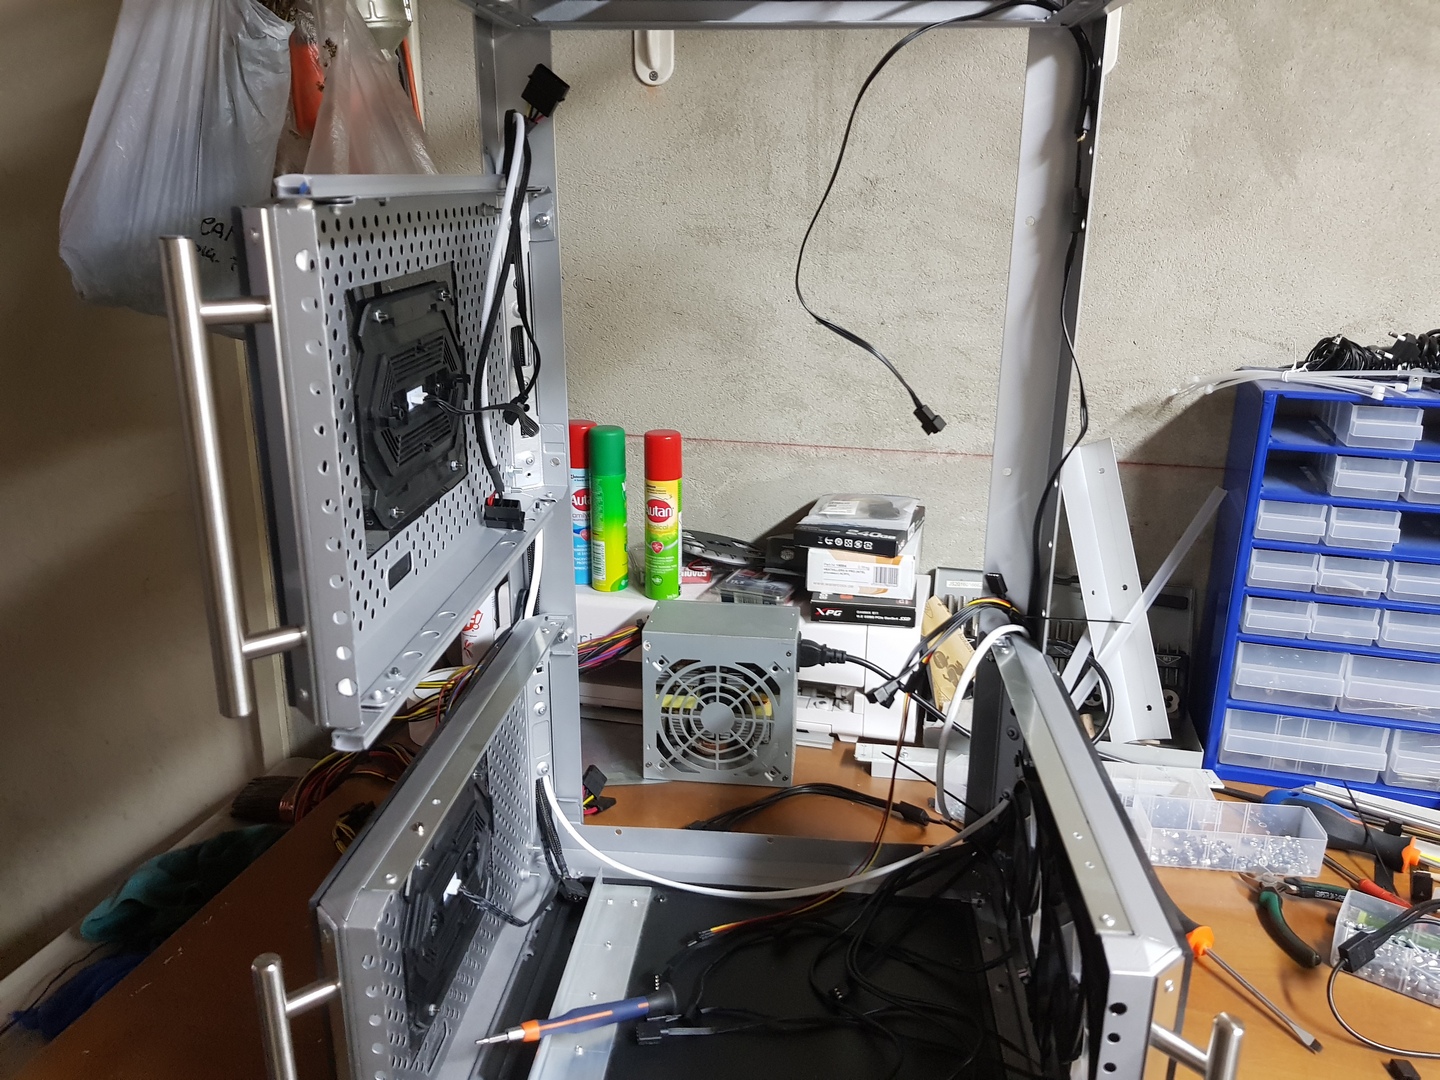
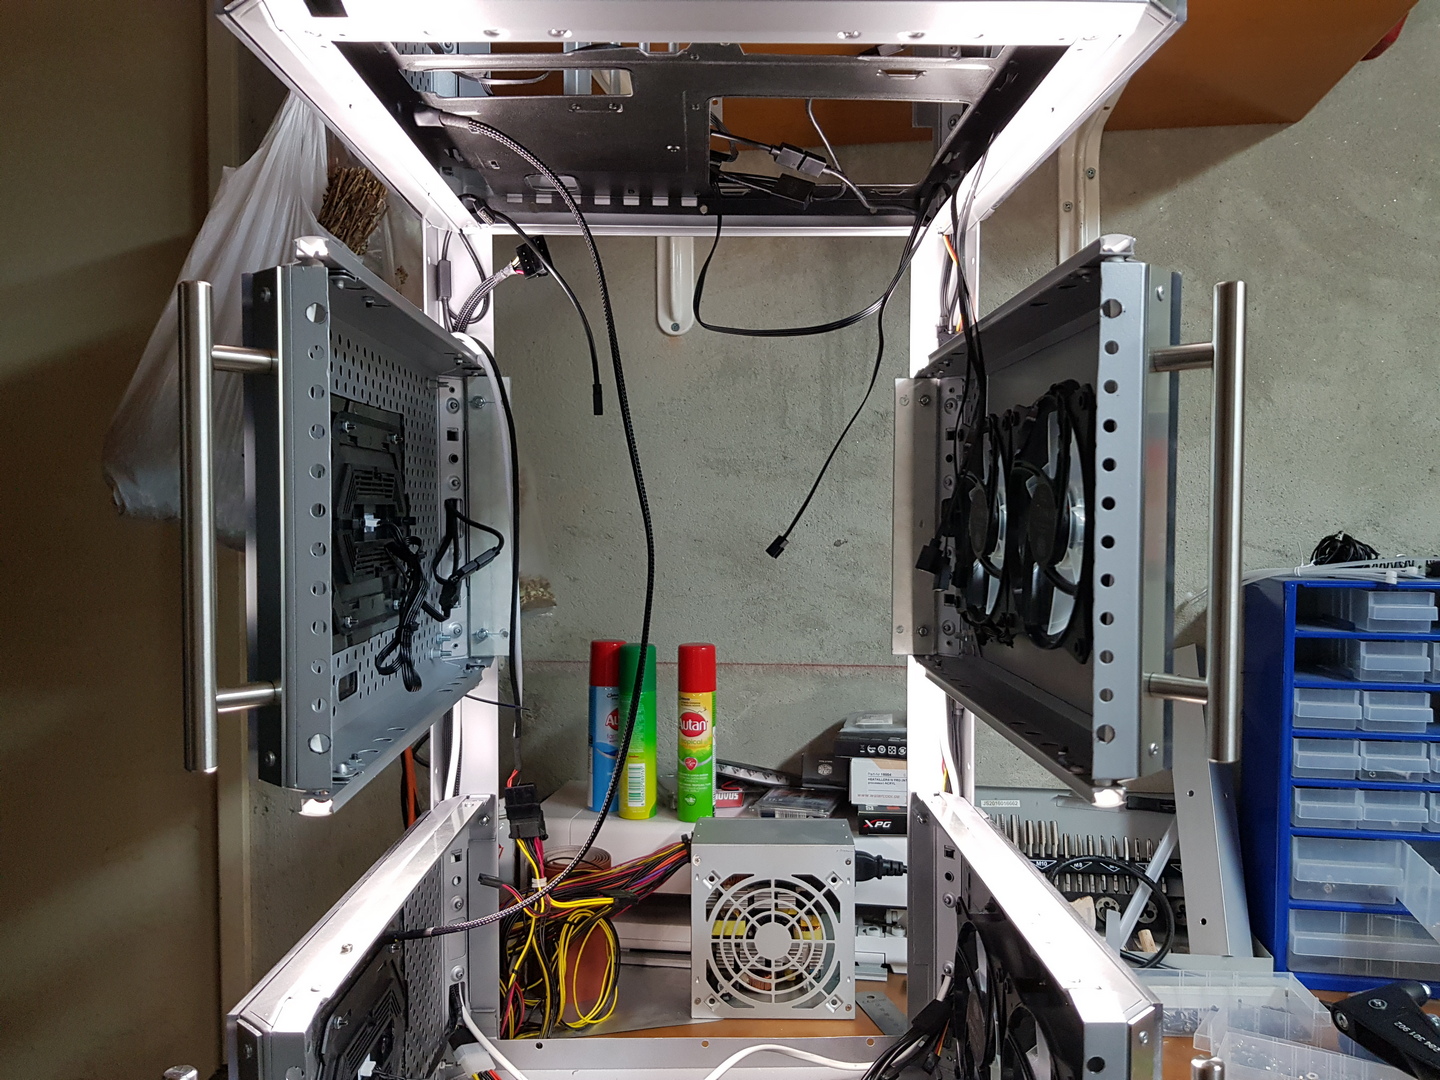
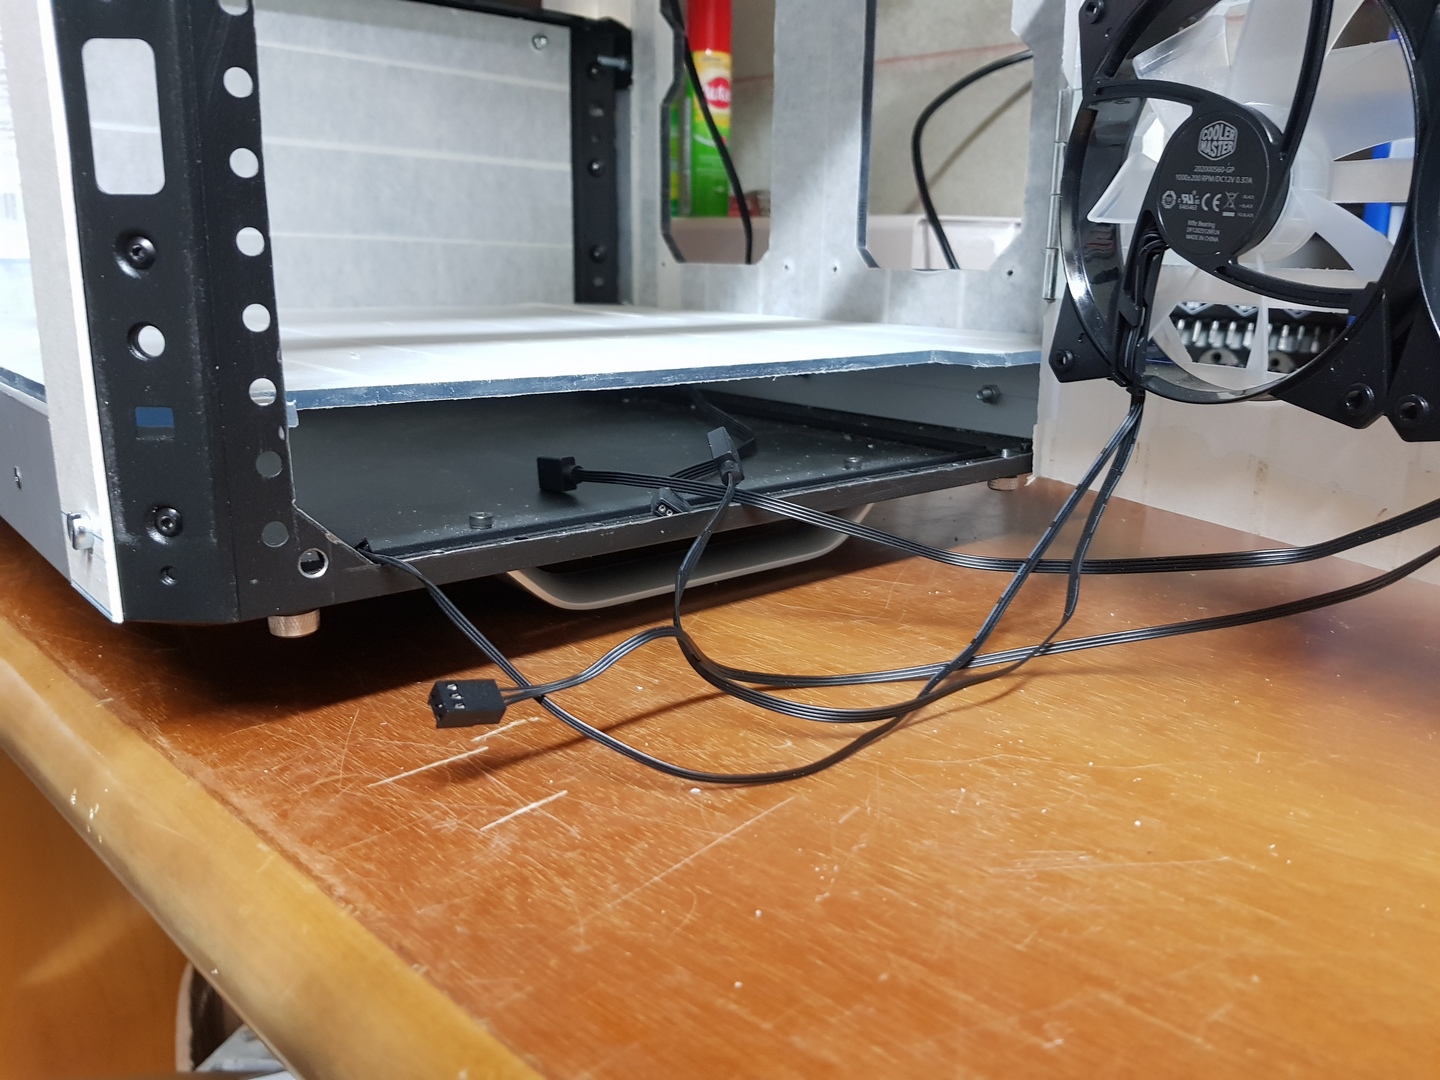
Verniciatura per pannelli esterni e interni, stencil compresi! A questo punto la struttura di base è montata e si può continuare con le varie connessioni. L’inferno di cavi ai piedi della struttura rende il tutto più spontaneo: in fondo, ogni cosa ha il proprio lato oscuro!
[ENG]
Paintjob for inner and outer panels, stencils included! At this point, the base structure is assembled e we can continue all the connections. The cable hell at the structure’s feet makes everything more spontaneous: after all, everything has its dark side!
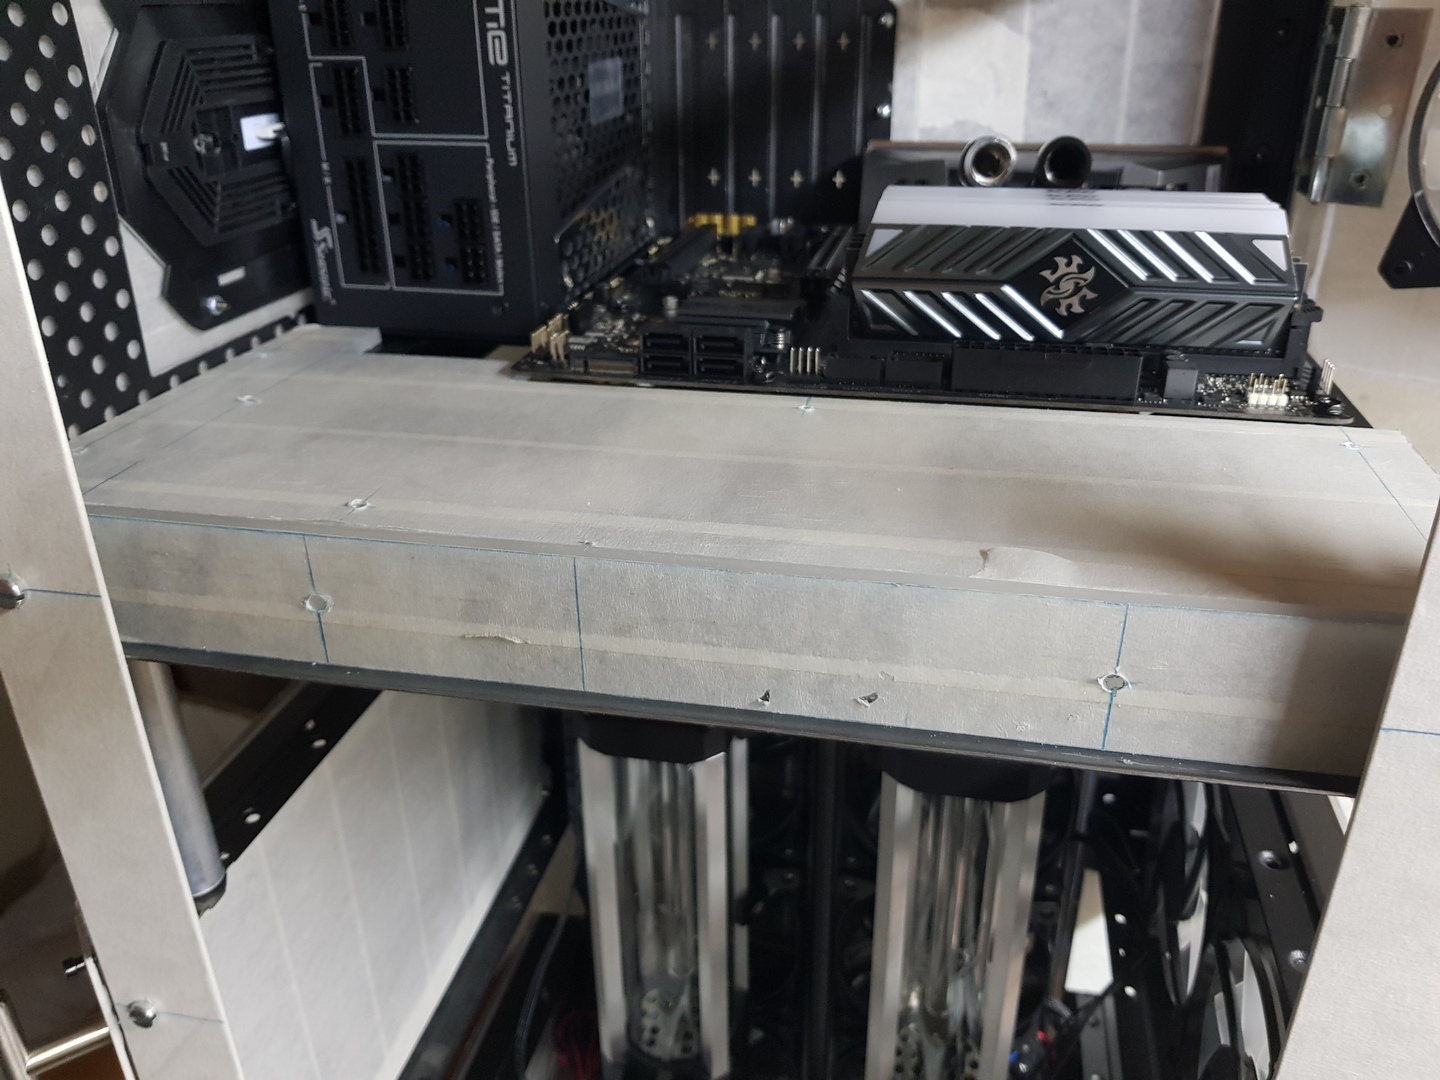
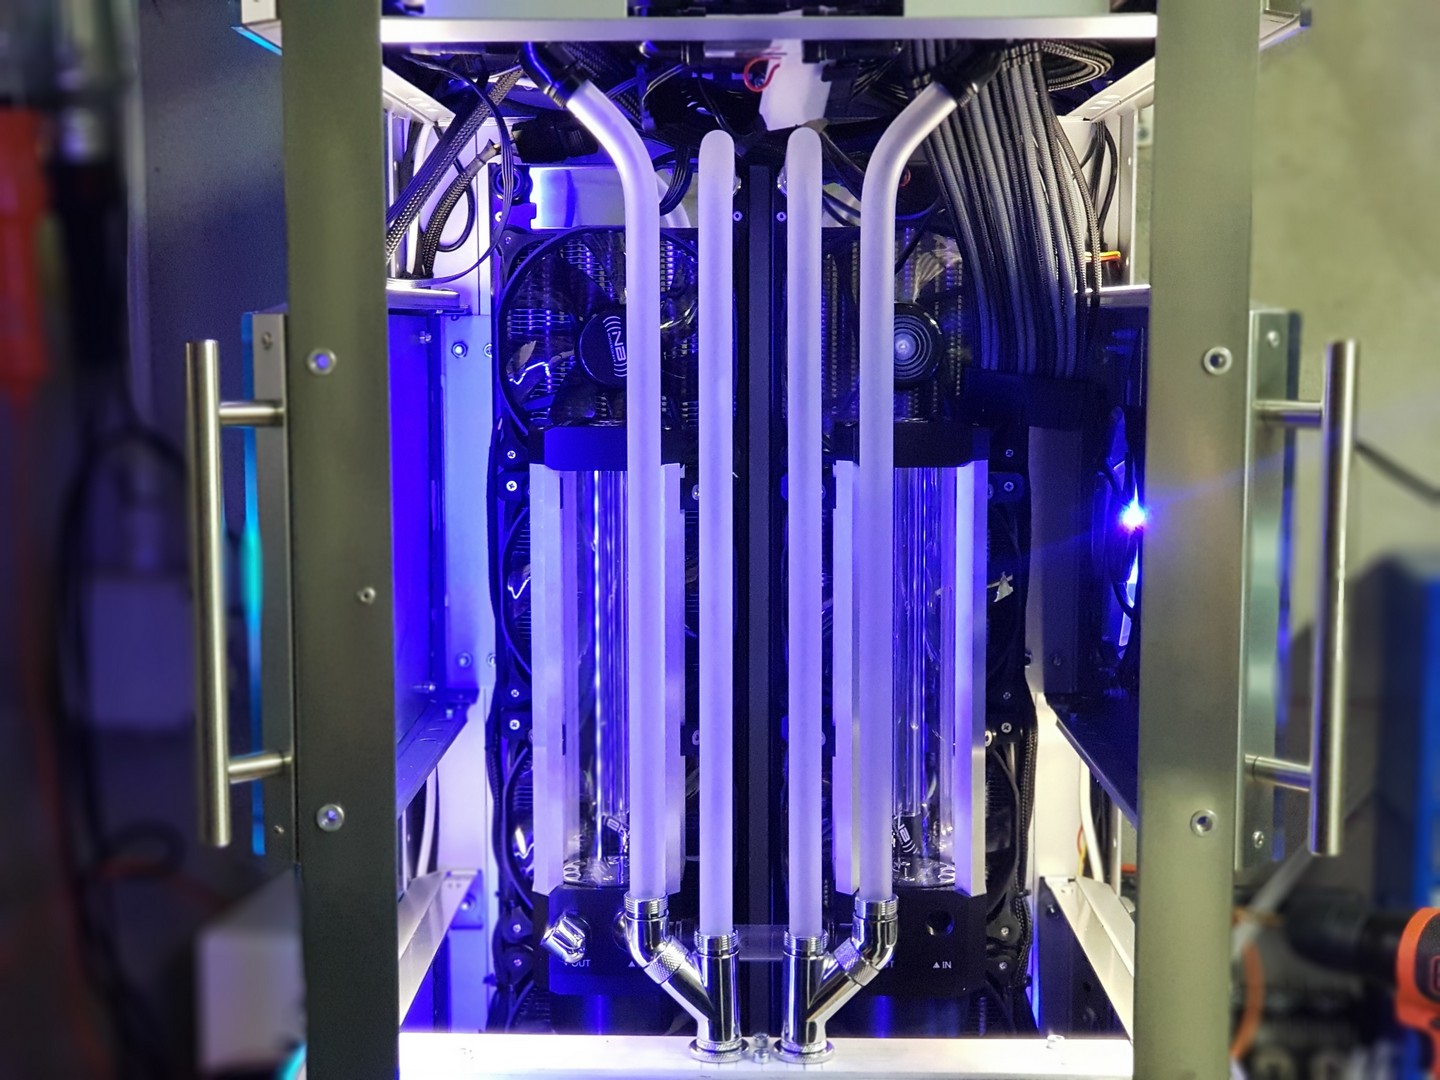
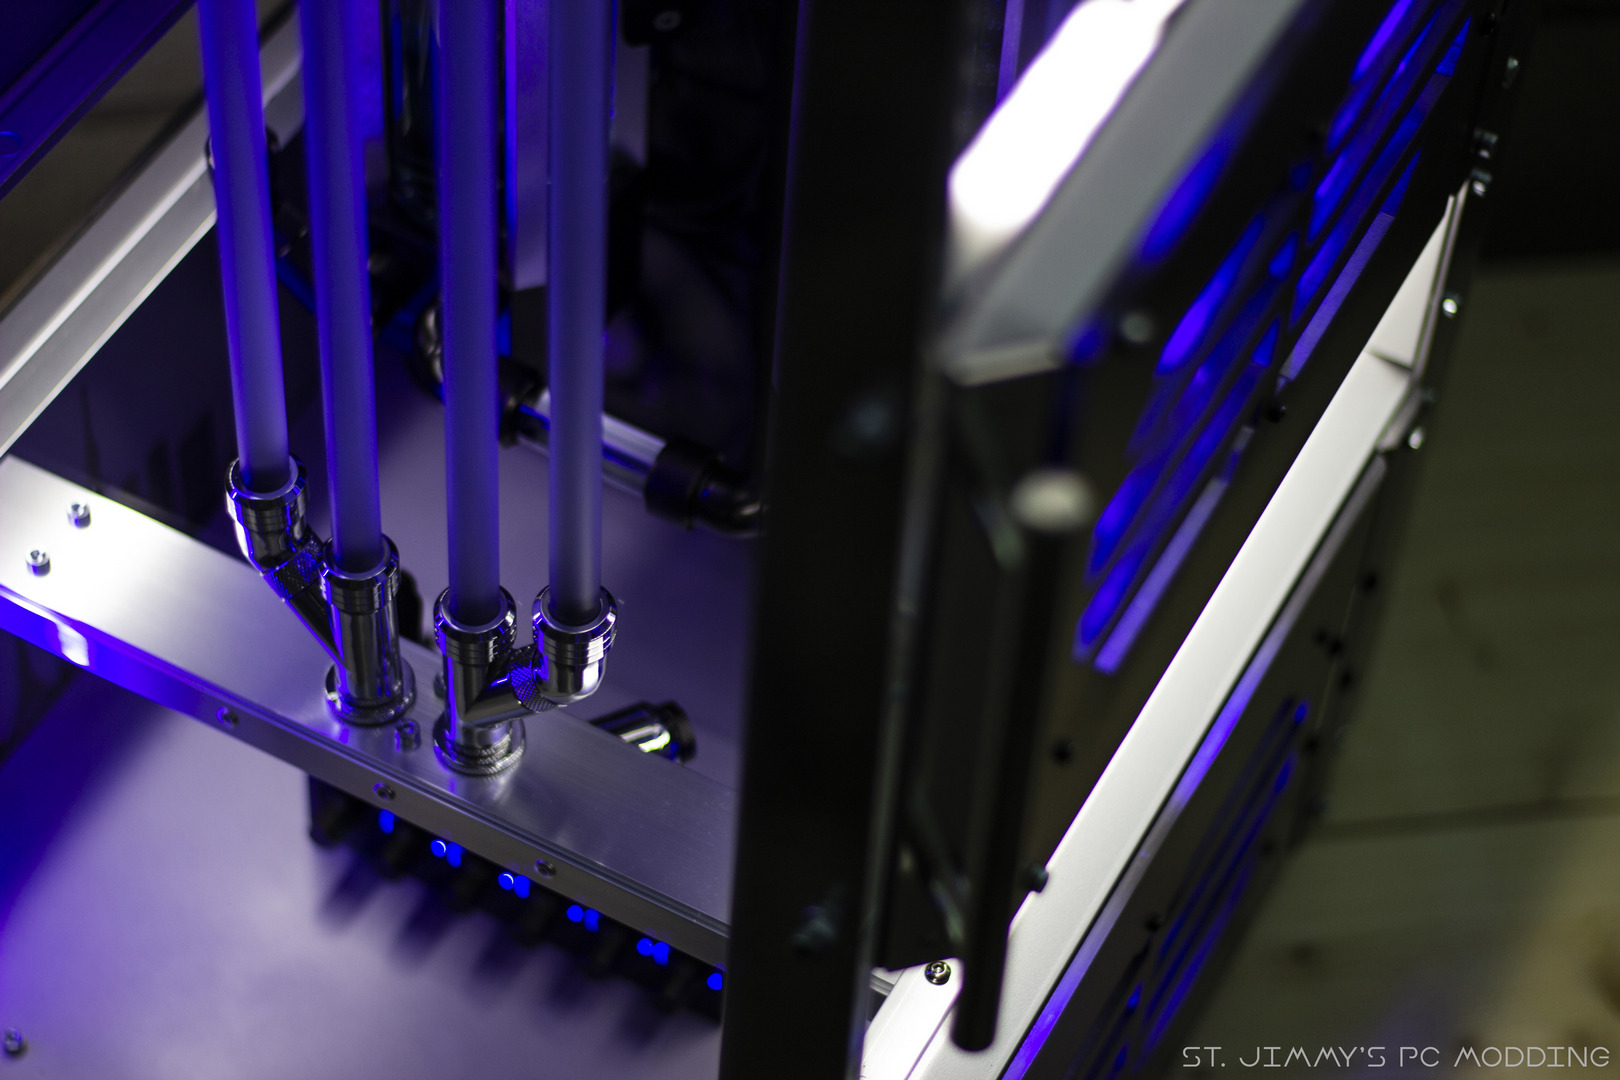
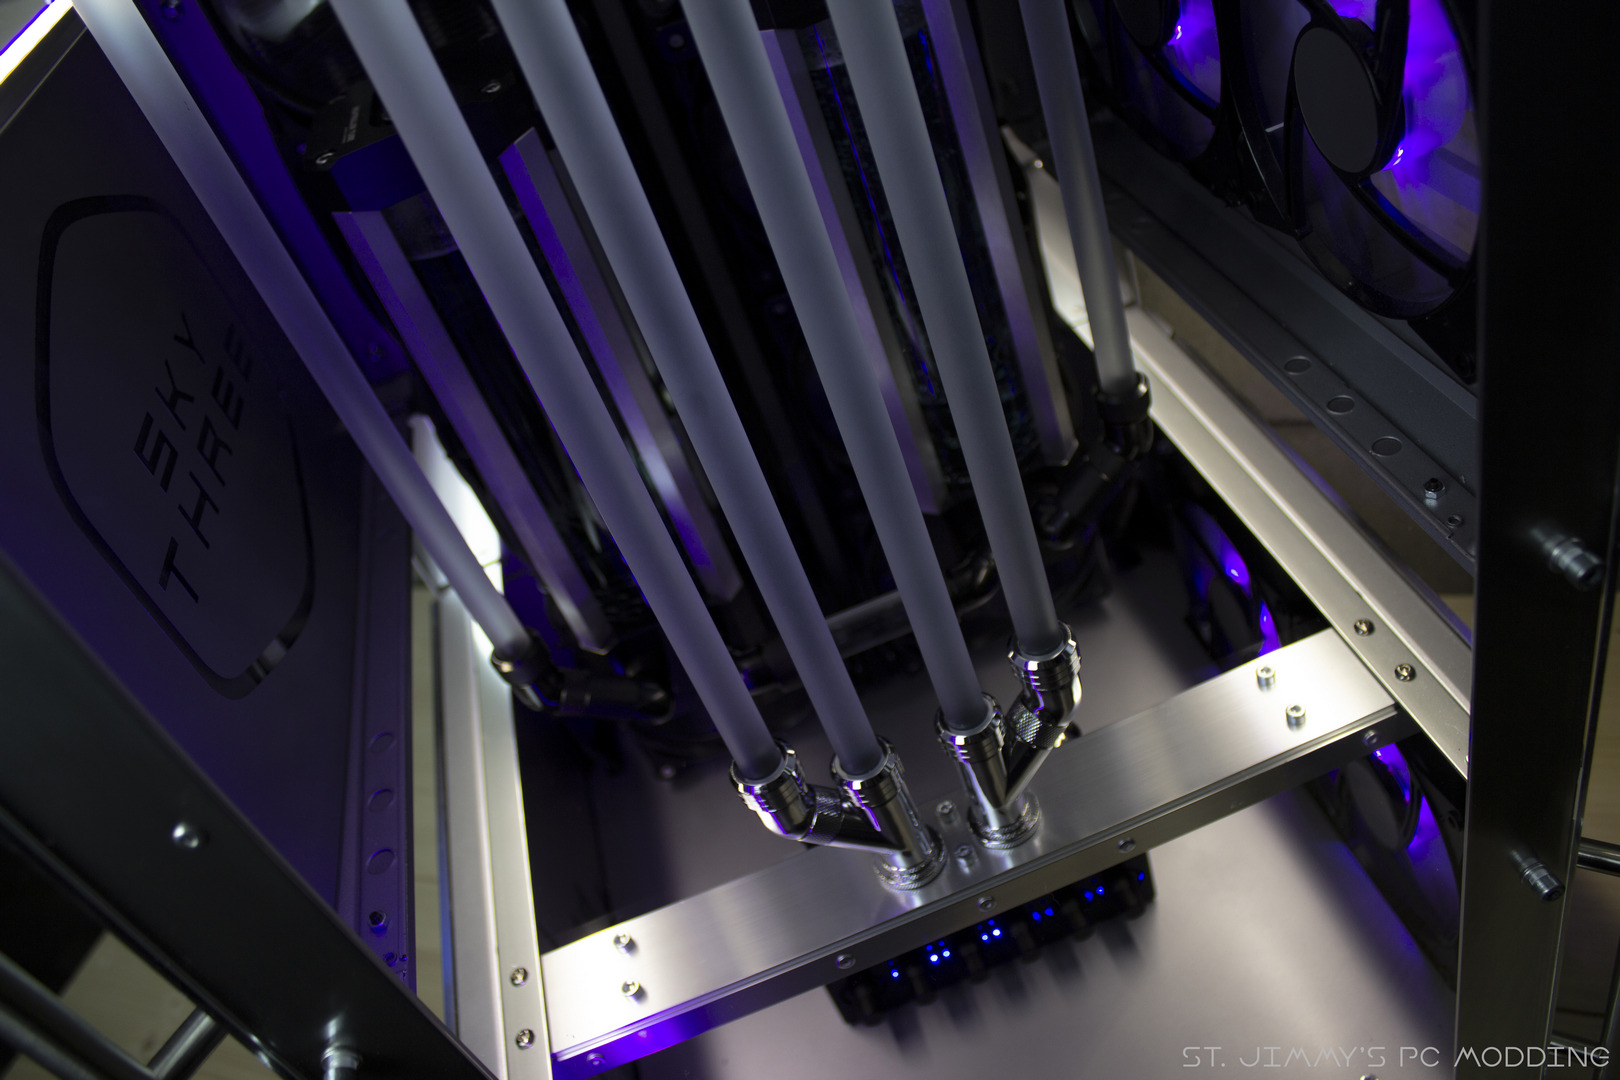
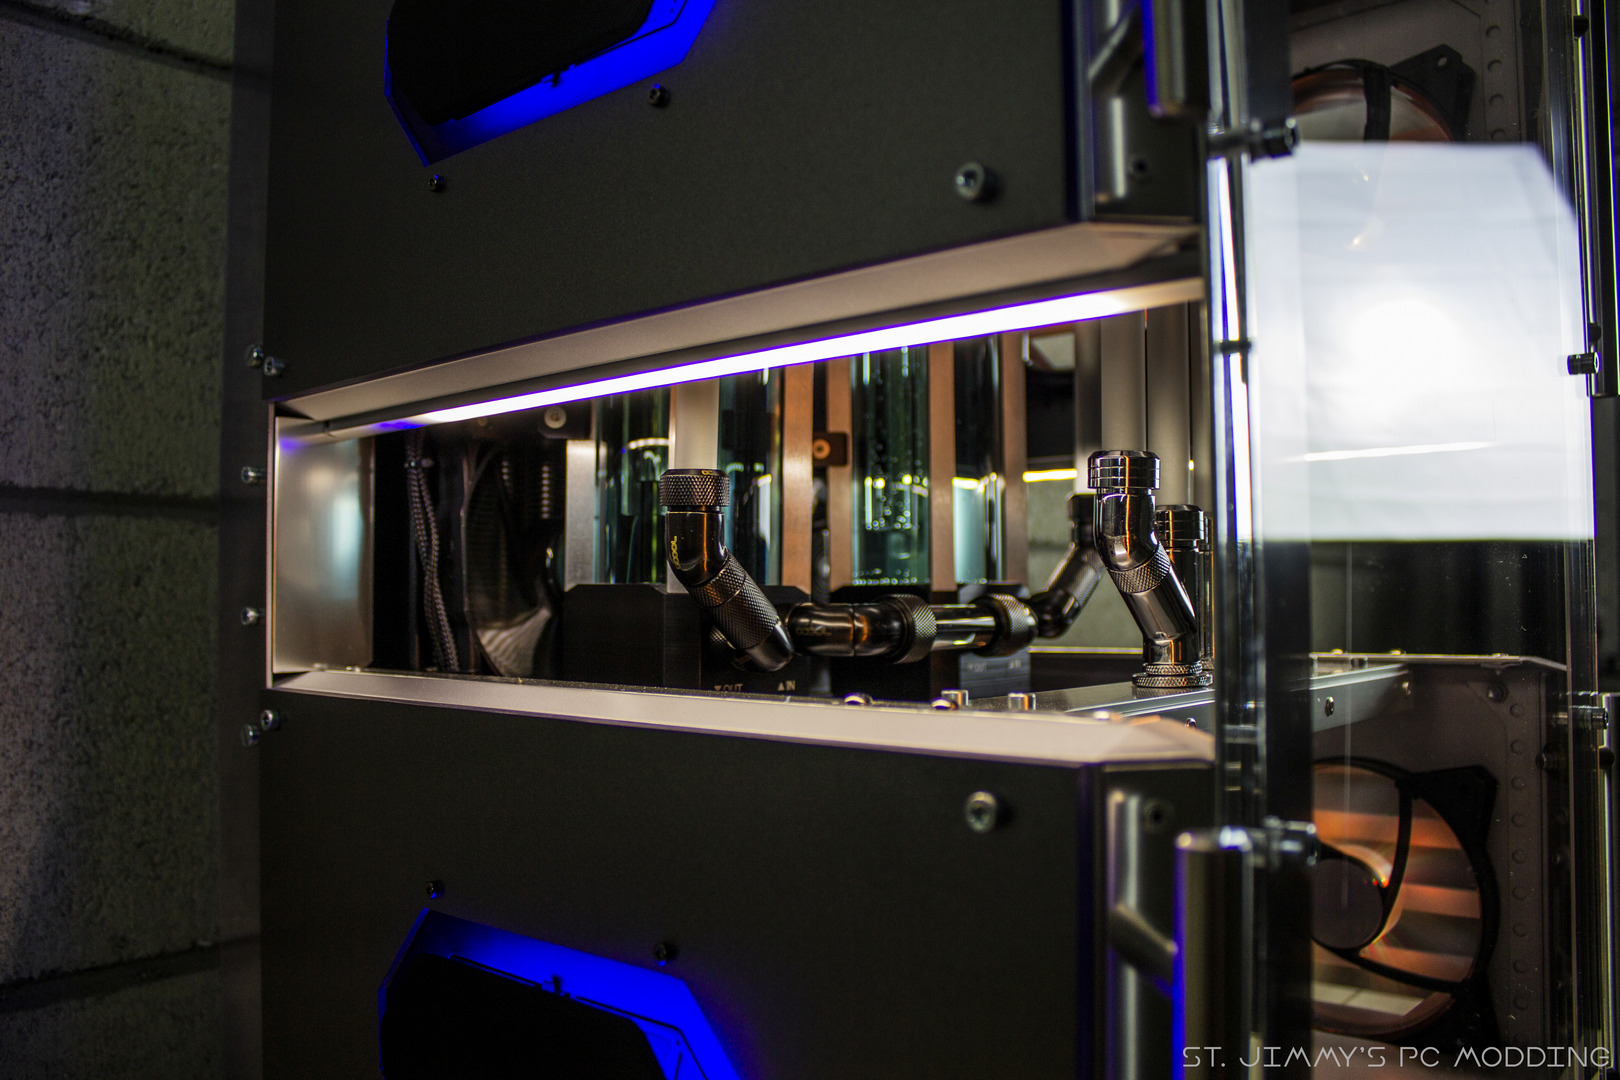
Ancora qualche pannello, e si passa finalmente ai tubi, che saranno un aspetto fondamentale di questa mod! Vedremo anche a cosa serve la piastra inferiore che abbiamo visto prima.
[ENG]
Still some panels, then we can finally move on the tubing, which will be a main feature for this mod! We’ll see what that lower plate we’ve seen before does as well.

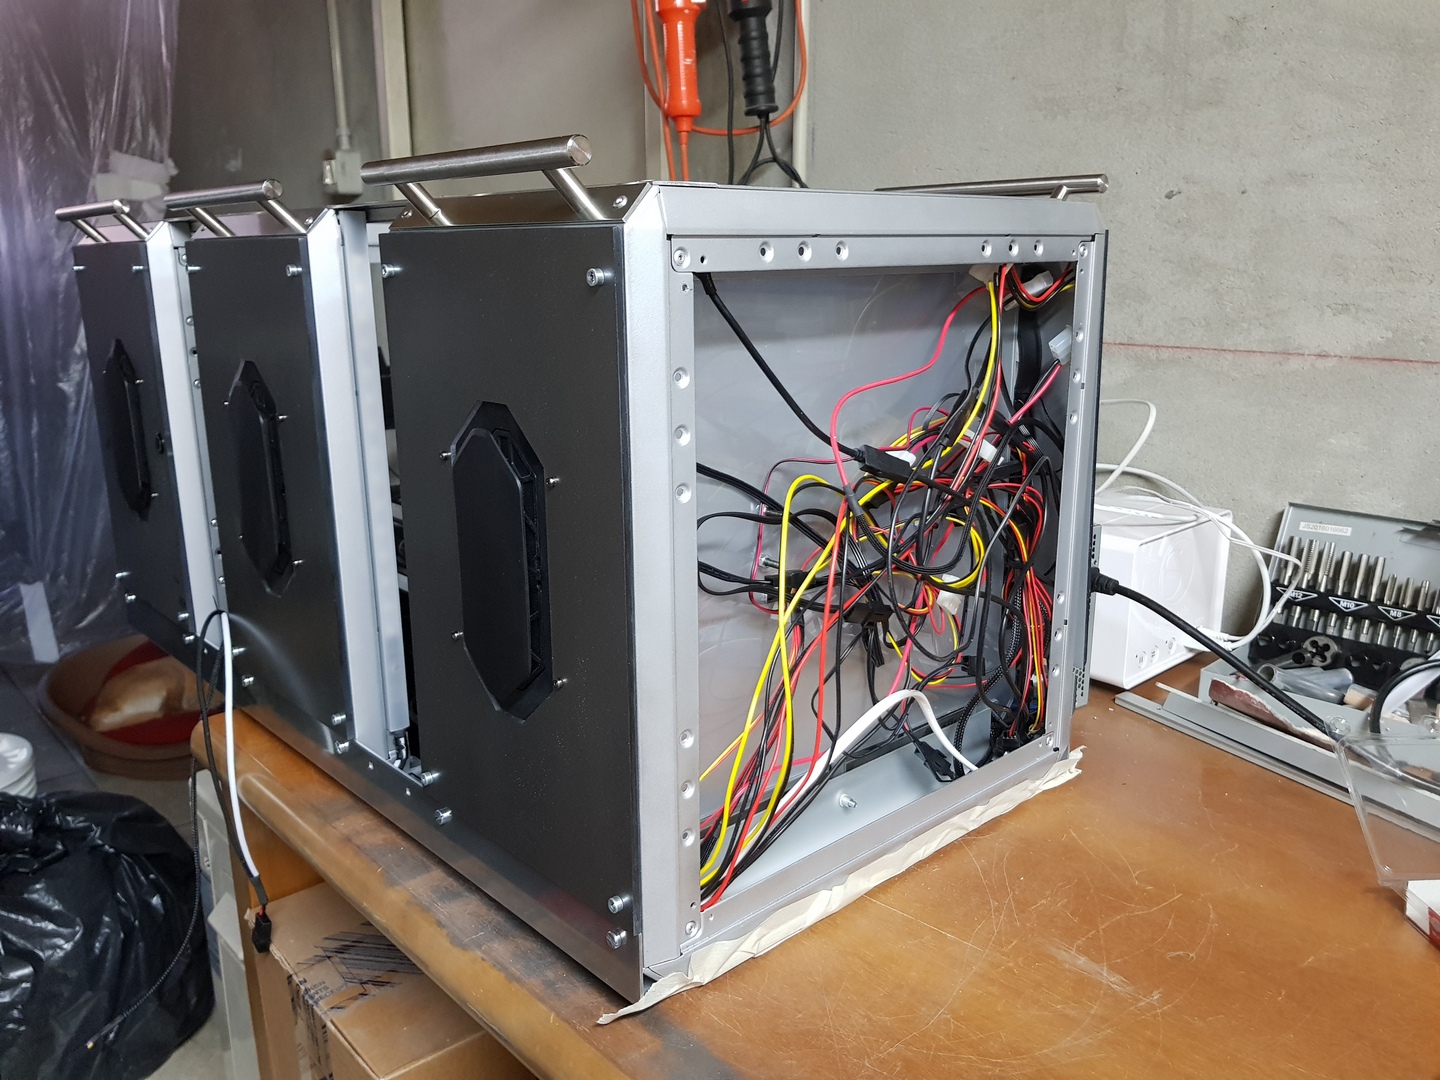
Seconda parte di cable management, quello tradizionale! Montate anche le cover tra i case.
[ENG]
Second part of the cable management, the traditional one! Also mounted the covers between the cases.
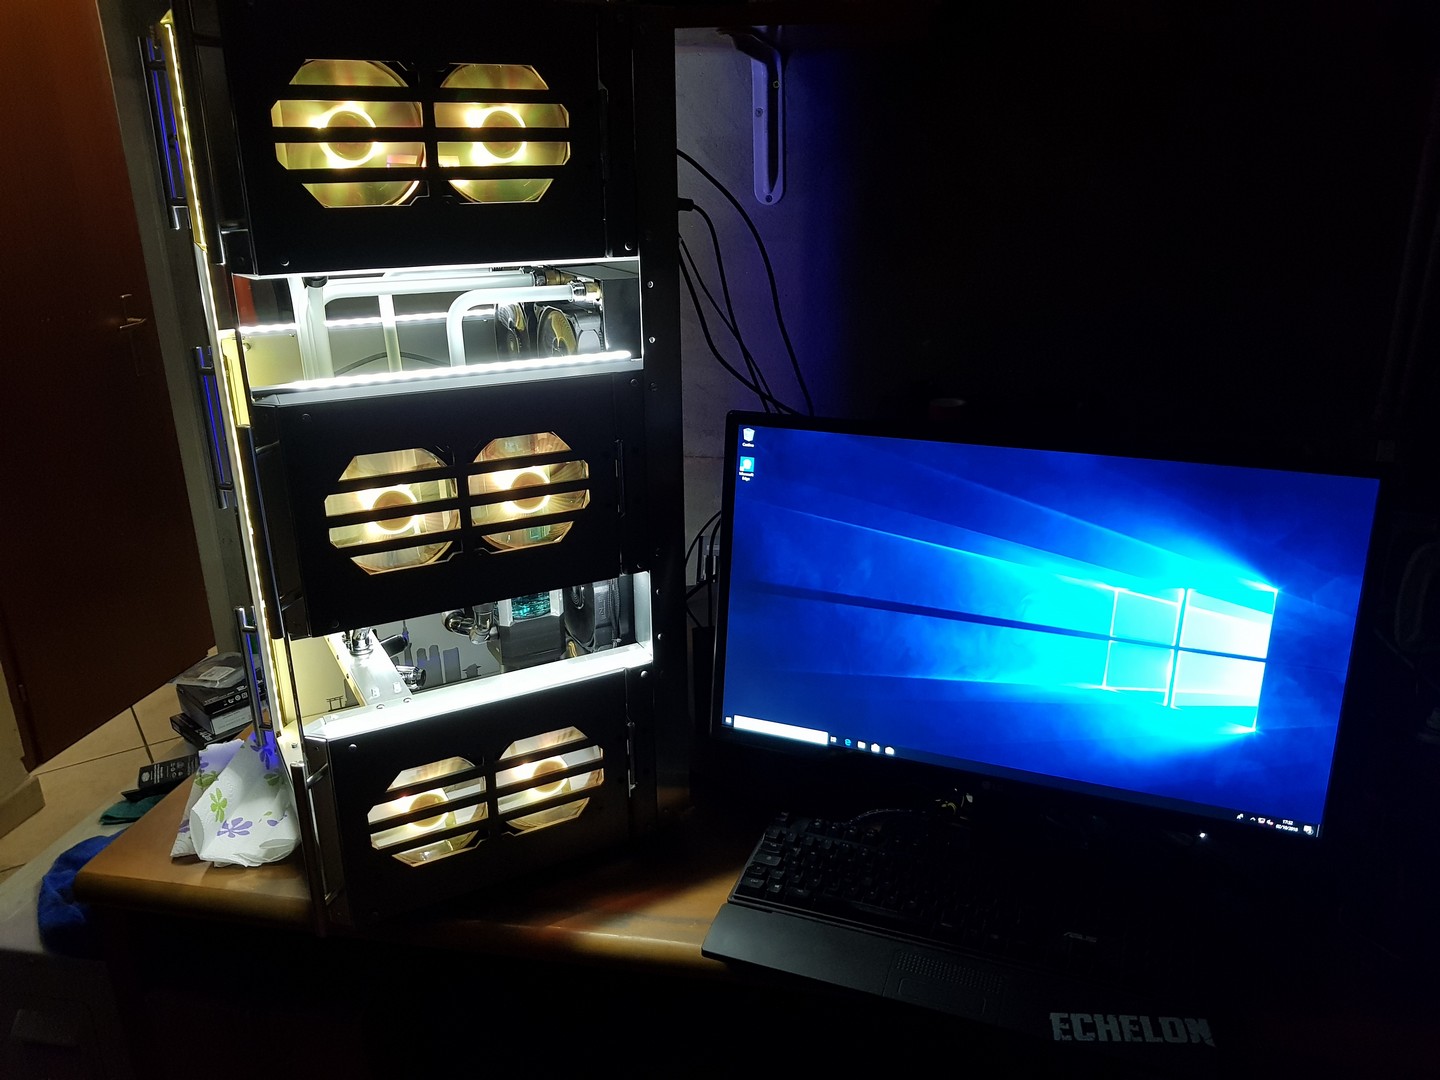
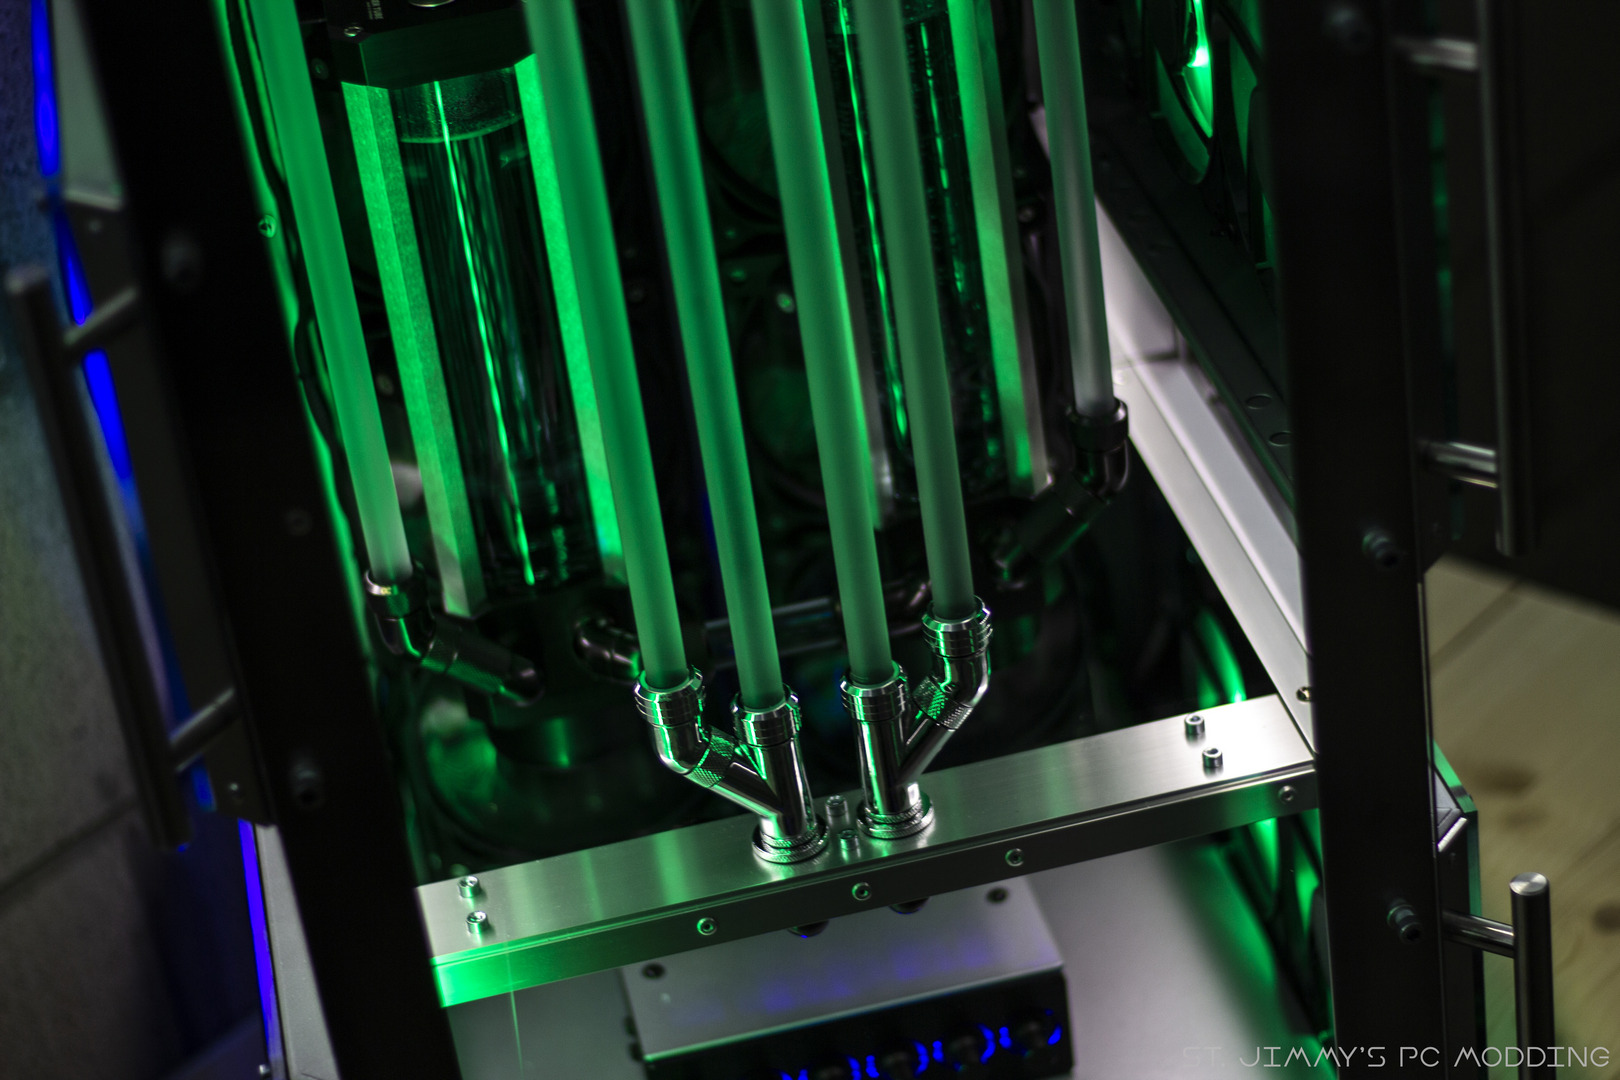
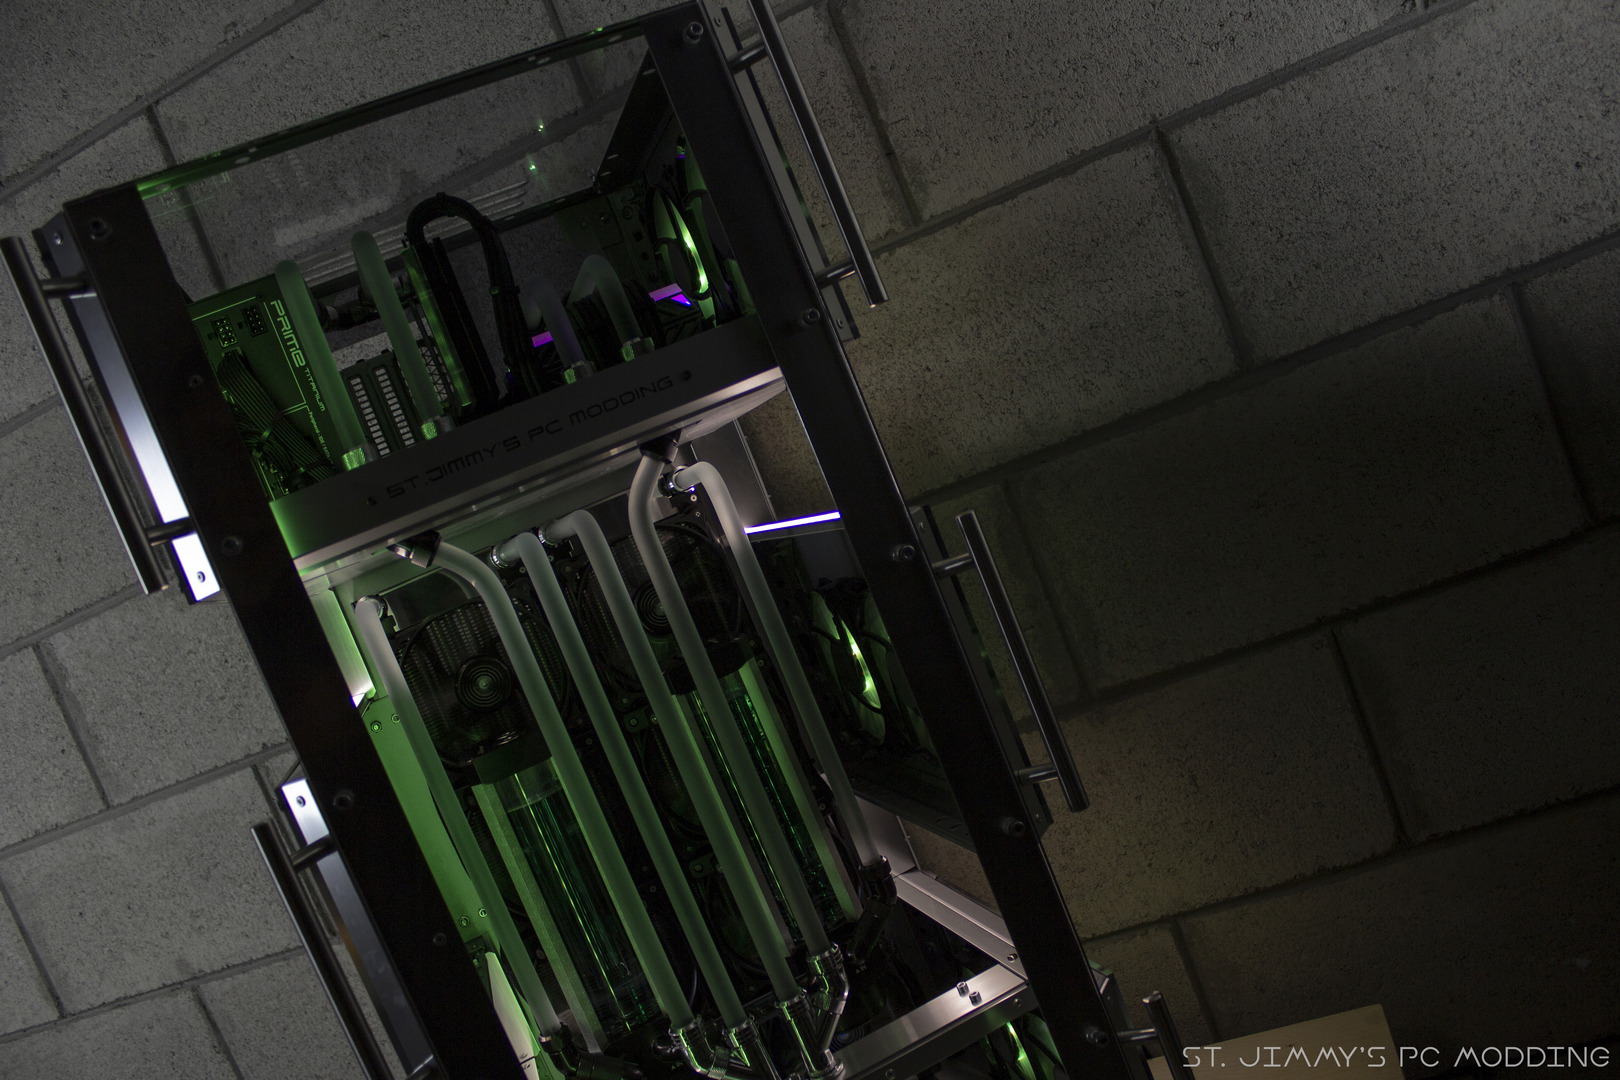
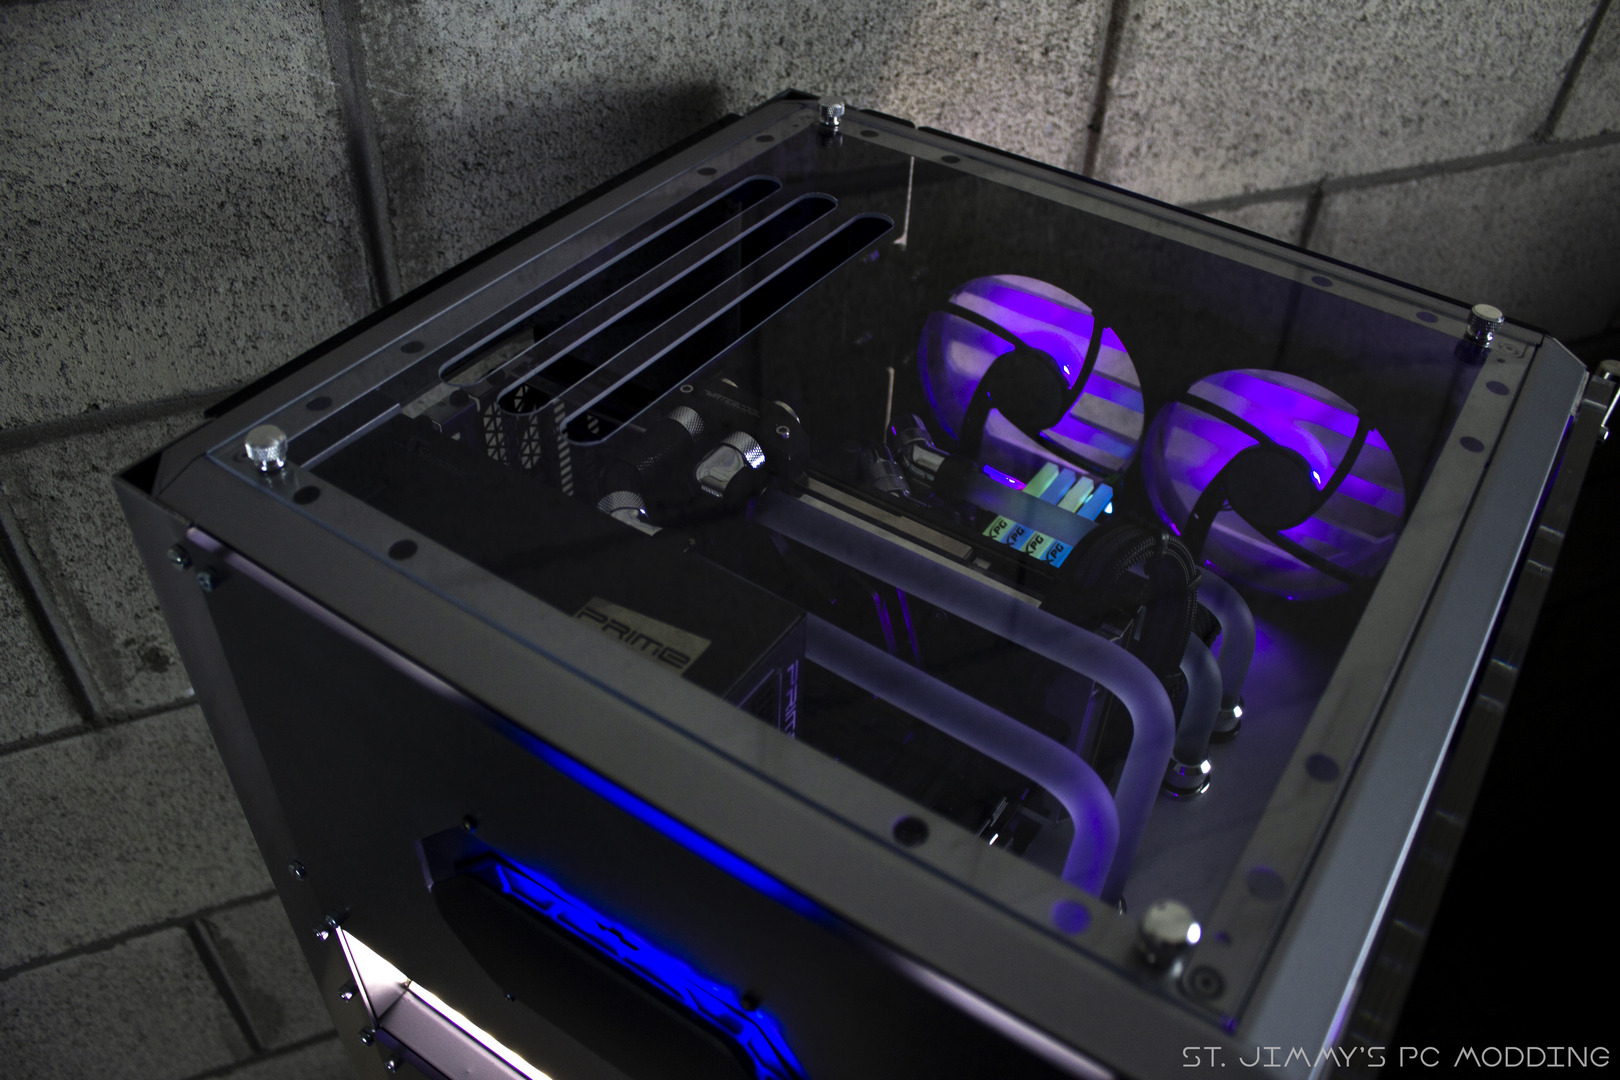
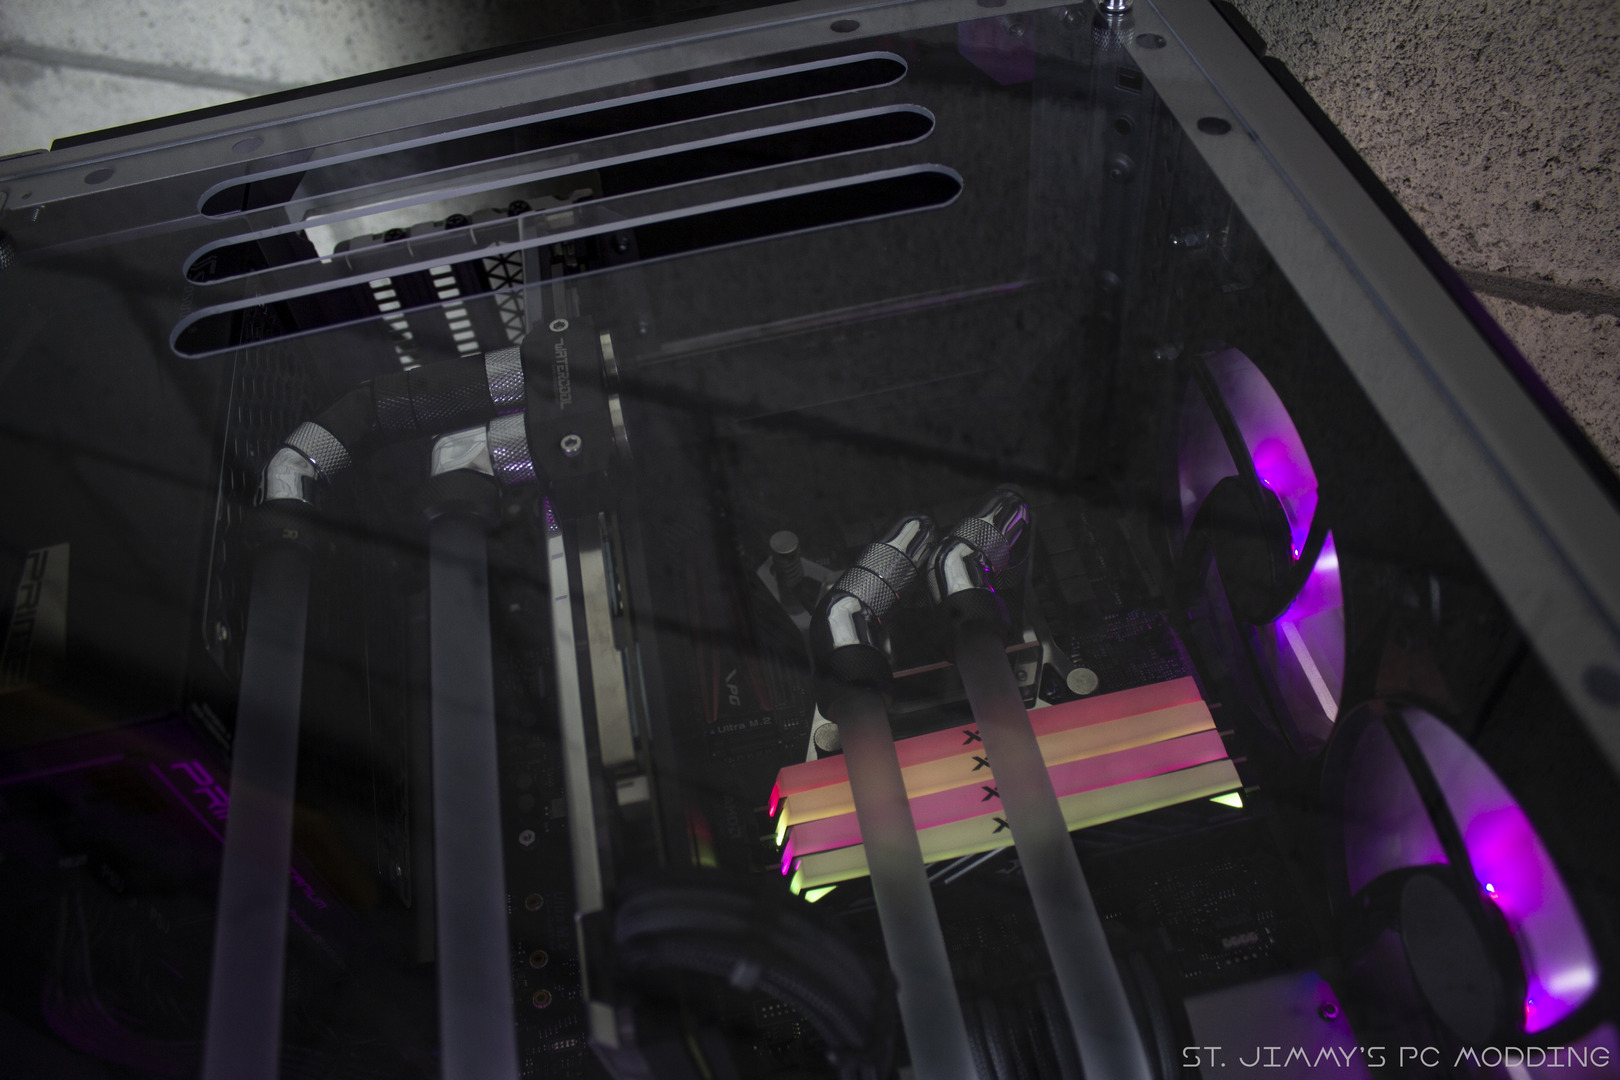
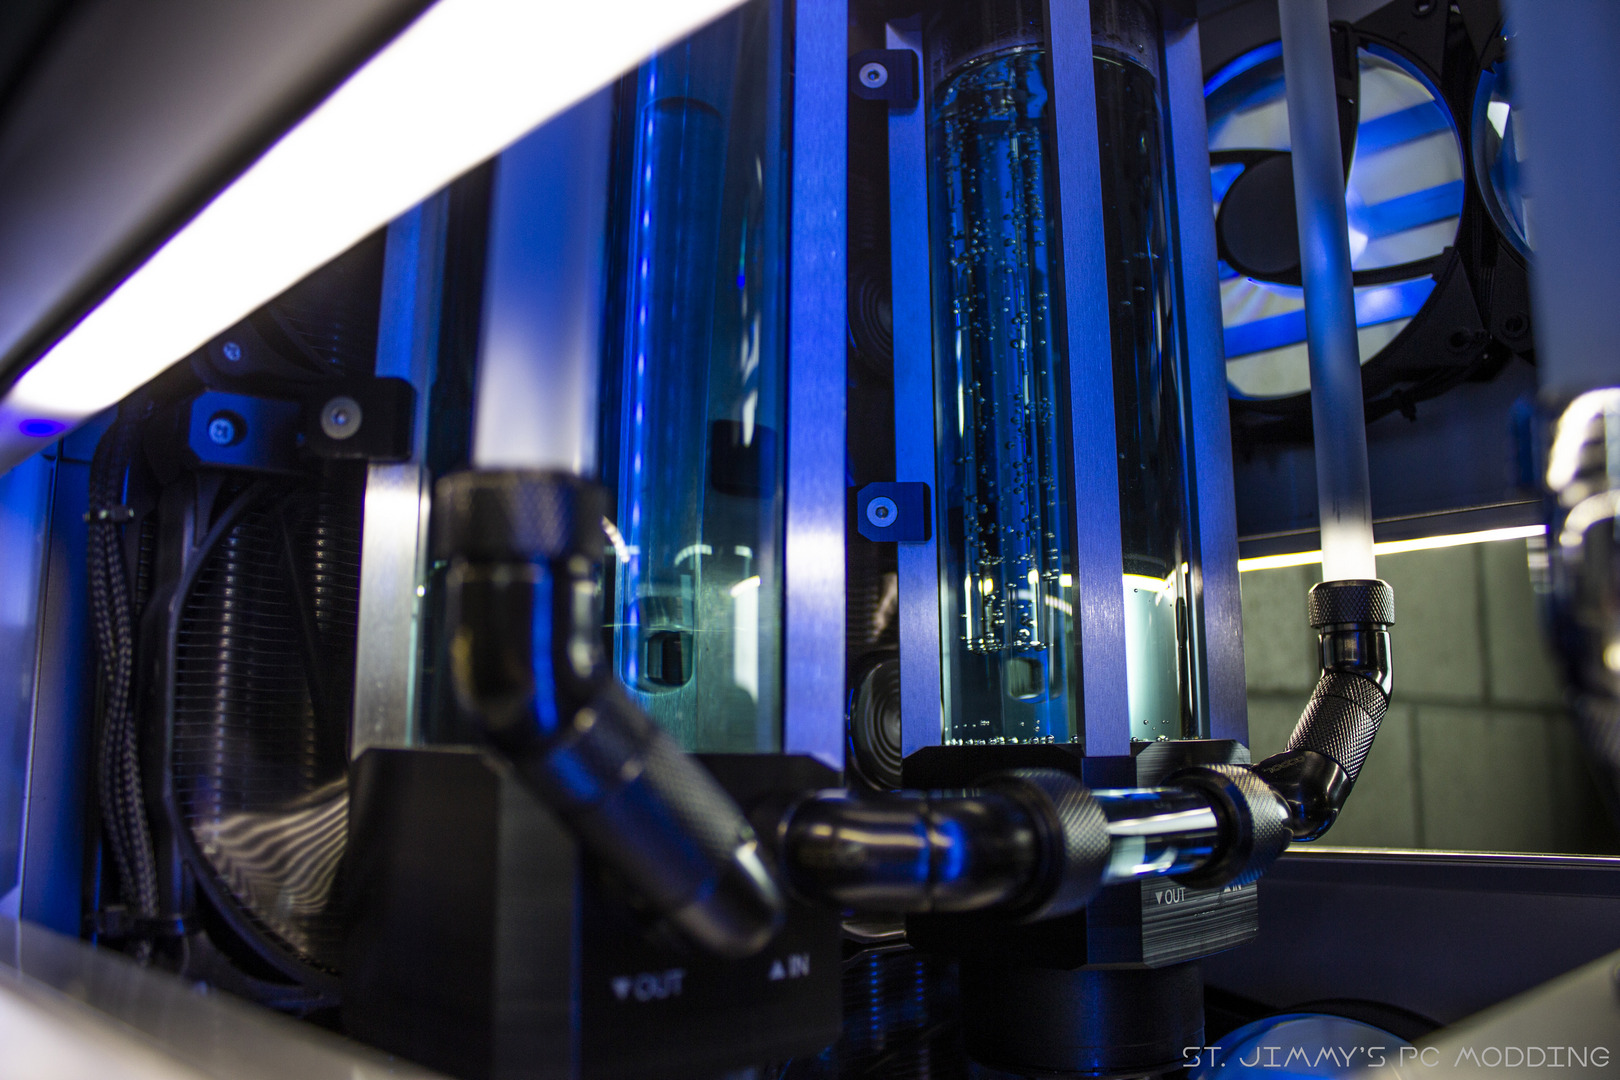
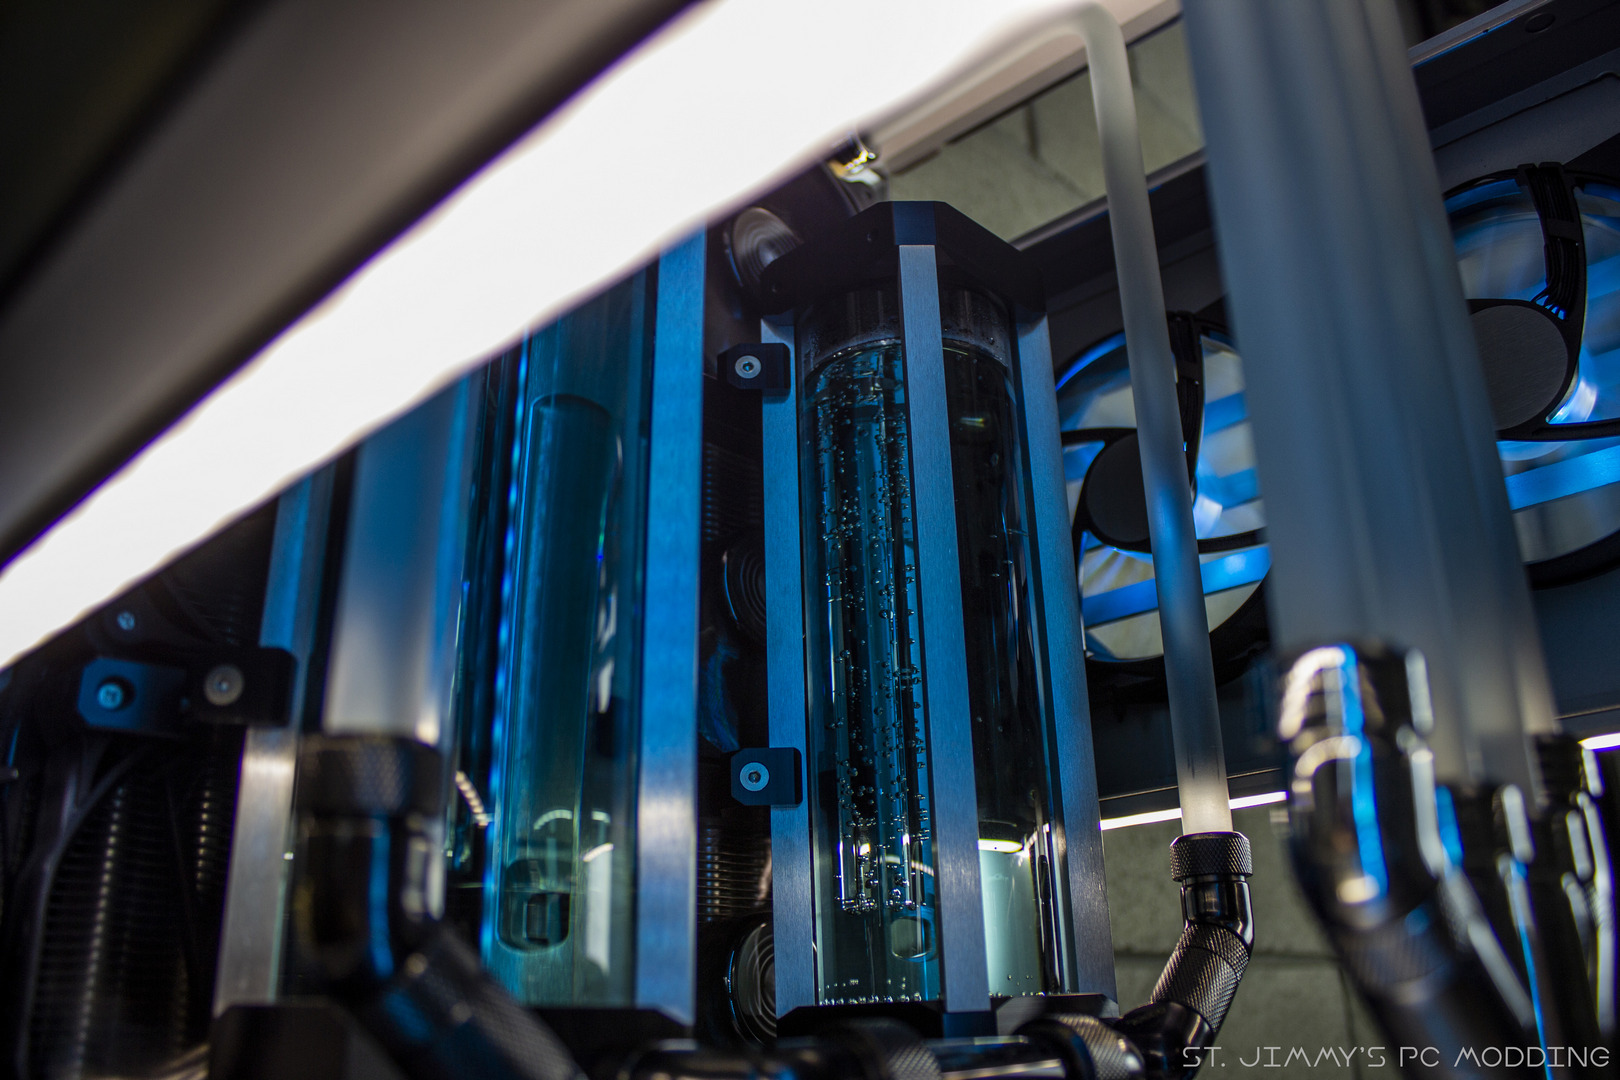
Impianto a liquido riempito e sistema operativo installato. Tutto funzionante e pronto per lo shooting finale!
[ENG]
Custom loop filled and operating system installed. All working and ready for the final shooting!
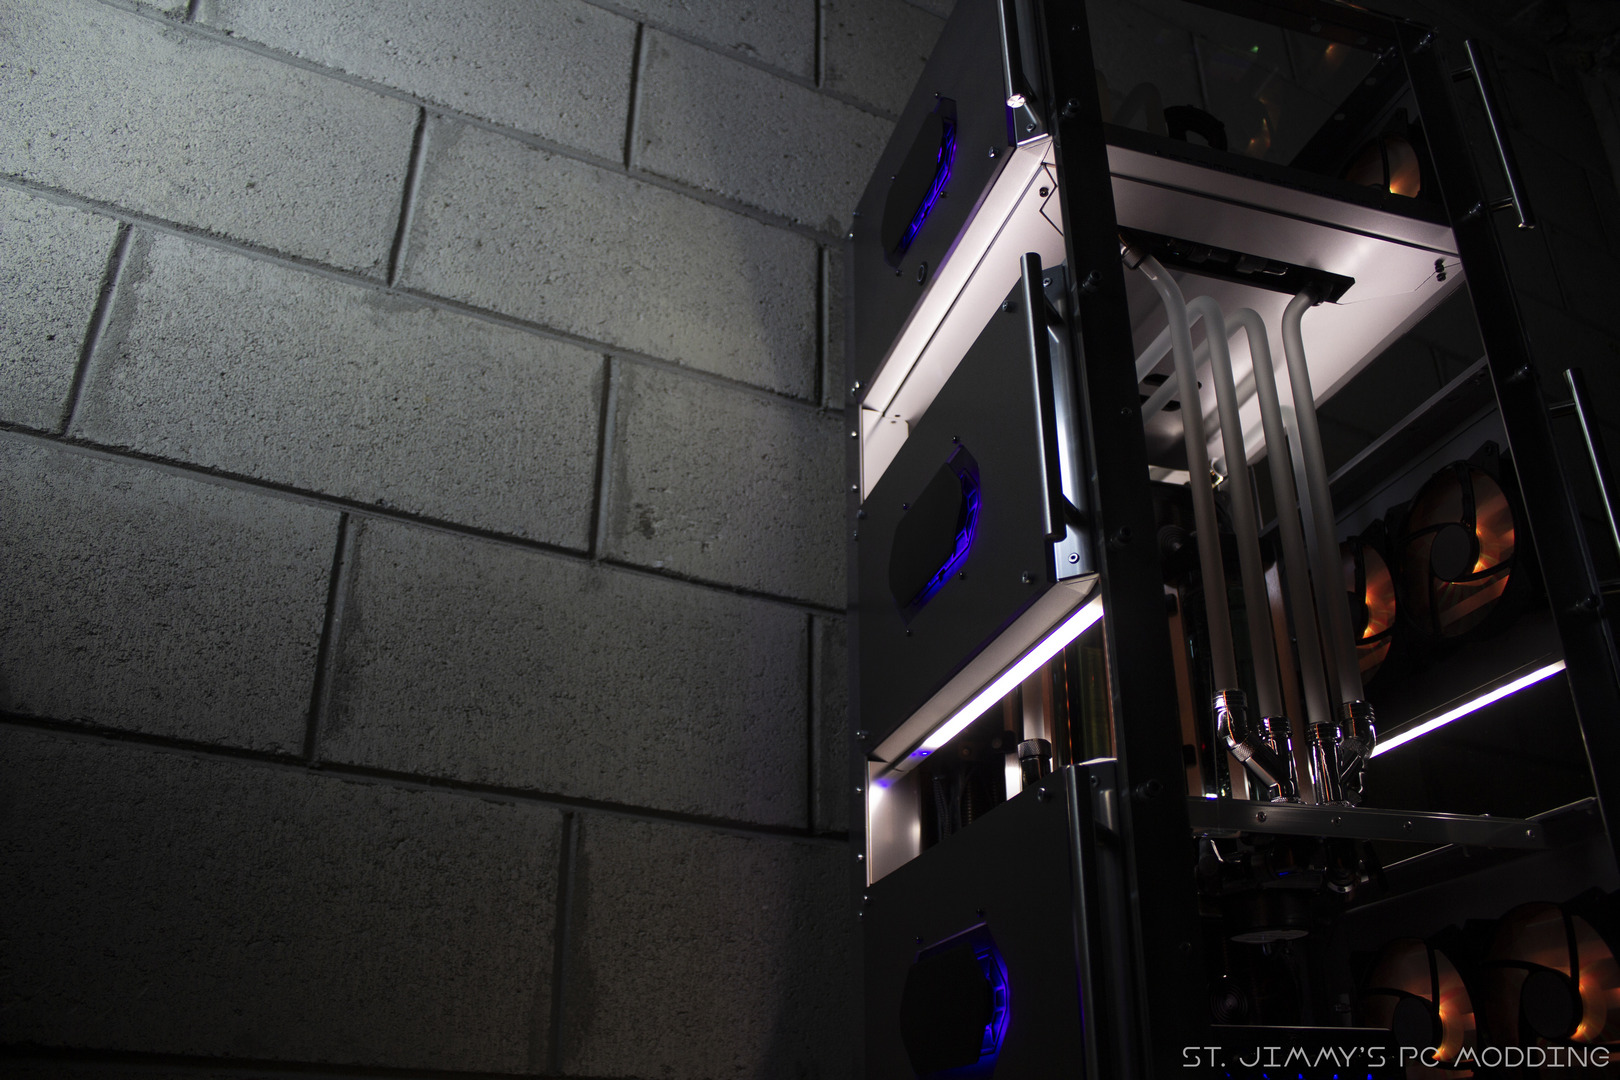
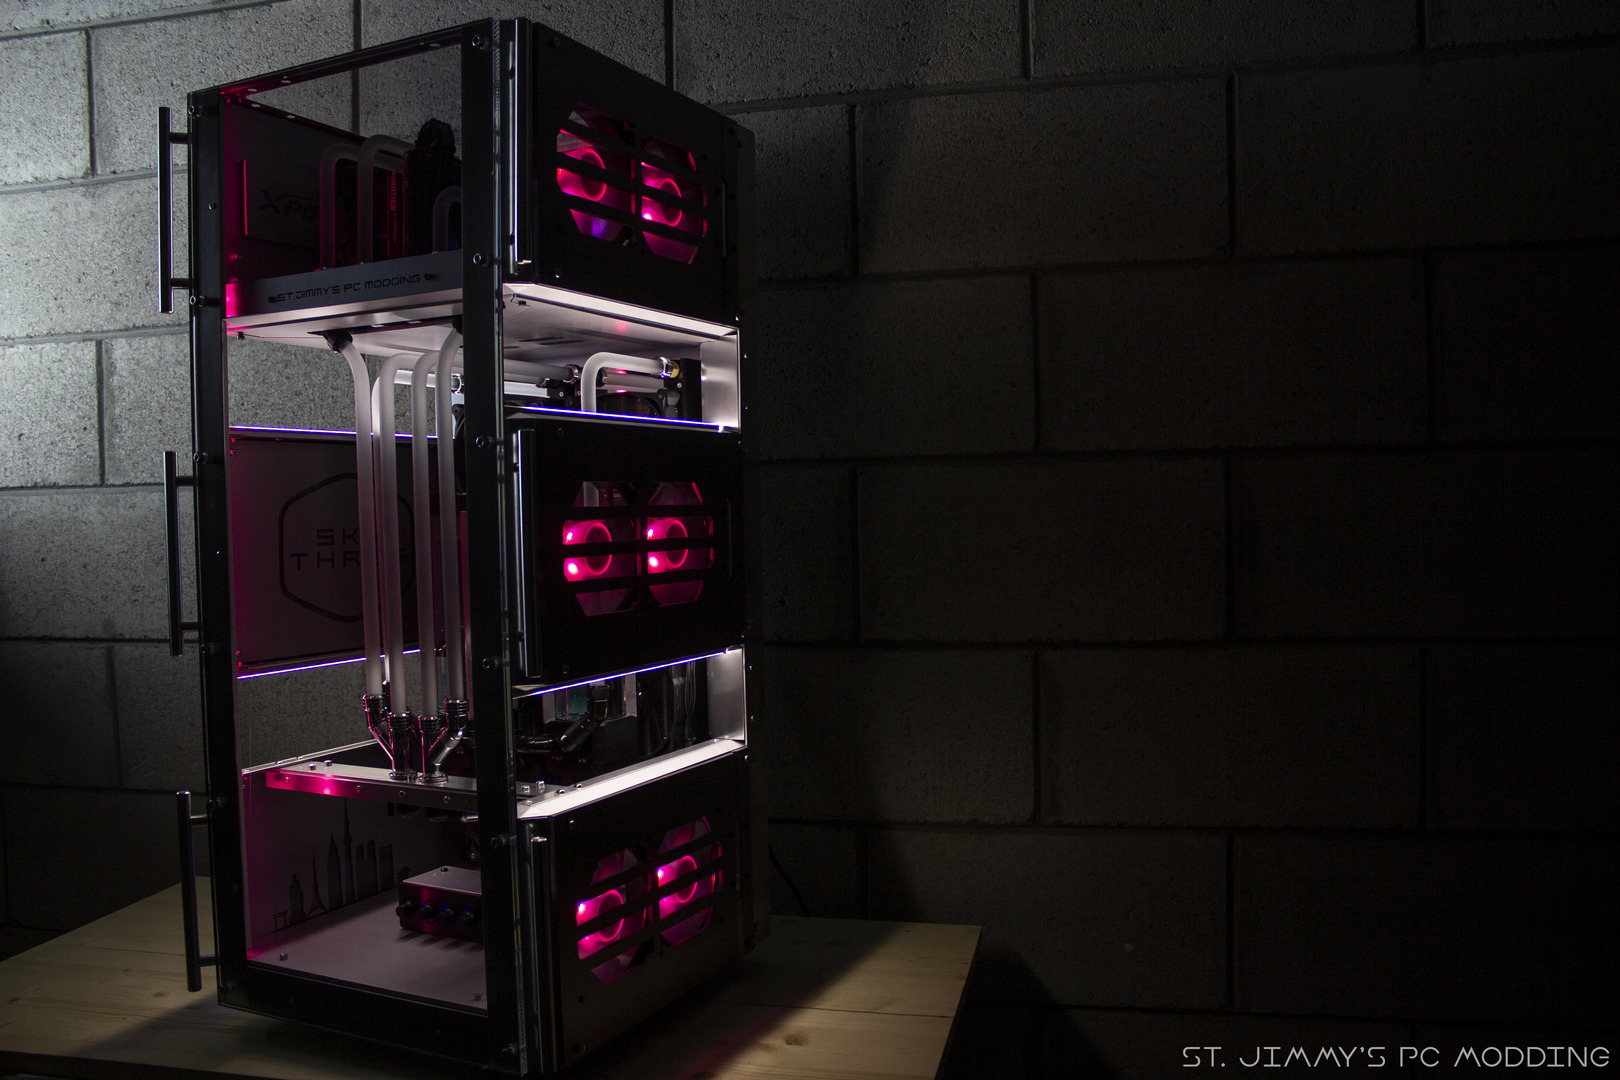
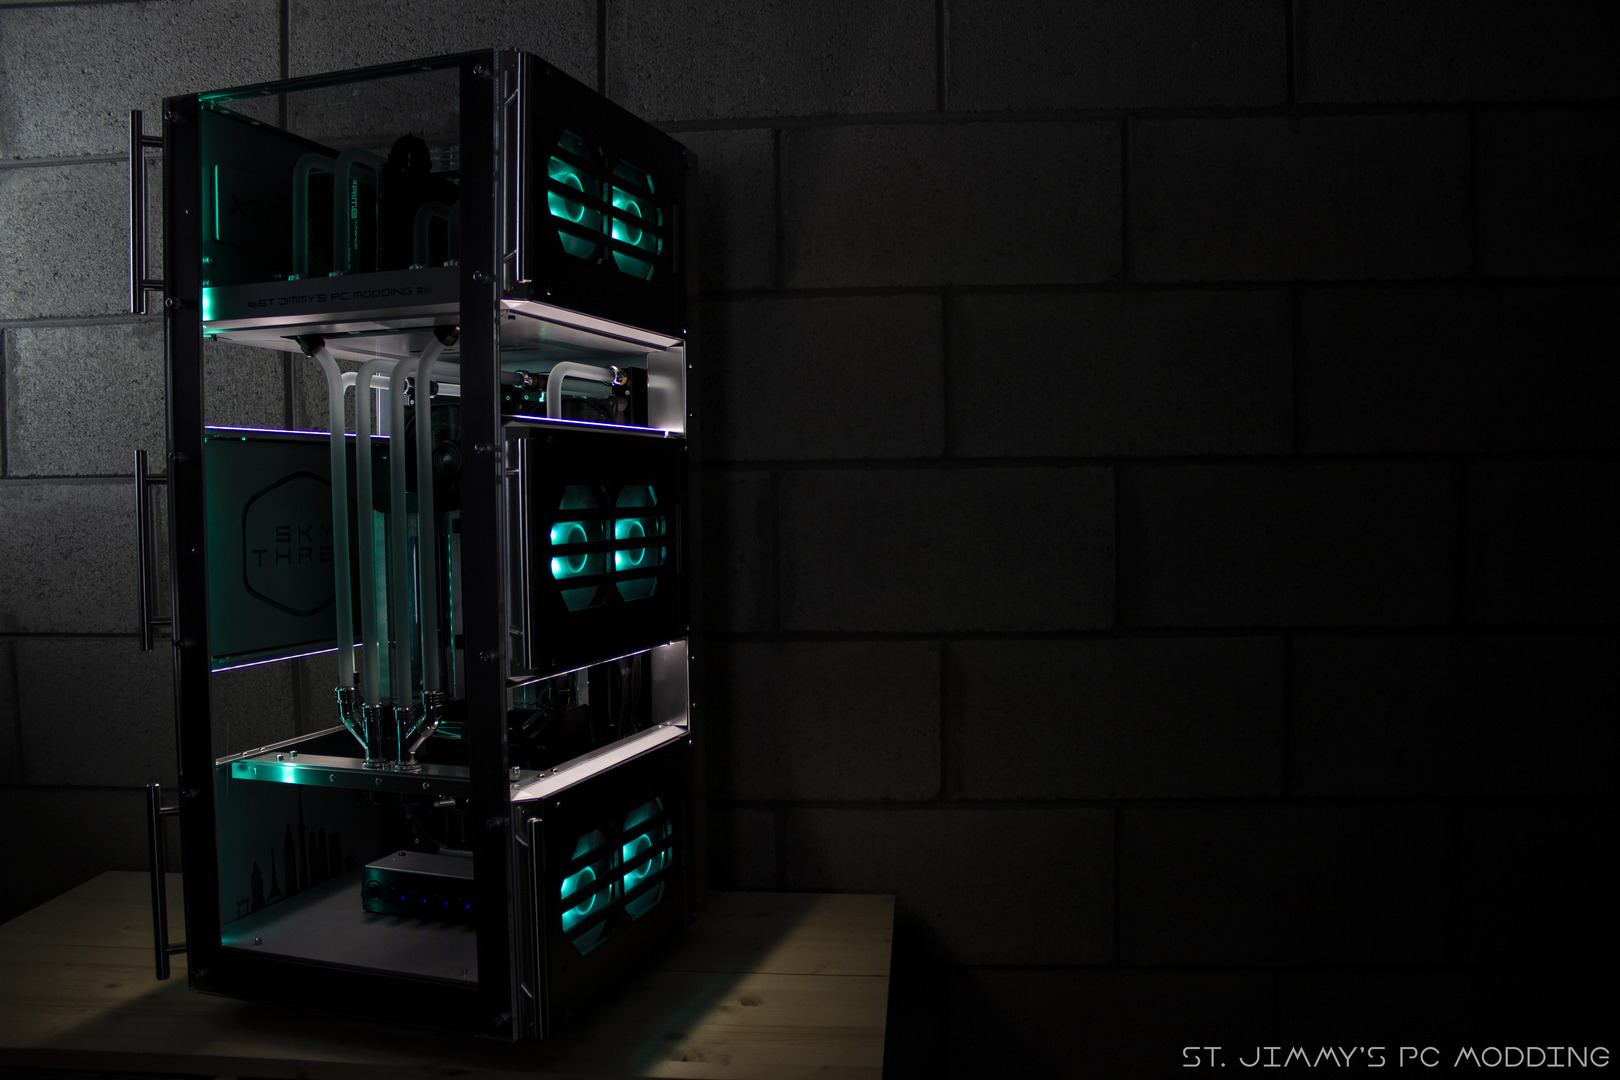
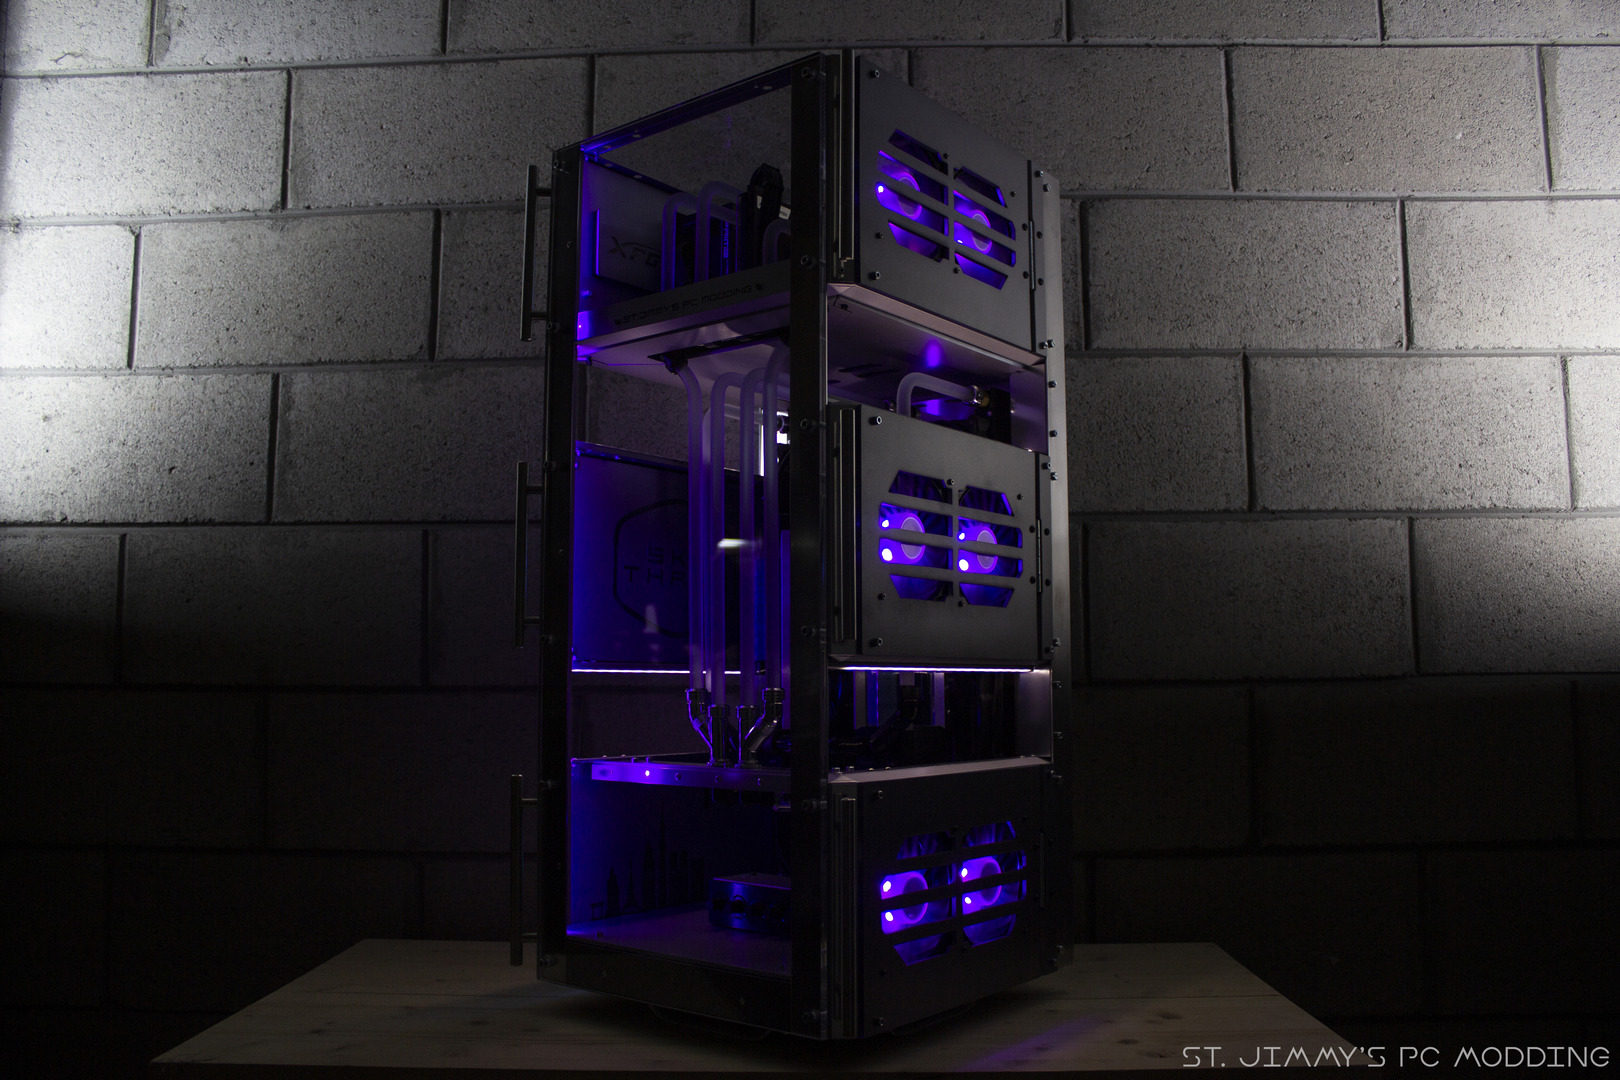
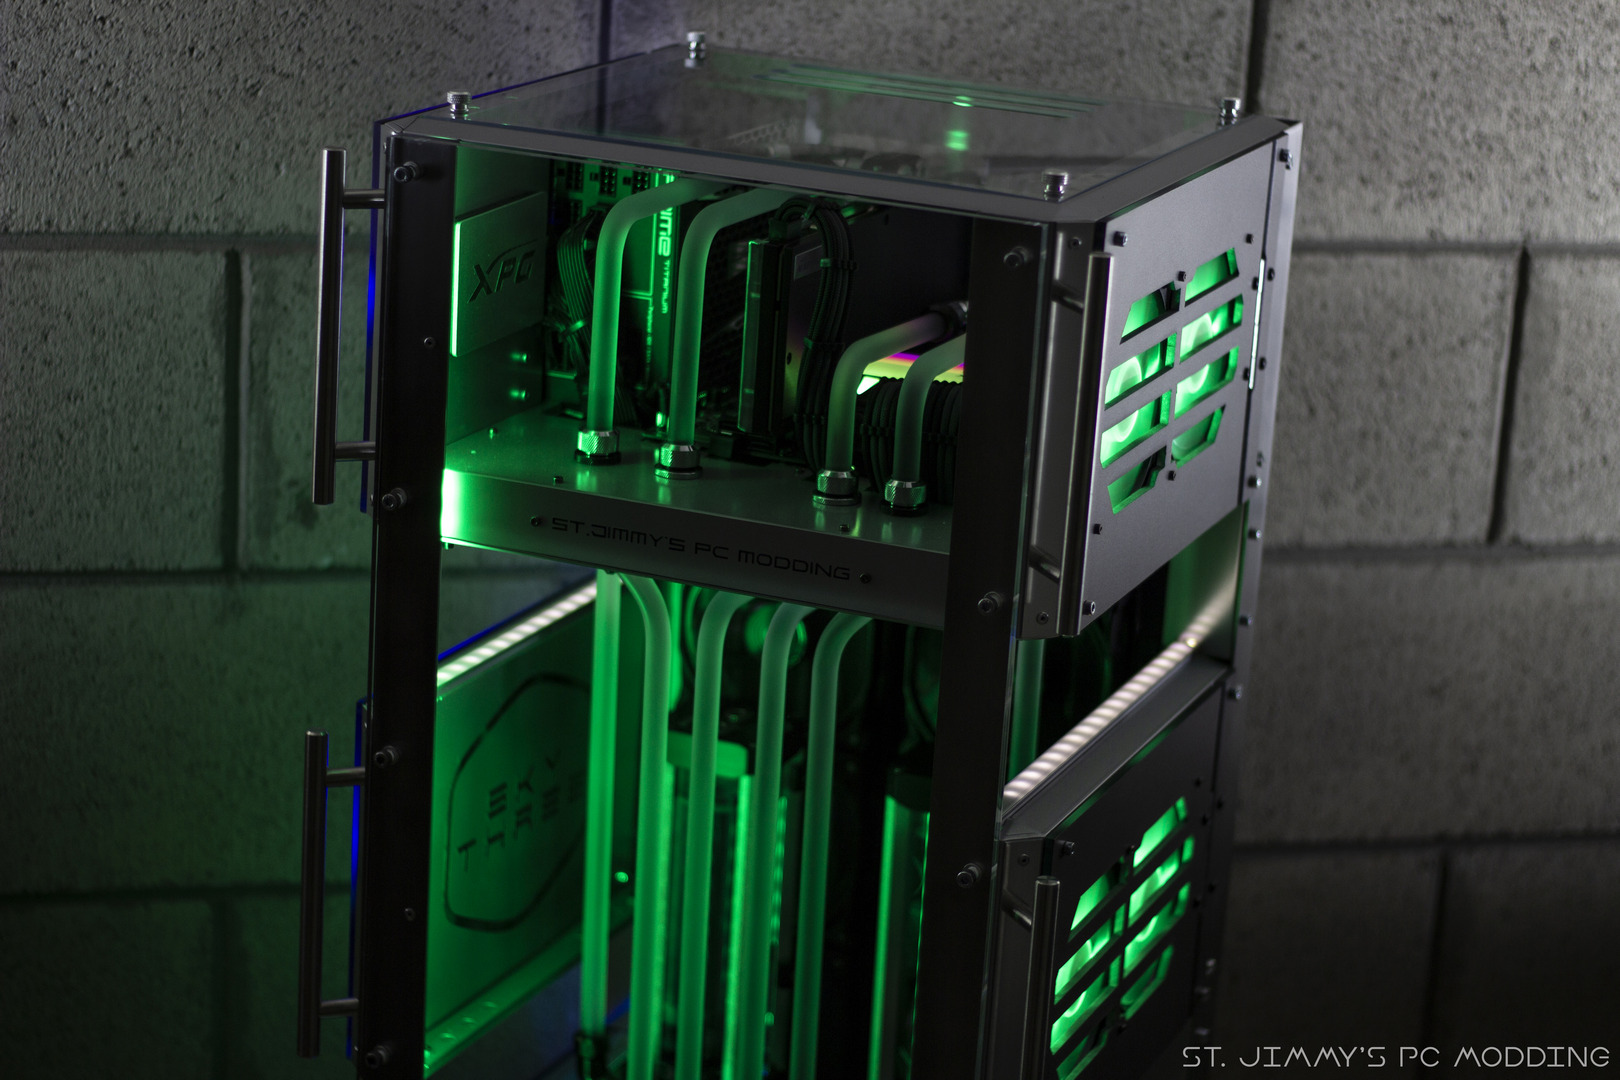
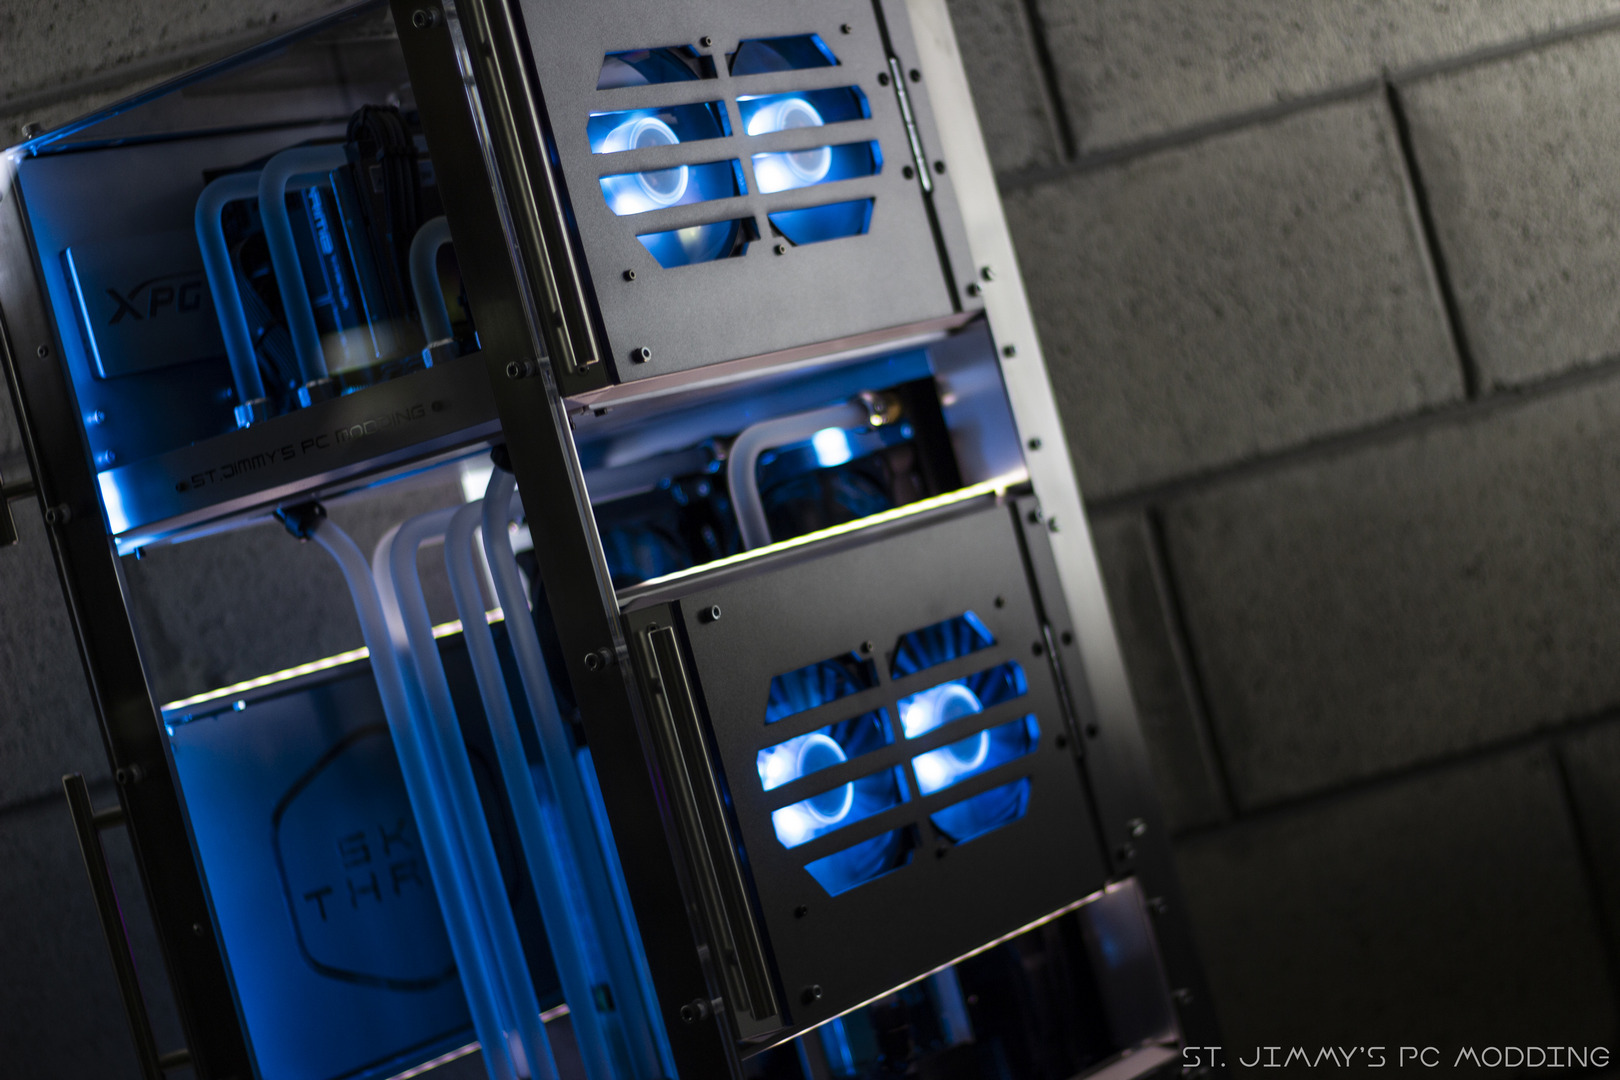
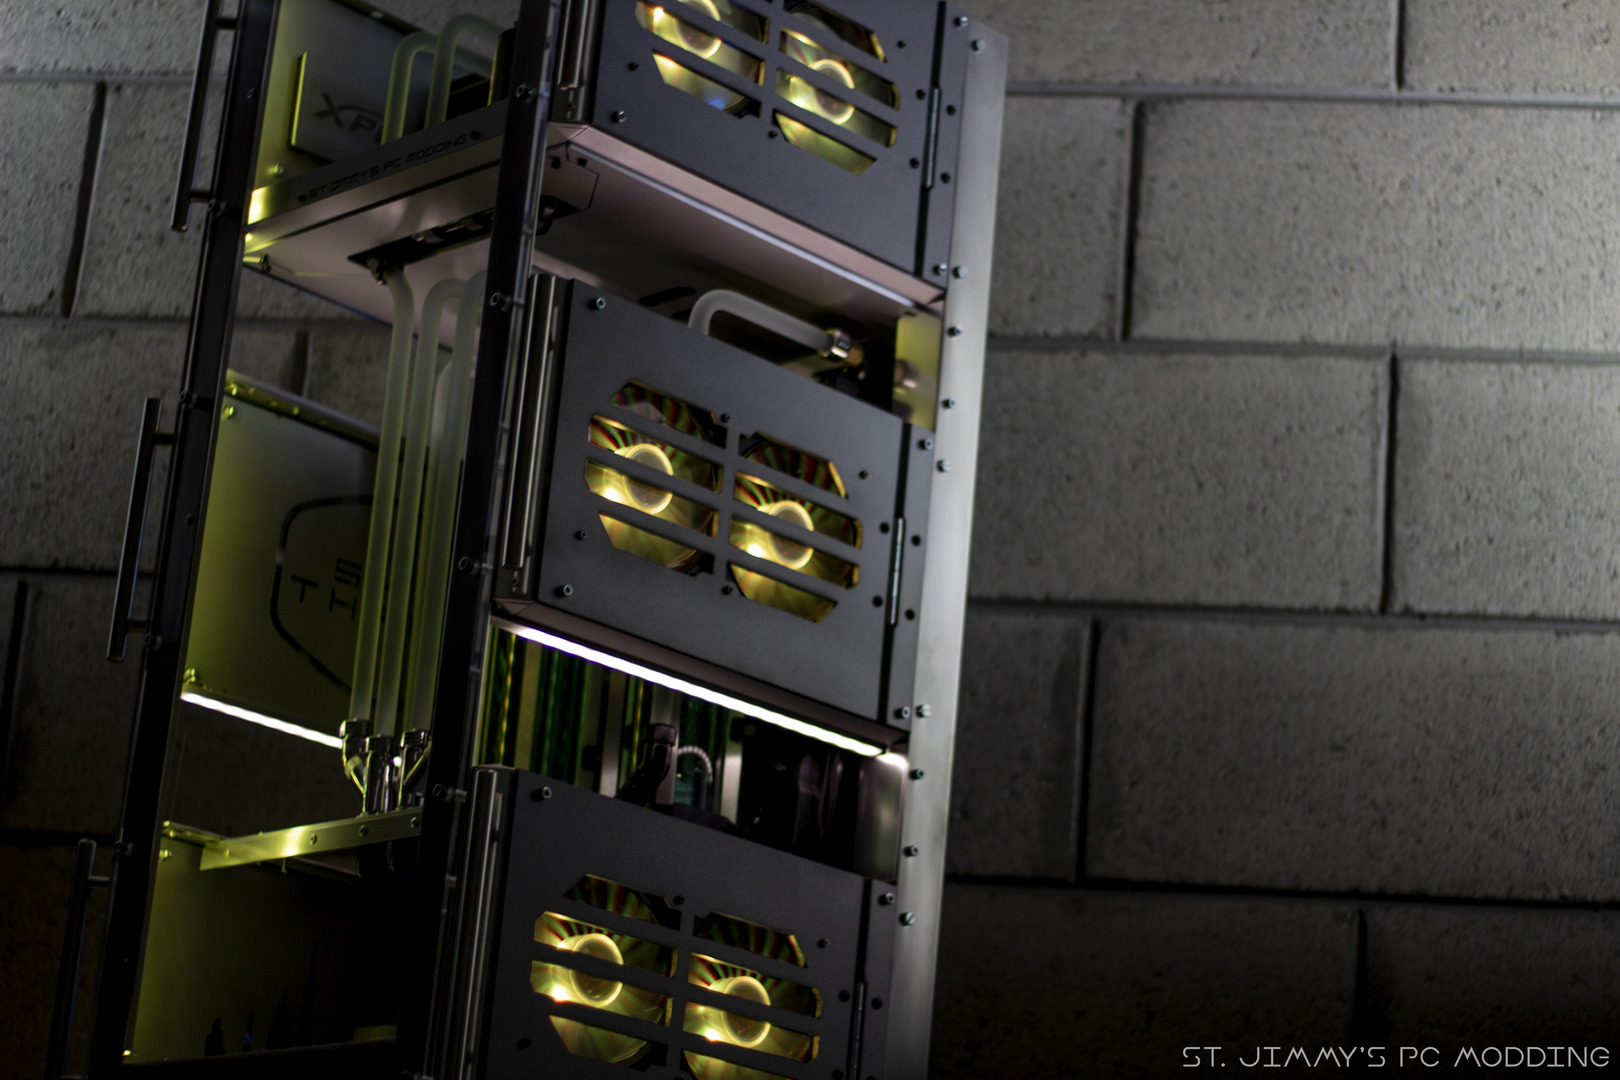
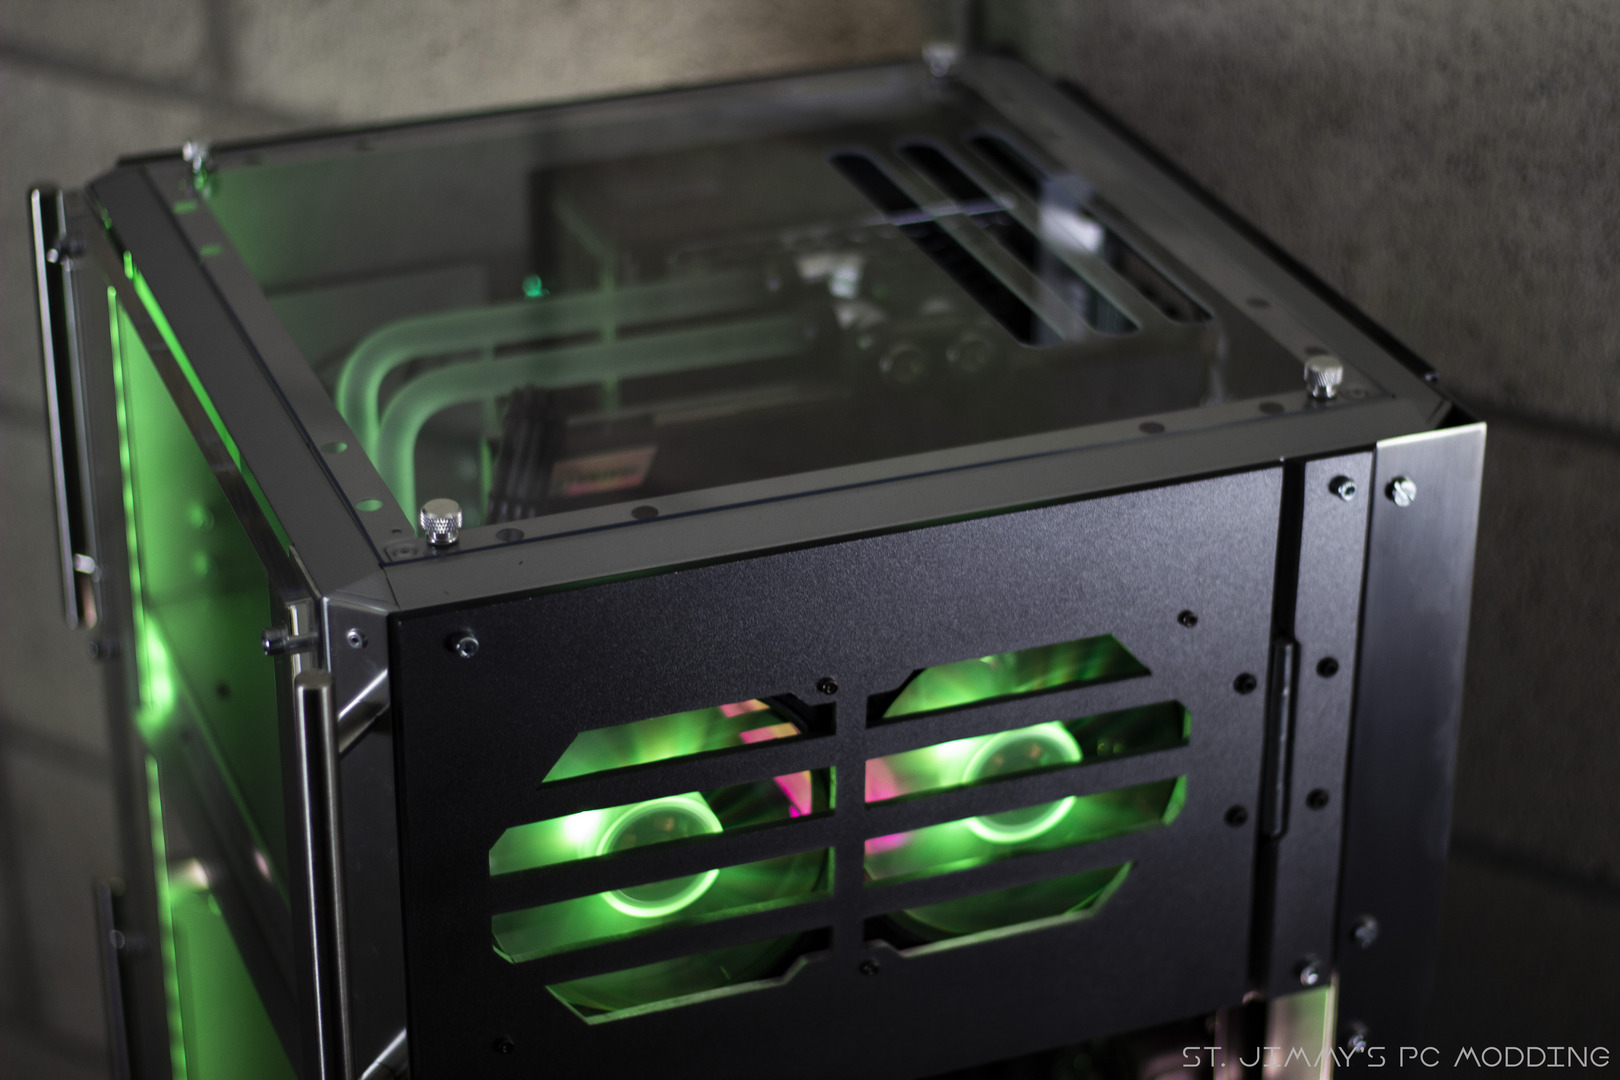
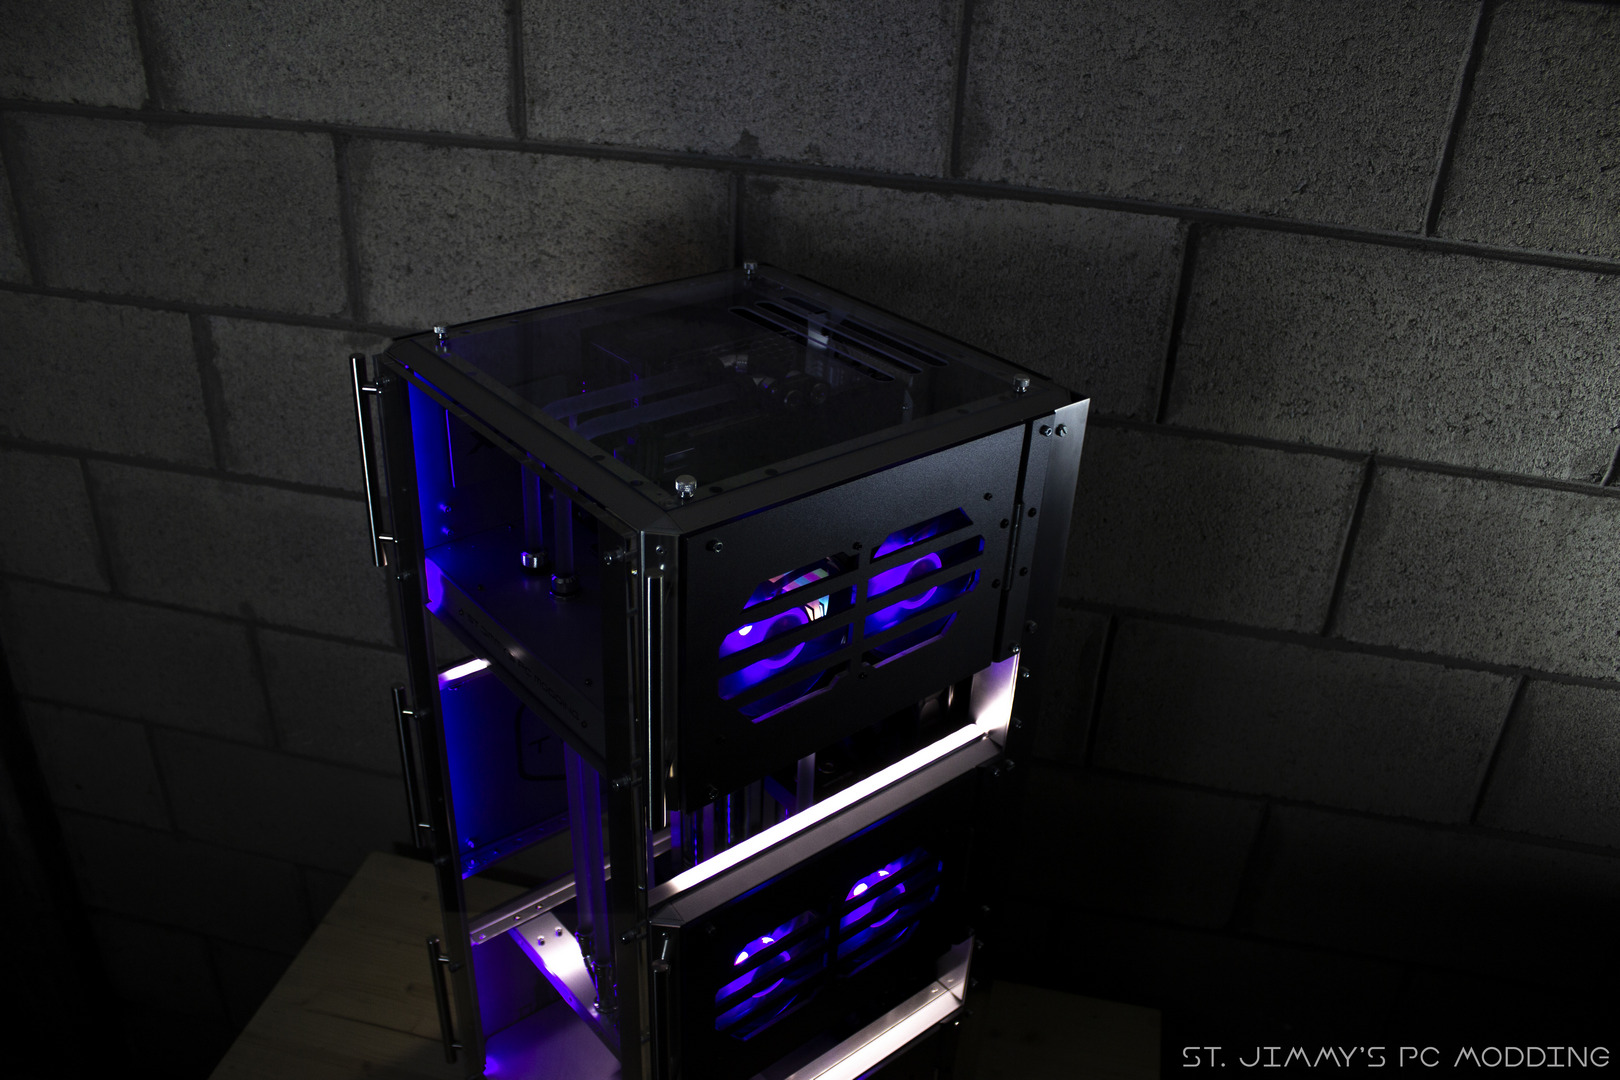
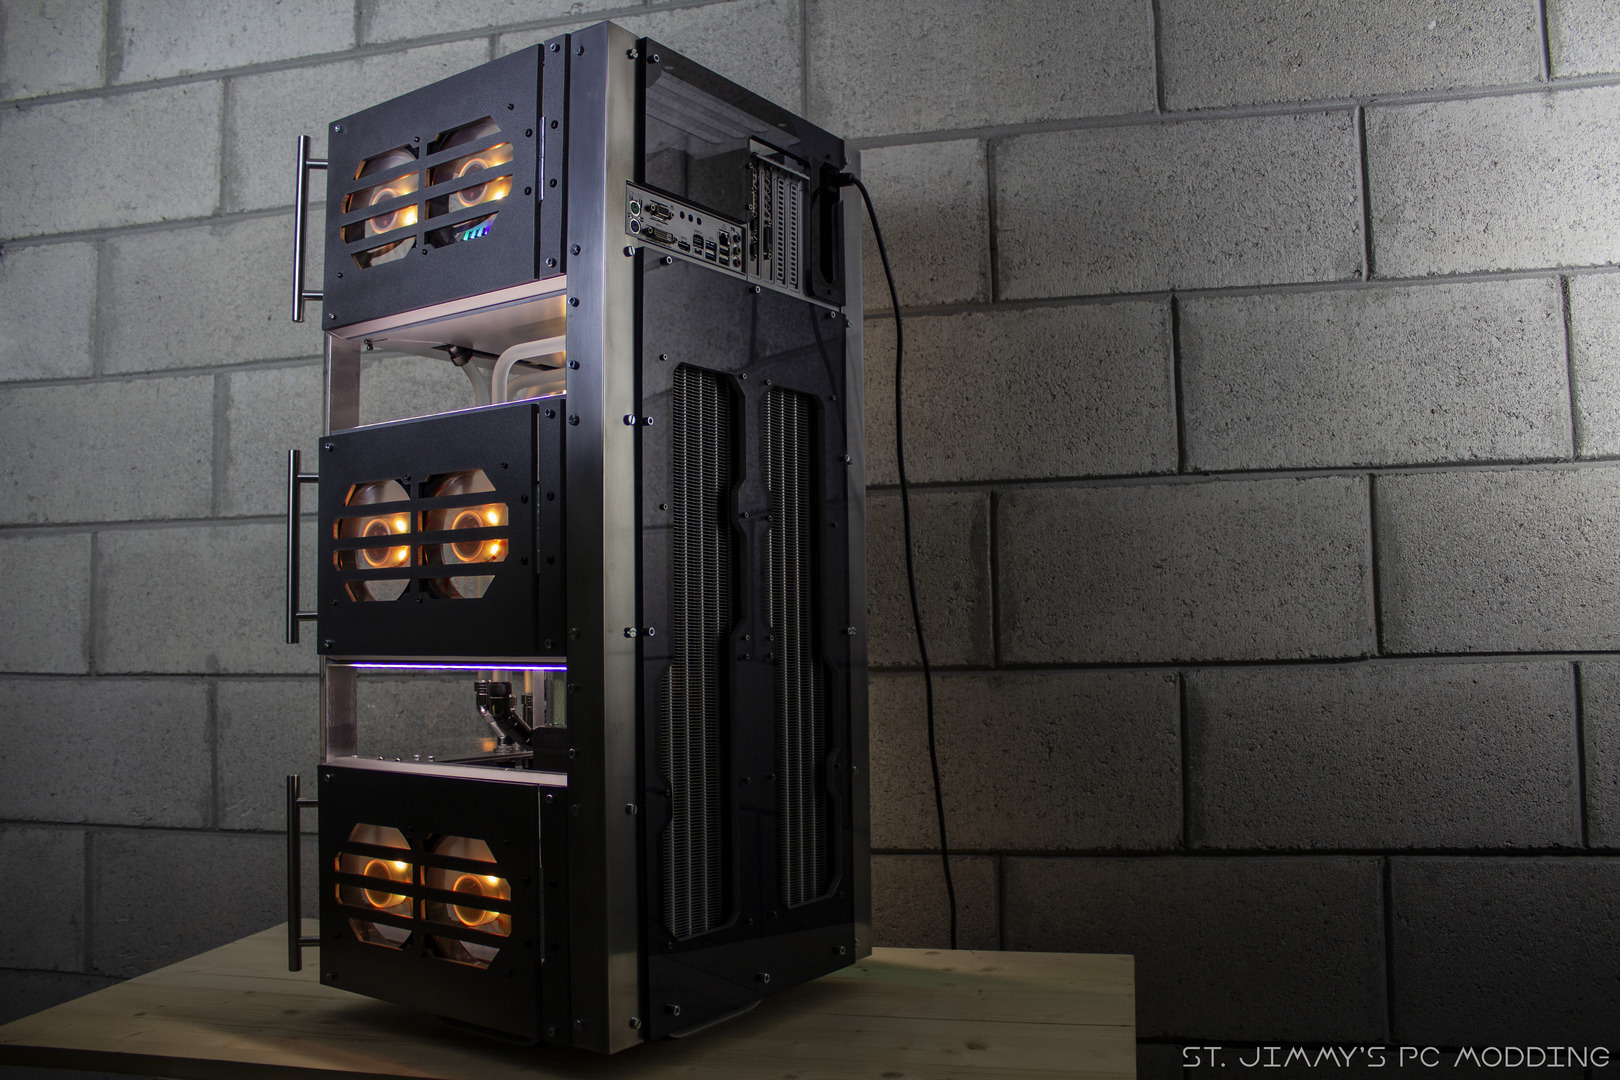
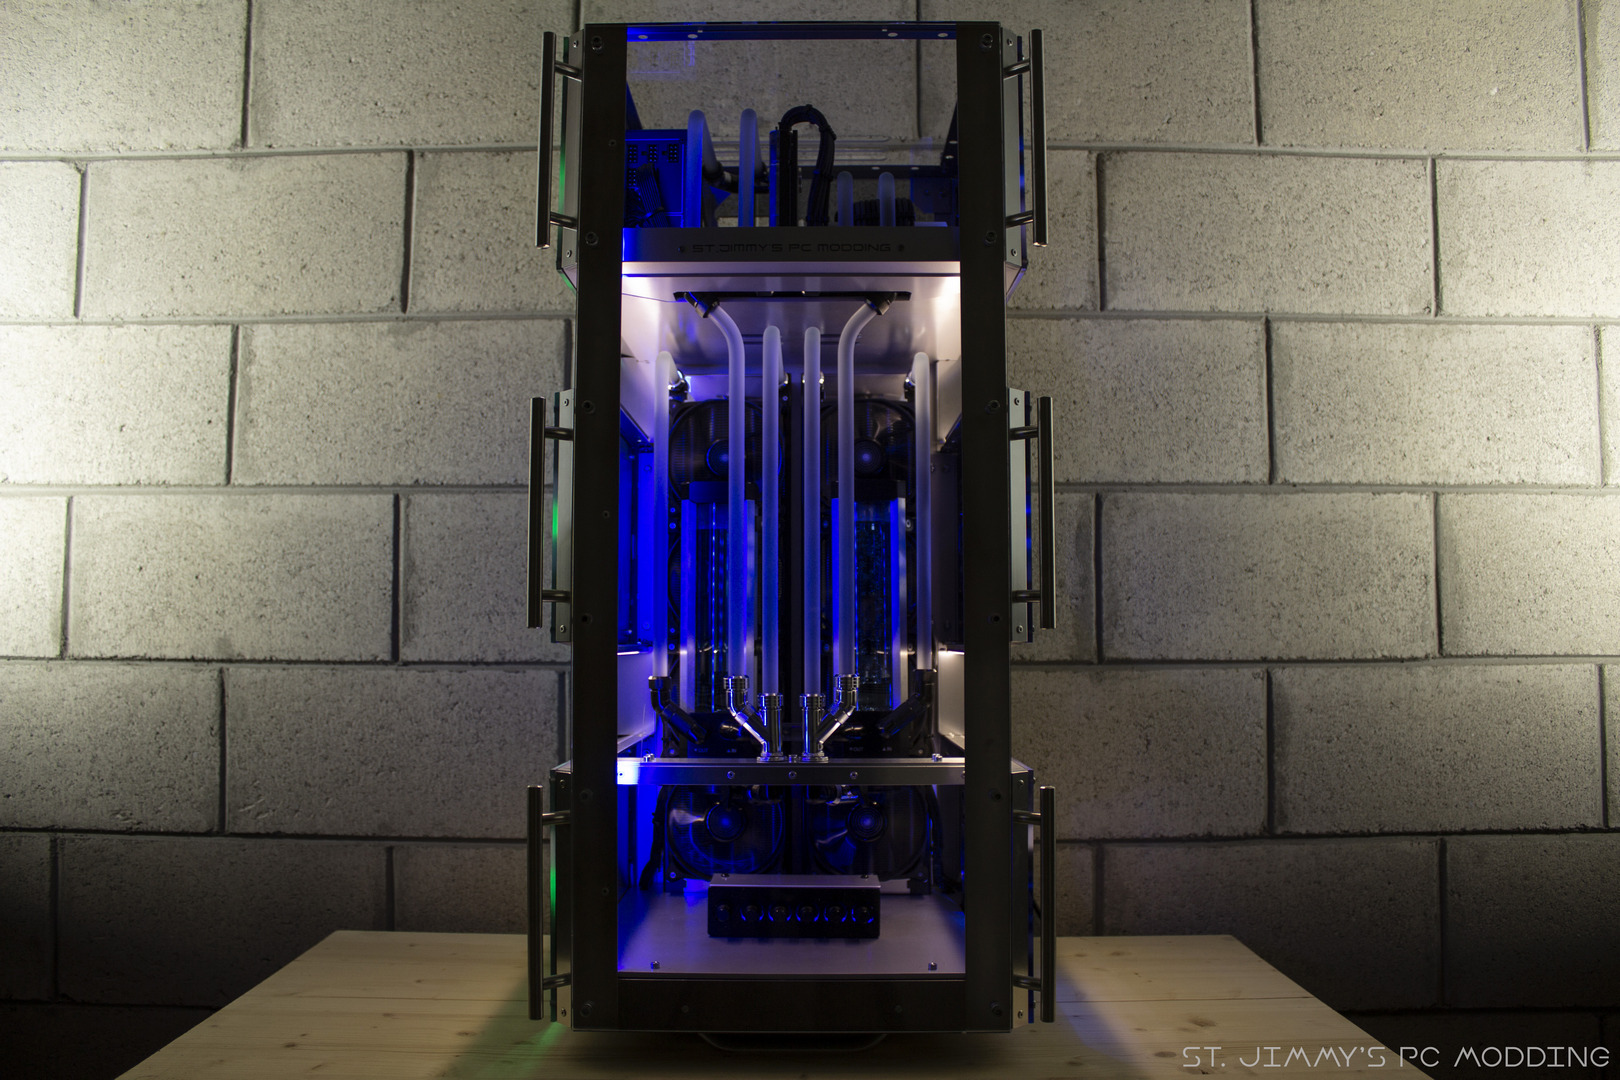
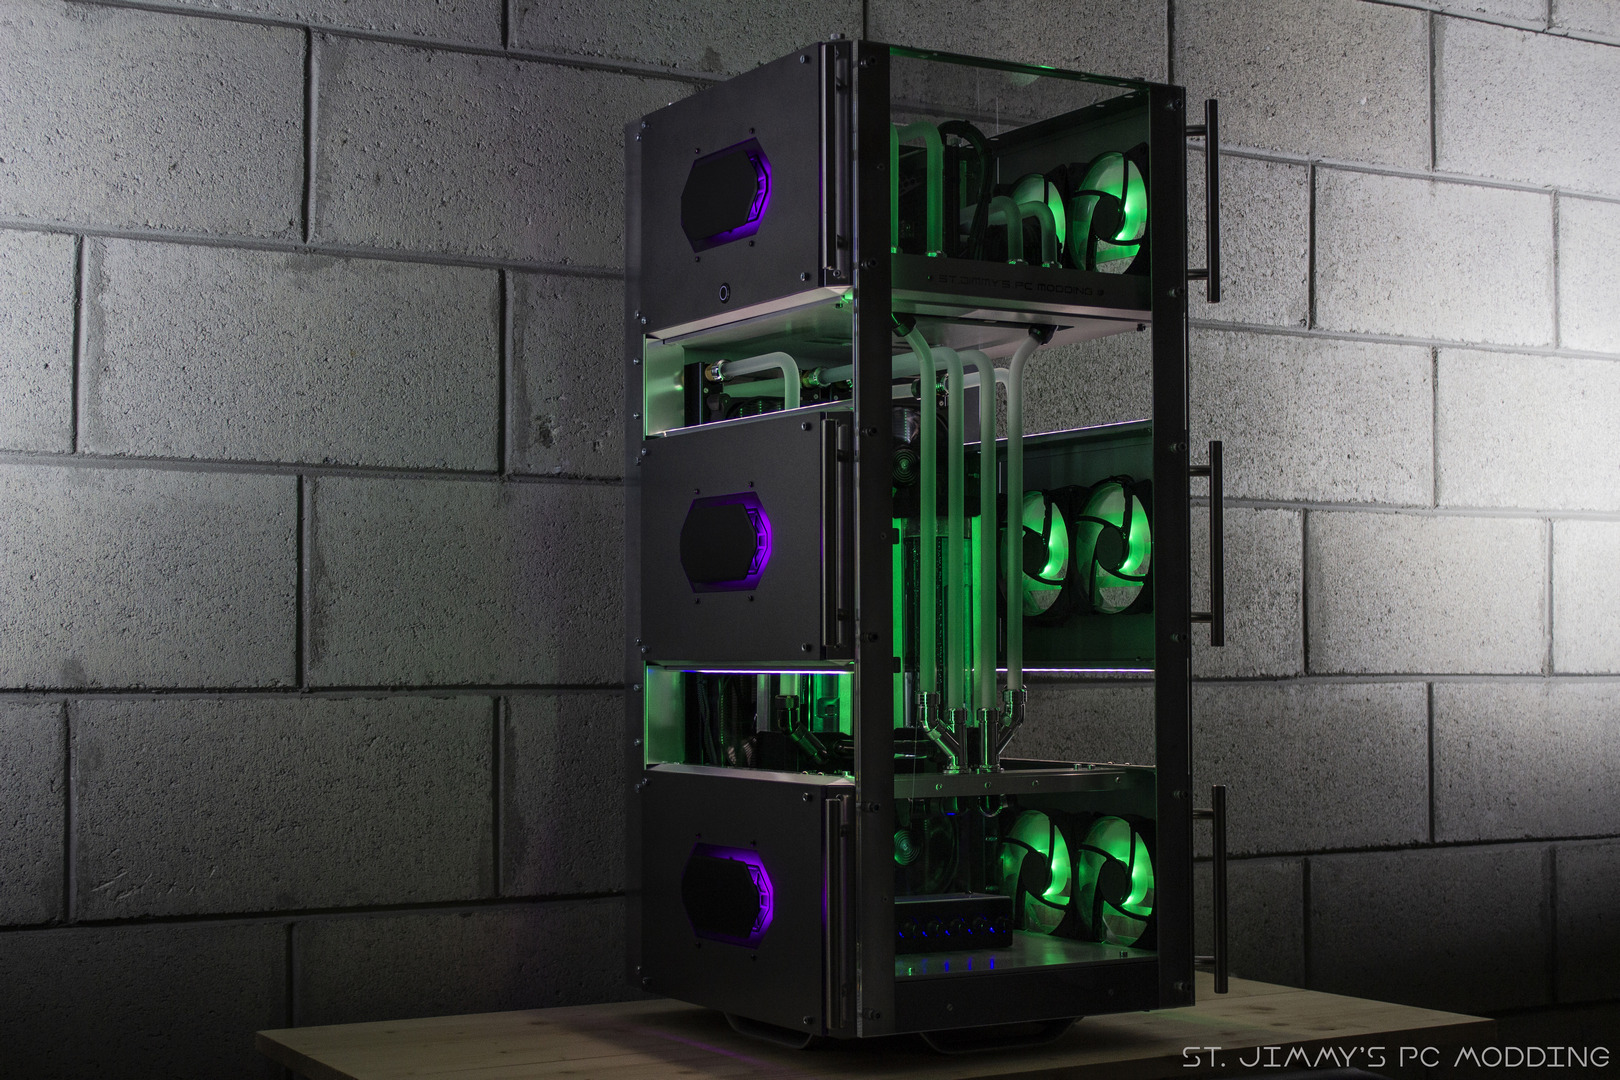
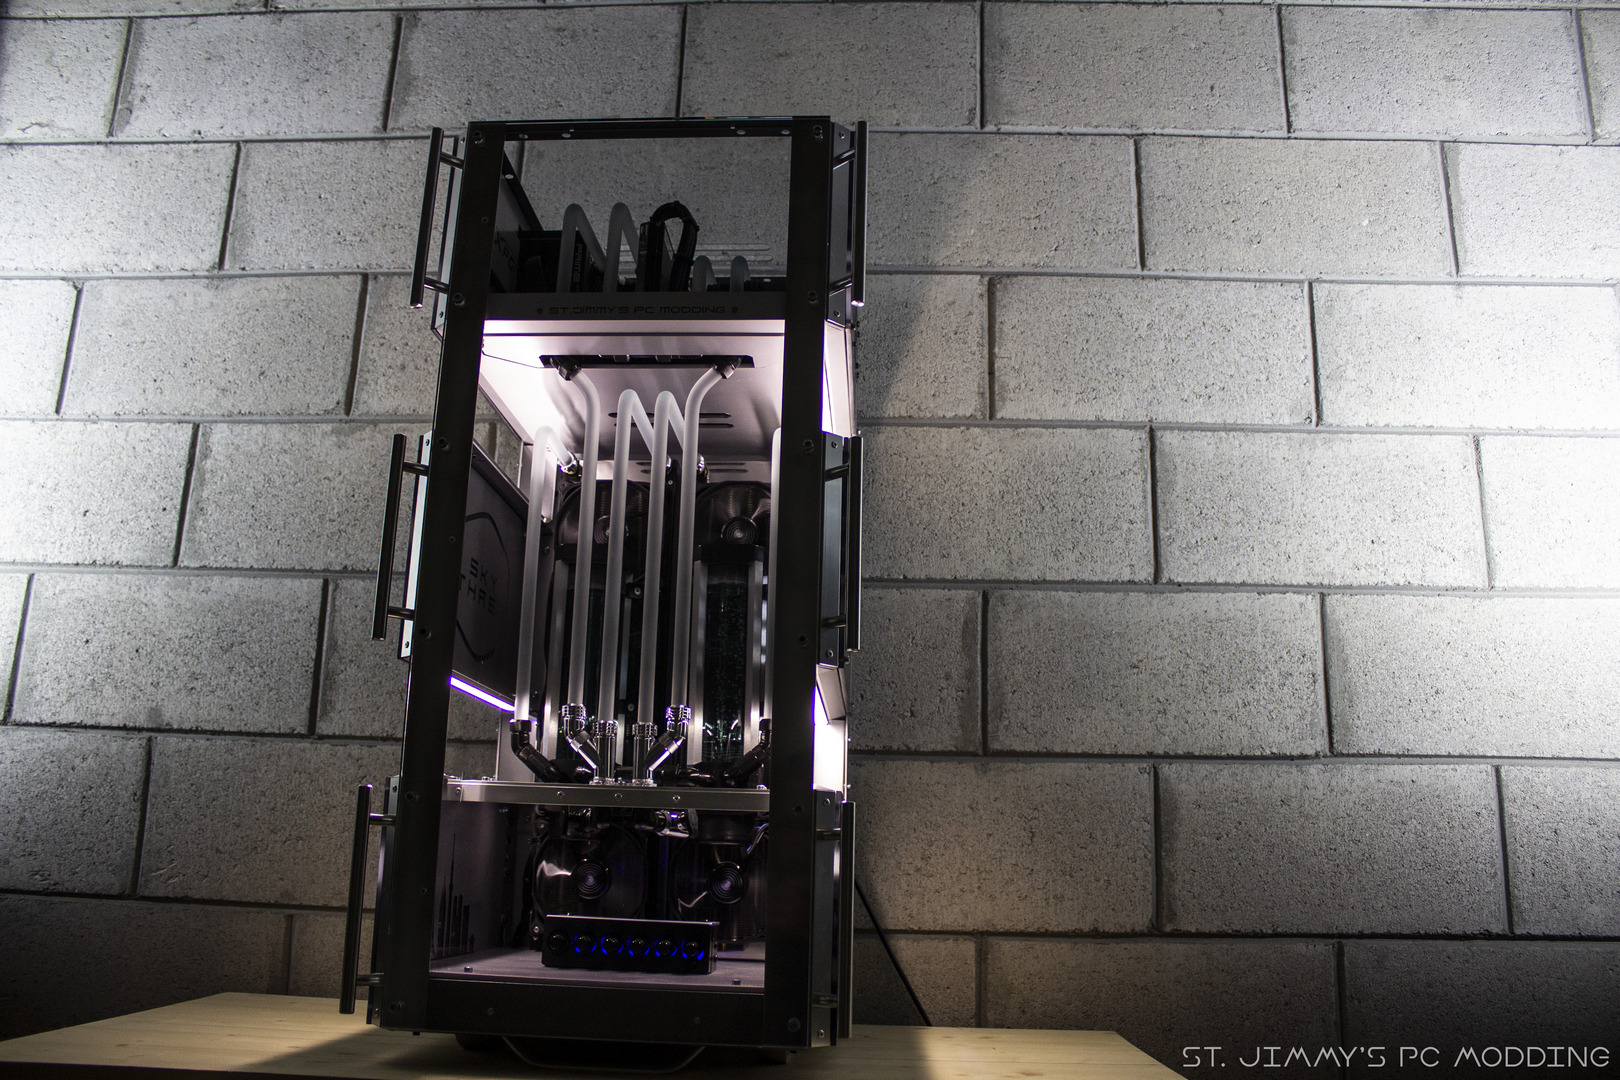
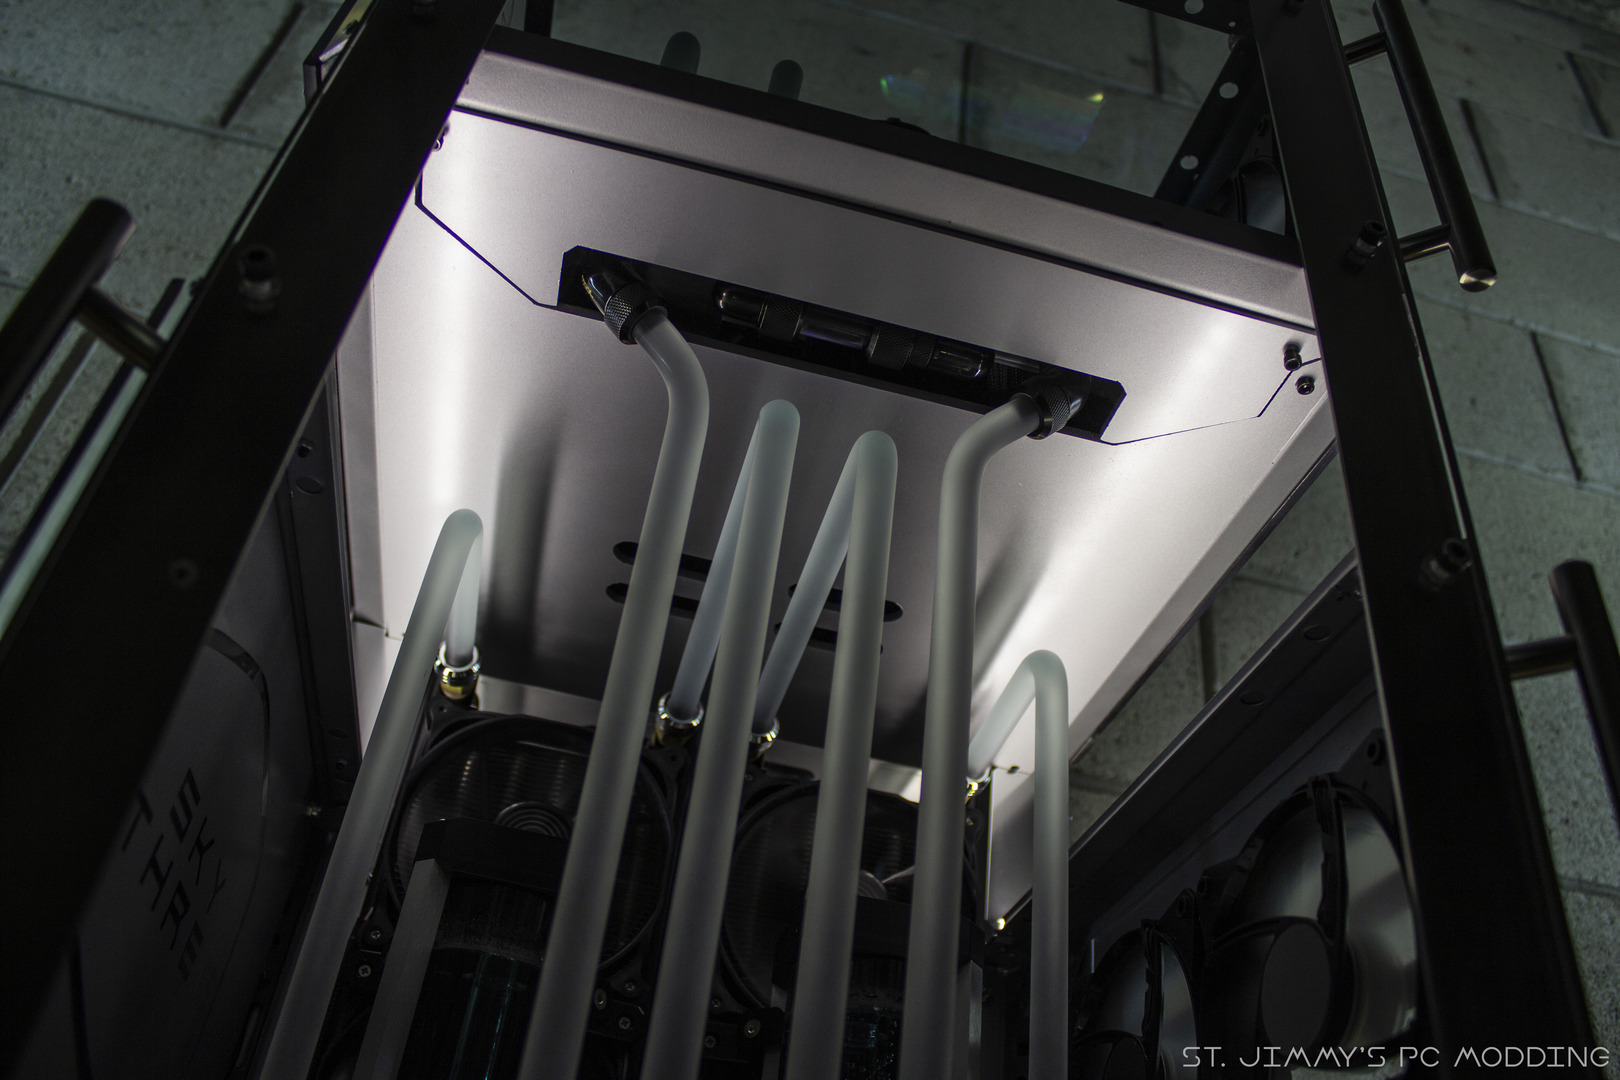
Il progetto finito–>
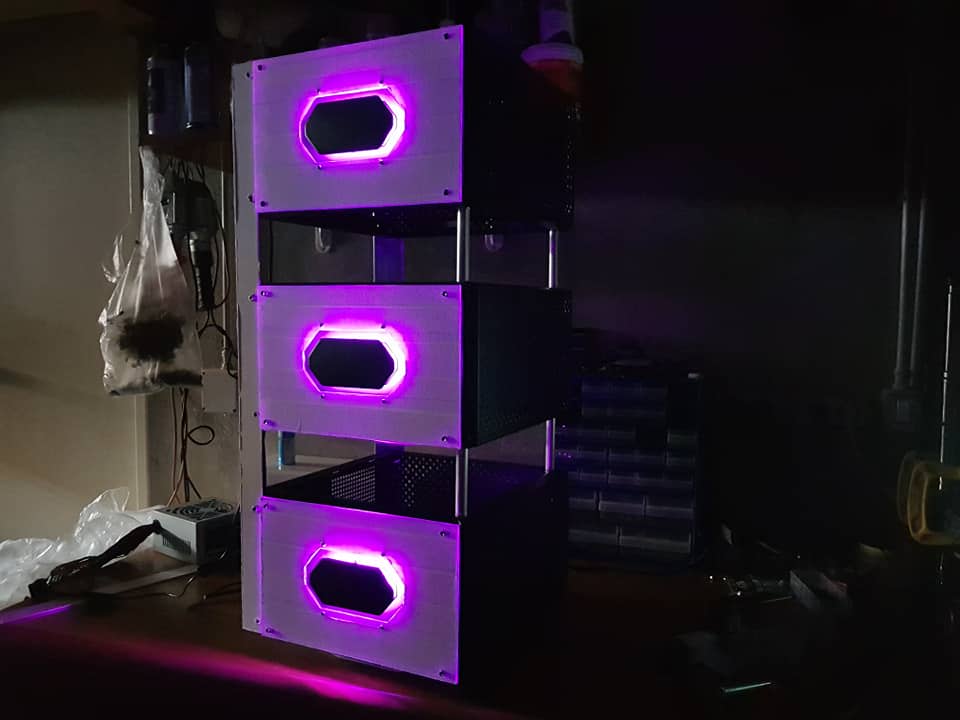
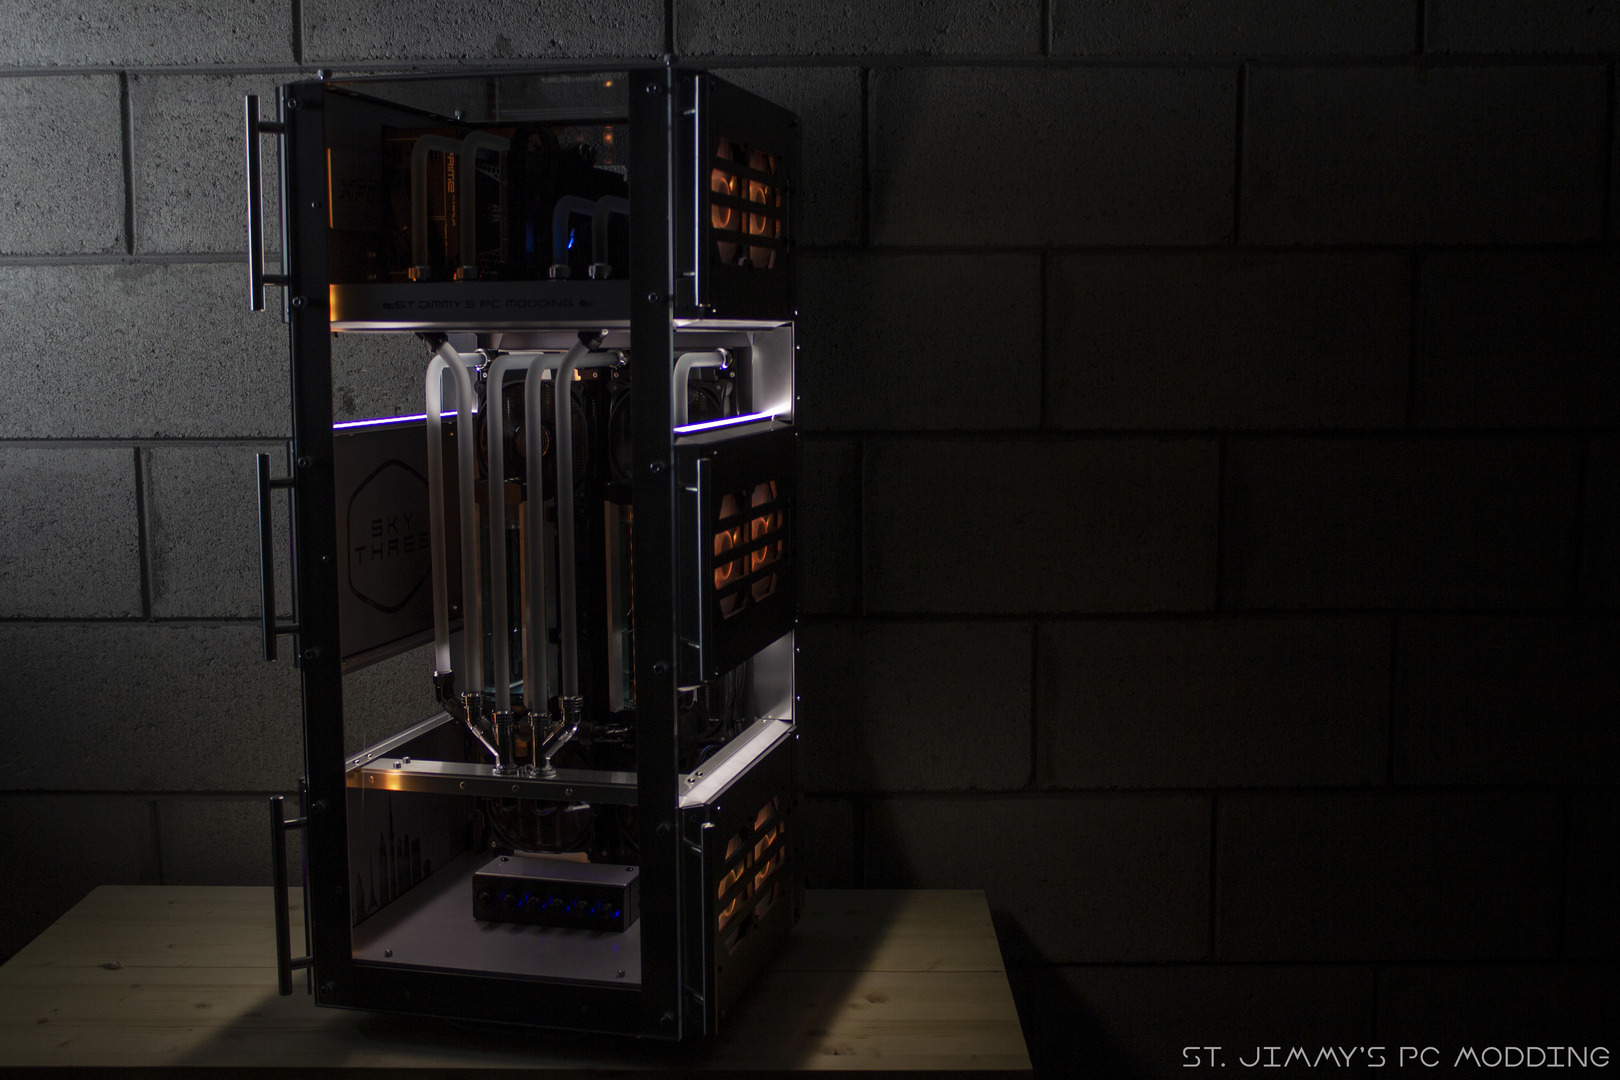
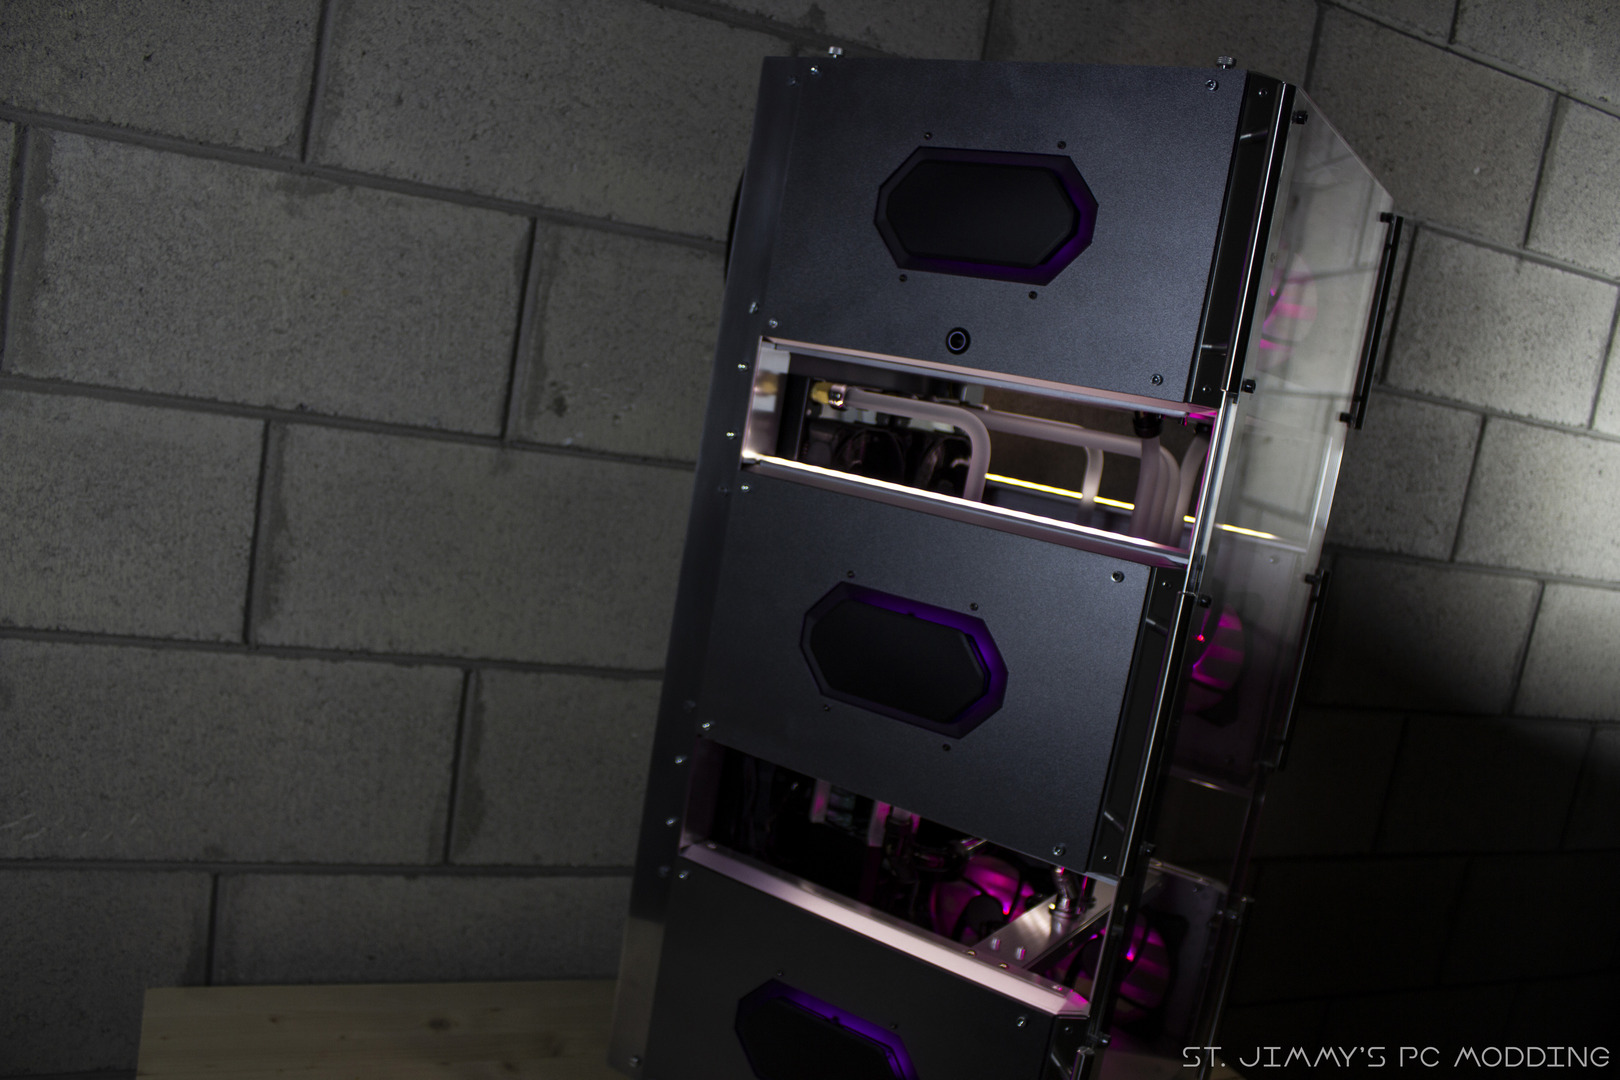
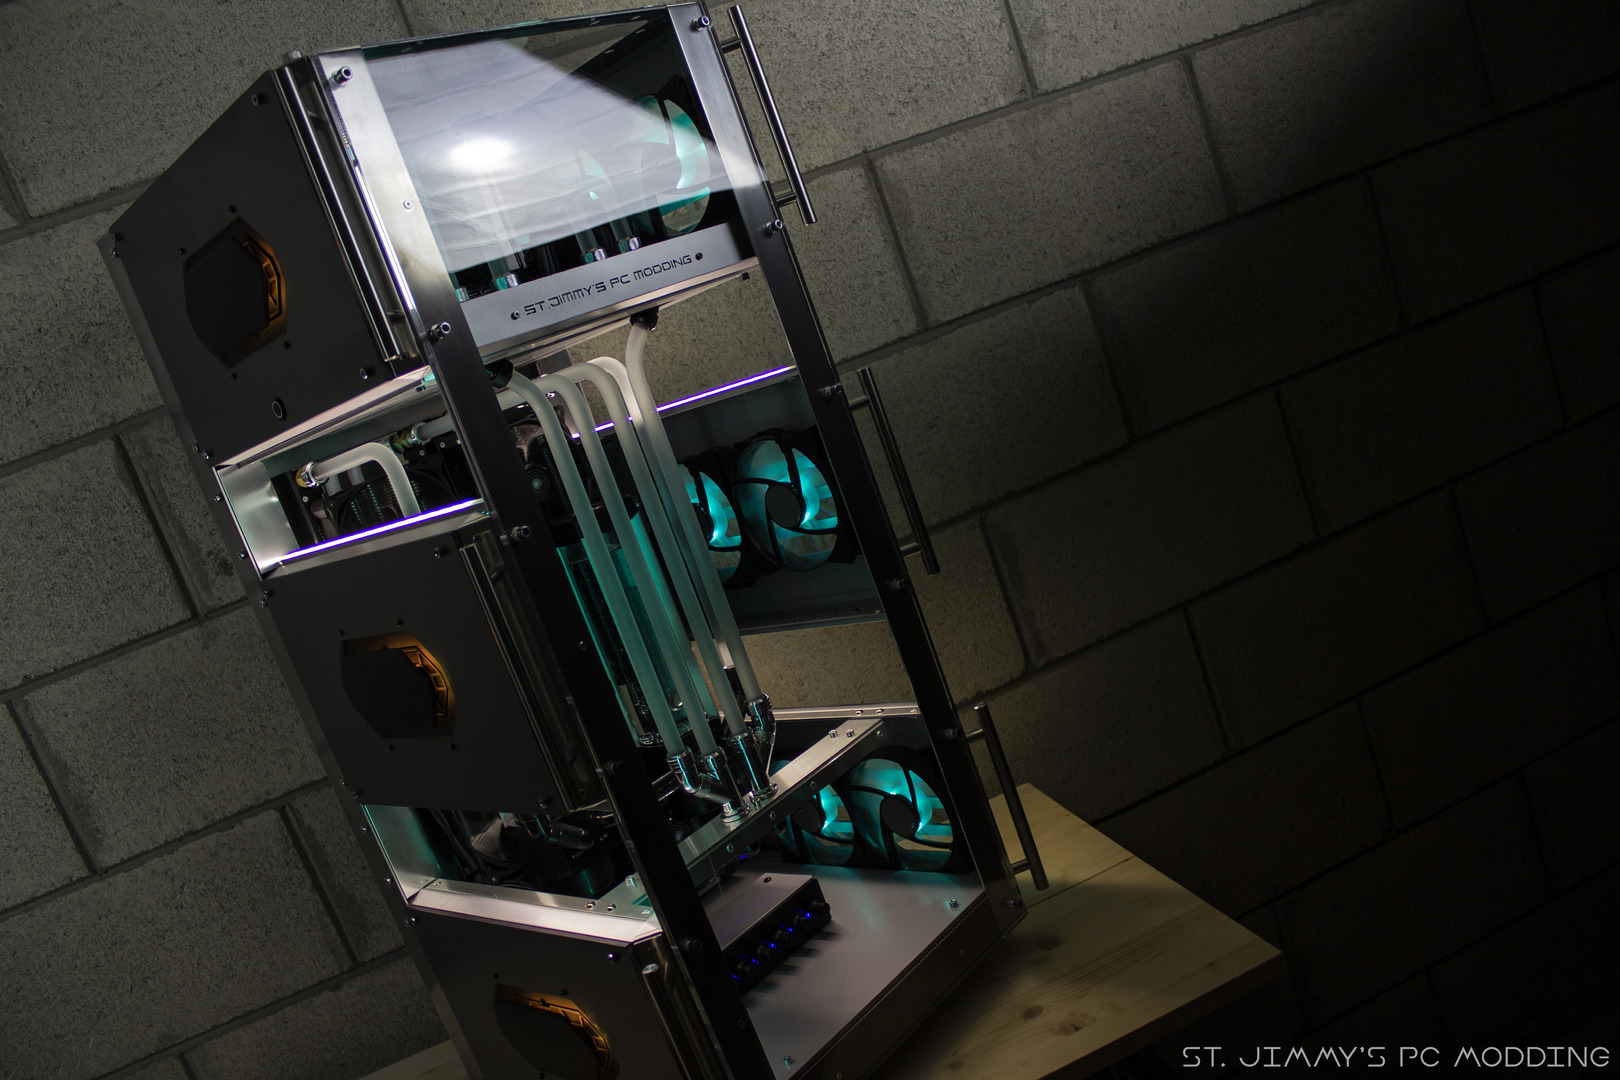
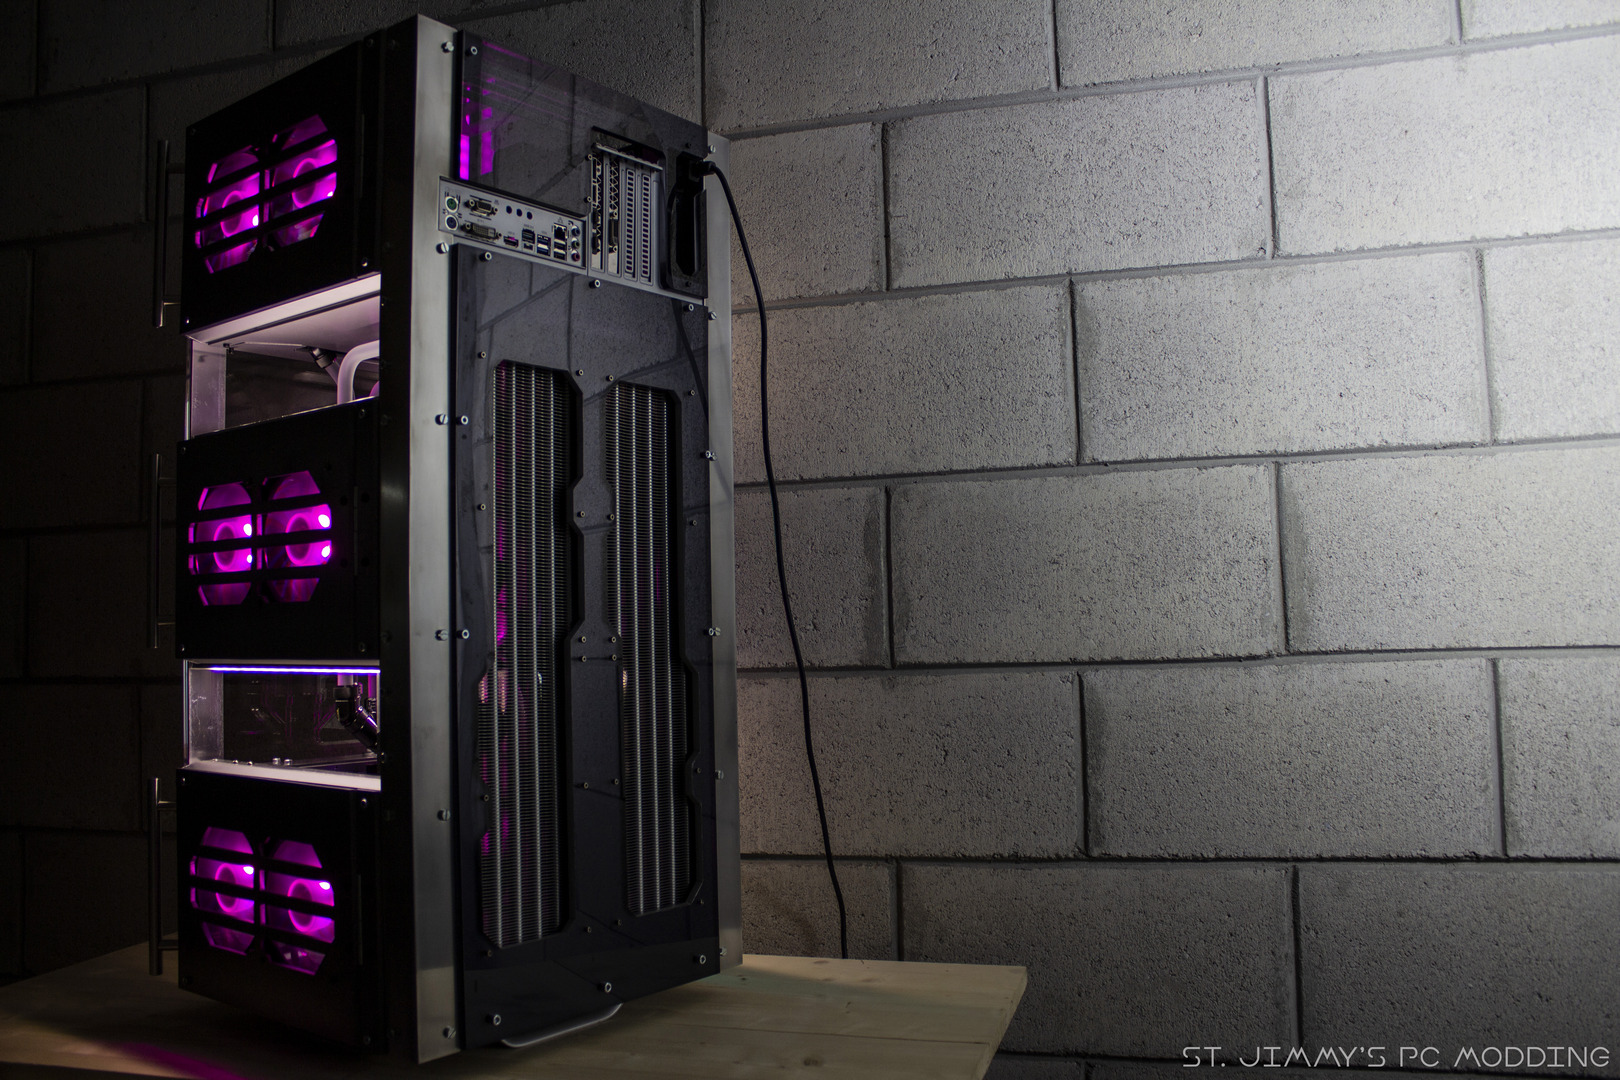
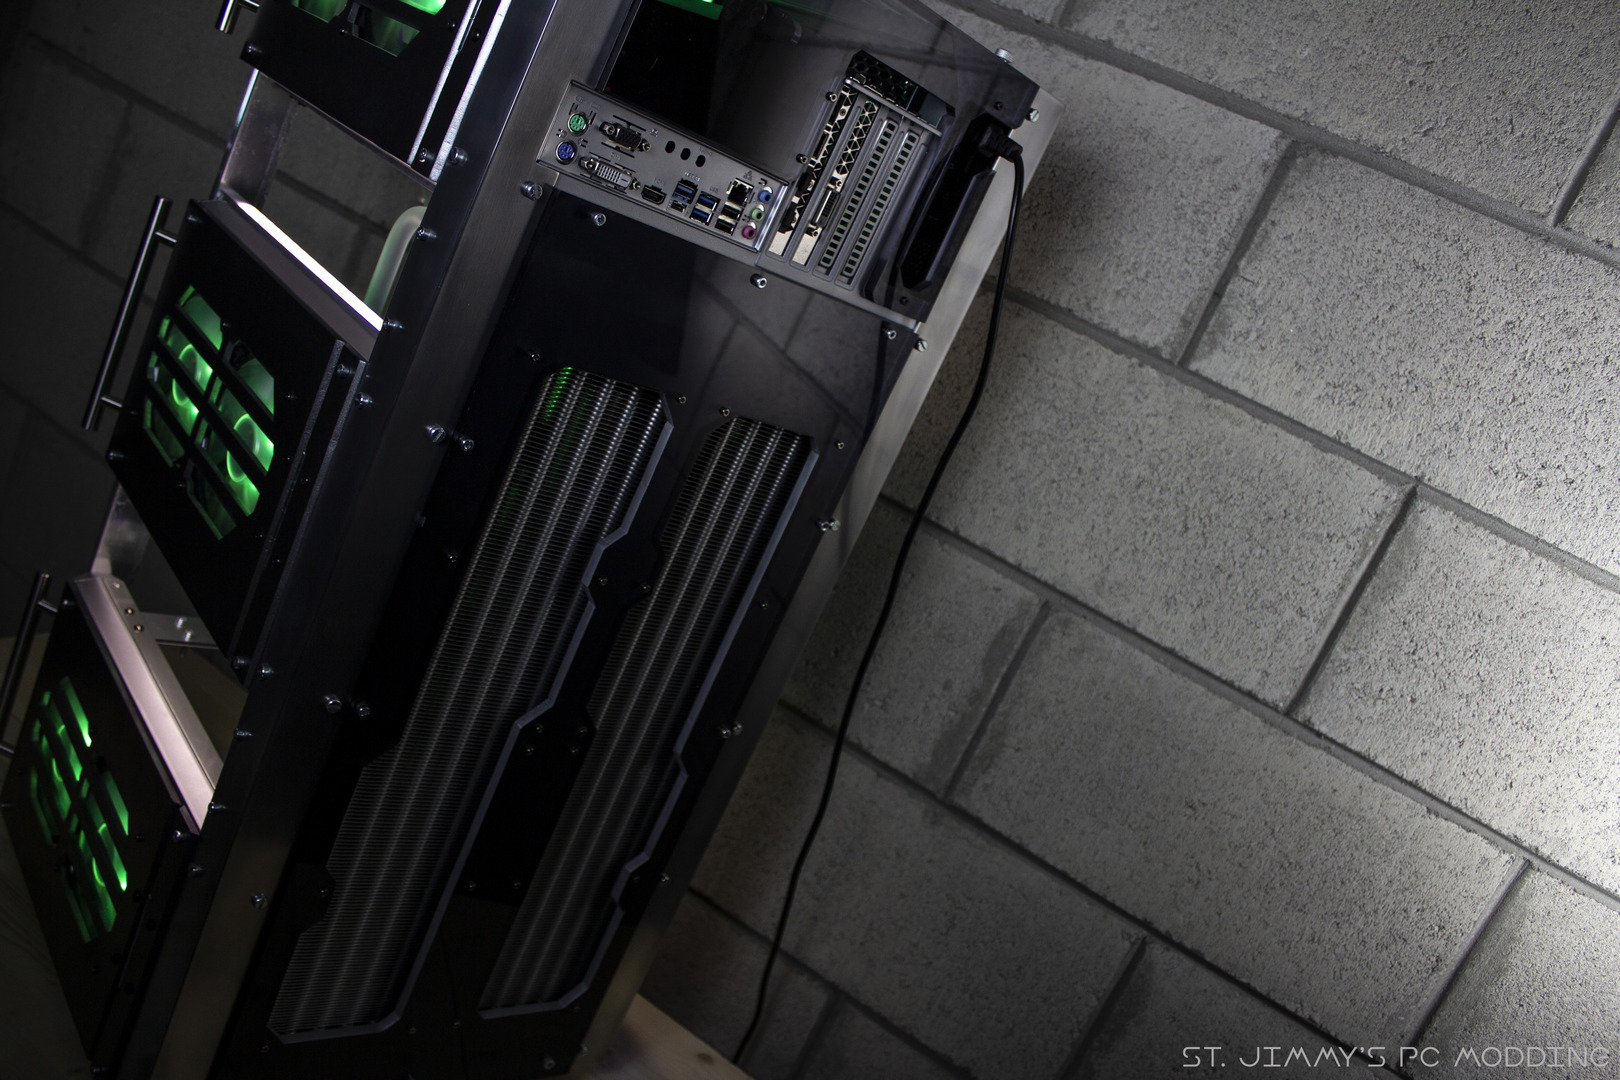
Vi presento Project Sky Three.
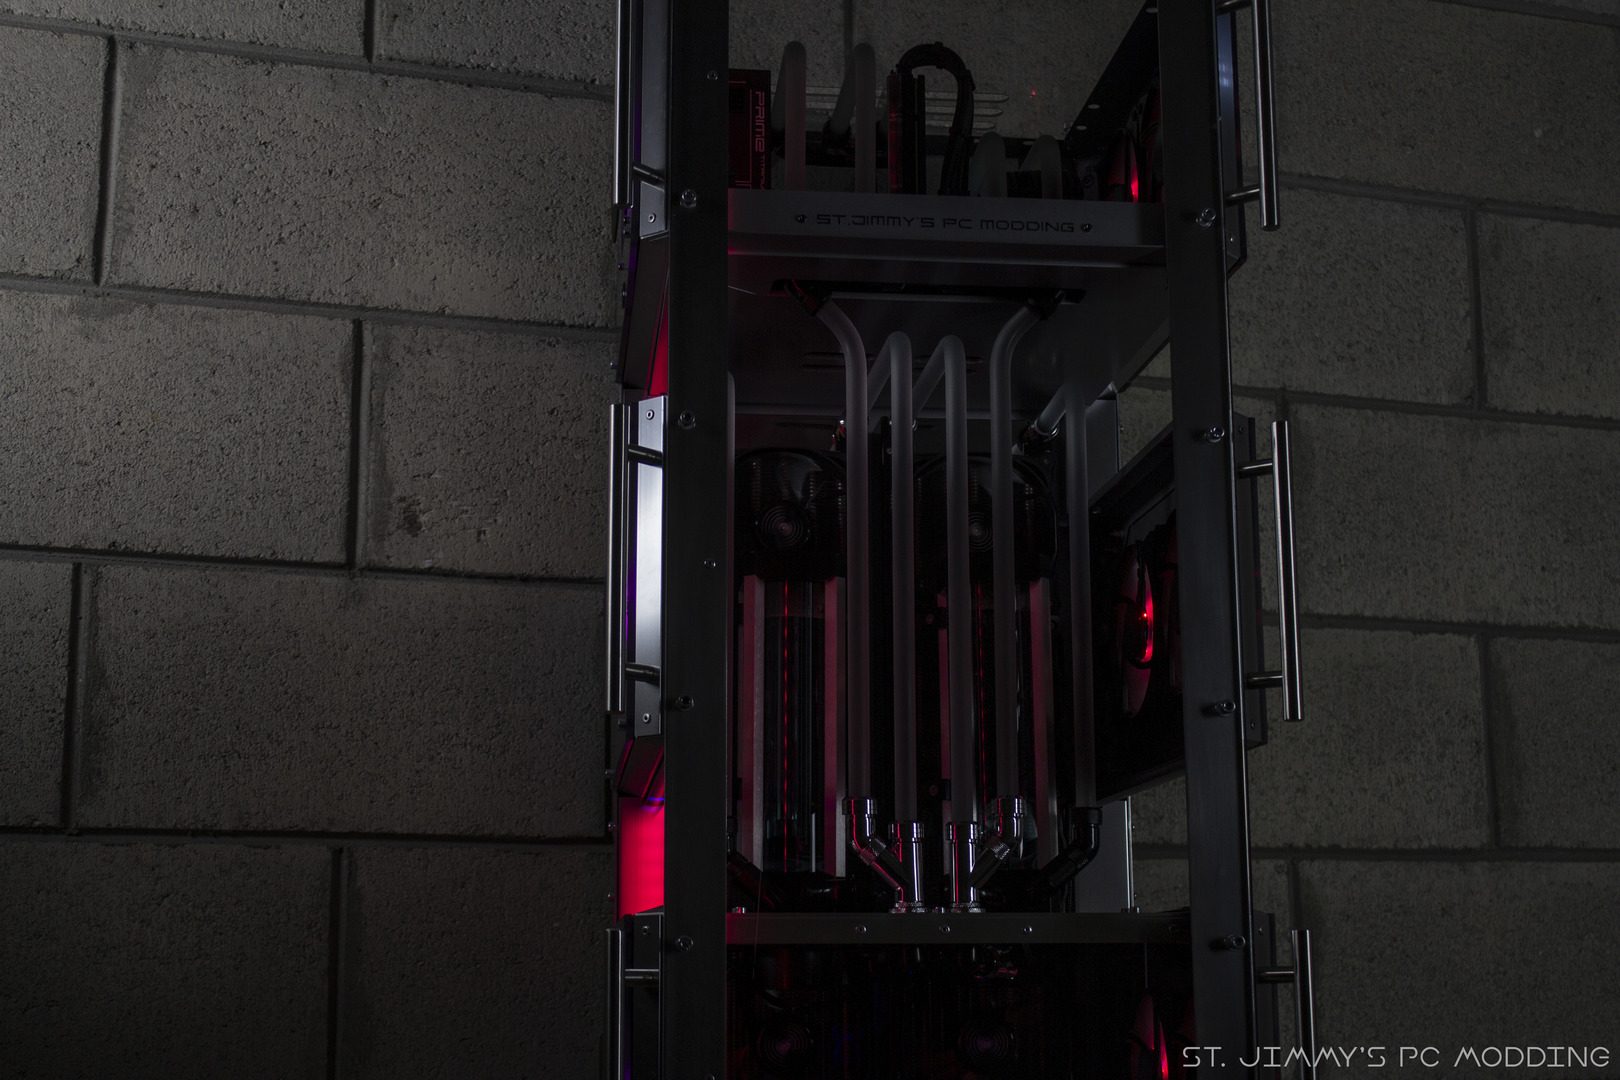
Un tributo al Tokyo Sky Tree e alla serie Stacker di Cooler Master, questa mod avvicina il concetto di extreme watercooling al fattore di forma MicroATX, grazie a un’impronta ridotta e al doppio radiatore da 480mm. Innumerevoli opzioni d’illuminazione, dal neutrale bianco all’arcobaleno RGB, proprio come la torre Sky Tree. Look metallico e di classe grazie all’alluminio lucido. Sky Three è un triplo Q300P con la stessa impronta ma capacità portata all’estremo.
[ENG]
Revealing Project Sky Three.
A tribute to the Tokyo Sky Tree and the Cooler Master Stacker Series, this mod brings the high end watercooling concept to a whole new level, with a smaller footprint and dual 480mm radiator. Endless lighting combinations, for every type of taste, from the stealth white to the RGB rainbow, just like the Sky Tree tower. Sleek metallic look with polished aluminum. This is a triple Q300P with same footprint but extremely enhanced capabilities.


Grazie infinite agli sponsor che hanno creduto in questo progetto e contribuito con i loro splendidi prodotti.
Vi ringrazio per l’attenzione e vi invito a seguire St.Jimmy’s PC Modding per progetti futuri!
[ENG]
Infinite thanks to the sponsors who believed in this project and supported it with their splendid products.
Thank you all for the attention and I invite you to follow St.Jimmy’s PC Modding for future projects!

![[COMPUTEX 2026] be quiet! svela tanti nuovi prodotti al Computex](https://www.rehwolution.it/wordpress/wp-content/uploads/2026/06/bq-computex2026-pure-base-803-4x5-5-350x250.jpg)
![[COMPUTEX 2026] Noctua e Carbice insieme per il raffreddamento DIY](https://www.rehwolution.it/wordpress/wp-content/uploads/2026/06/noctua_nt_cp1_am5_4_announcement_post_v4-scaled-350x250.jpg)
Discussione su post